7
4.1 Power up
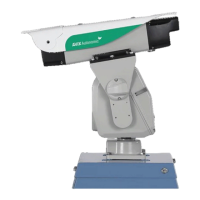
CAUTION: Before using the AVIX Autonomic ensure that:
• All bolts connecting the base of the Motor Platform to the supporting
structure are tightly secured.
• The AVIX Autonomic is not allowed to wobble or tilt when
operational. If stability is insufcient, improve supporting structure.
• The AVIX Autonomic should not be subjected to surface vibrations,
as these can lead to a displacement of the laser projection over time.
• All power cables are properly connected.
• The emergency stop button is deactivated.
• The key is positioned inside the key lock switch and is switched to
the ‘active’ position (turn in a clockwise direction).
WARNING: Do not stare into the laser beam during conguration.
CAUTION After pressing the ( ) button, the Motor Platform
may start moving. Use the ( ) button to switch the AVIX Autonomic
ON/OFF. When powered, the AVIX Autonomic is automatically
switched ON.
4.2 Connecting to the device
Before establishing a connection, make sure:
• You have a mobile device with Bluetooth functionality.
An Android device with Android version 6.0 (or higher) and
Bluetooth version 4.0 (or higher) is recommended, other devices
might experience problems during conguration.
• Google Chrome is installed on your device.
• You have an active internet connection.
• Bluetooth and location are enabled on your mobile device.
Step 1 Open Google Chrome.
Step 2 Navigate to http://connect.AVIX.com.
Step 3 Login with your AVIX Connect account.
Step 4 Select ‘Autonomic conguration’.
Step 5 The following window will appear. Press ( ).
7 Connect the plug exiting the base of the Motor Platform to the
Power Switch Module. Make sure to tighten the screw connection
properly to establish a watertight connection.
8 Connect the plug exiting the Mains Power Adapter to the remaining
connector on the Power Switch Module. Make sure to tighten the
screw connection properly to establish a watertight connection.
9 Secure the base of the Motor Platform to its supporting structure.
3.1 Preparing the mains power connection
WARNING: Always make sure that all equipment is de-energized
and disconnected from mains power before working on the mains
power connection.
1 Connect the CEE Connector (mains power side) to the power cable
(cable specications are shown below). Use a flat blade screwdriver
to open the connector and expose its terminals. Use a Philips screw
driver to secure the cores to the terminals. Make sure the cores are
stripped sufciently and the screws are secured tightly to ensure
proper conductivity. Close the connector again by combining its
parts until it clicks into place.
2 Power can be restored. Provide a voltage of 100 - 277V to the power
cable. The mains power connection is ready for use.
The power cable is not provided with the AVIX Autonomic.
Cable requirements:
• Outdoor rated
• Conductor: 1 - 2.5 mm
2
(14 - 17 AWG)
• Cores: 3
• Outer diameter: 6-15 mm (0.25 – 0.6”)
3.2 Connecting the Autonomic to power
1 Connect the CEE Plug (exiting the Mains Power Adapter) to the CEE
connector. The AVIX Autonomic is now powered and ready to be
congured.
4. Conguration
CAUTION:
• Do not drop. This product may malfunction if subjected to strong
shocks or vibration.
• The AVIX Autonomic is an automated laser device intended for bird
repelling purposes only.
• When using the AVIX Autonomic, always adhere to the safety
precautions outlined in this document.
• To prevent injuries or damage as a result of entrapment, stay clear of
the Motor Platform during operation.
 Loading...