20
5. After entering the time, the analyzer will prompt:
OK? Press YES, if the date and time you
entered is correct, or press NO to make a change.
6. After entering YES, the following prompt appears
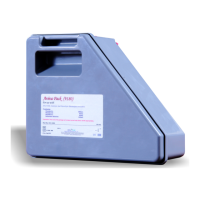
in the display : STATUS: NO SnapPak.
Install the ISE SnapPak
TM
. Record the installation
date on the label on the pack. Remove the protective
strip and slide the ISE SnapPak
TM
into position on
the left side of the analyzer.
See illustration 2-16 and 2-17.
Note: Once the protective strip is removed, be sure to
keep the ISE SnapPak
TM
upright to avoid spillage.
Save the protective strip to use to close the nipples on
the pack prior to disposing.
At the prompt New SnapPak Installed?, press
YES. Press YES again to the question Are you
sure?
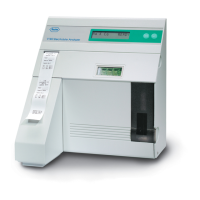
Install the thermal printer paper into the printer by
placing the printer paper into the paper tray and
threading it into the feeder slot, as shown in the
diagram underneath the paper holder on the analyzer.
See illustration 2-18.
2-16. Removing protective strip
2-17. Installing ISE SnapPak
TM
2-18. Inserting printer paper
 Loading...