This document provides operating and installation instructions for electrical freestanding ovens, specifically models AFEE30, AFEE31, AFEE32, AFEE56, AFEC50, AFEC51, and AFEC52. The manual emphasizes safe and efficient use, as well as proper installation and maintenance.
Device Description
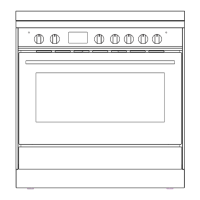
The oven is designed for non-professional, domestic use. It features a cooktop cover, cooktop, control panel, child lock, oven door handle, drawer cover, supply leg, oven door, oven tray, wire grid, front resistance, fan store, oven lamp, hotplate, and highlite element.
Important Technical Specifications
The ovens come in two main sizes:
- TE 66: 60x60x85 cm or 60x60x90 cm
- TE 56: 50x60x85 cm or 50x60x90 cm
Heating element specifications:
- TE 56:
- Lower Heater: 1000 Watt
- Upper Heater: 1000 Watt
- Grill: 1600 Watt
- Turbo Heater: 2000 Watt
- TE 66:
- Lower Heater: 1100 Watt
- Upper Heater: 1200 Watt
- Grill: 2000 Watt
- Turbo Heater: 2000 Watt
Electrical connection: The appliance is adjusted for 220-240 Volts and 400V 3N Volts of electricity. It requires an all-pole disconnector in the supply circuit with a contact opening of at least 3.0mm, rated 32A, and delay functioning type. The power lead should be of wire type H05VV-F.
Usage Features
The oven offers various cooking functions controlled by a function switch and thermostat switch:
- Oven Lamp: Illuminates the oven interior.
- Ice Melter Function (Defrost): Activates the oven lamp and fan to defrost frozen food without cooking it. Food should be placed on the third shelf support from the bottom, on a wire shelf, with a tray below to collect water.
- Lower - Upper Heater Function (Static Cooking): Uses both lower and upper heating elements for traditional cooking, ensuring even cooking of the food's bottom and top. Ideal for cakes, sponge cakes, flans, spaghetti, lasagna, and pizza. Pre-heating for 10 minutes is recommended.
- Fan and Lower - Upper Heater Function (Static Cooking with Fan): Distributes heat from lower and upper heating elements via a fan. Suitable for pastries and single-tray cooking, ensuring even cooking. Pre-heating for 10 minutes is recommended.
- Turbo Fan Function: Spreads heat equally throughout the oven, allowing multiple dishes to be cooked on different shelves simultaneously. Pre-heating for 10 minutes is recommended. If cooking two trays, additional cooking time may be required, and rotating trays can improve results.
- Turbo Fan and Lower Heater Function: Ideal for cooking pizza, with the lower heater cooking the paste and the turbo fan spreading heat evenly. Pre-heating for 10 minutes is recommended. Maximum thermostat setting: 190°C.
- Grill and Chicken Turning Function: Used for grilling and roasting chicken on a skewer. Food is placed on the grill at the top level, with an oven tray on the 3rd shelf to collect oils.
- Upper Heater, Grill and Roast Chicken Function: Combines upper heater and grill for rapid grilling and roasting chicken on a skewer. Food is placed on the grill at the top level, with an oven tray on the 3rd shelf to collect oils. Pre-heating for 5 minutes is recommended. Maximum thermostat setting: 190°C.
- Grill, Chicken Roasting and Fan Function: Integrates grill, upper heater, and fan for perfect roasting and grilling, including chicken on a skewer. Food is placed on the grill at the top level, with an oven tray on the 3rd shelf to collect oils. Pre-heating for 5 minutes is recommended. Maximum thermostat setting: 190°C.
- Lower Heater Function: Uses only the lower heating element, suitable for heating food rather than cooking.
- Lower Heater and Fan Function: Combines the lower heating element and fan for quick and even heating of food.
Cooktop Usage:
The electrical cooktop is controlled by 7-grade switches (0-6).
- 0: Off
- 1: Keeping hot
- 2-3: Low heat
- 4-6: Cooking, roasting, and boiling
For optimal efficiency, use saucepans with smooth, flat bases that match the size of the hotplate. Avoid using small saucepans on large cookers to prevent heat loss.
Dual or Oval Vitroceramic Cooker: These cookers can heat in two positions. Turning the switch to "6" activates both the big and small diameters of the dual cooker. Turning the switch to " " activates both the oval and round parts of the oval cooker.
Electronic Programming Clock:
- Adjustment of Day Hour: The "A" symbol flashes upon power connection. Pressing (+) and (-) keys simultaneously adjusts the time.
- Alarm / Time Setup: Press "Mode" until the "A" LED lights up. Adjust the desired interval (0-23.59 hours) with (+) and (-) keys. An alarm sounds when the set time ends.
- Programming as Determining the Cooking Period: Press "Mode" until "Dur" lights up. Adjust the cooking period (0-10 hours) with (+) and (-) keys. An alarm sounds when the cooking period ends.
- Programming as Determining the Finish Time: Press "Mode" until "End" lights up. Adjust the finish time with (+) and (-) keys. An alarm sounds when the finish time is reached.
- Programming as Determining the Cooking Period and Finish Time: This function allows setting both the cooking period and the end time for automatic cooking.
- Digital Timer Sound Adjustment: Three audible warning levels are available. Press the minus button for 1-2 seconds to cycle through the sounds.
Mechanical Timer:
- Manual Operation: Set the timer knob to "M" for continuous oven operation. The oven will not operate if the knob is at "0".
- Operation with Time Set: Turn the knob clockwise to set a time between 0-100 minutes. The oven turns off and a single warning sound is heard when the set time ends.
Accessories:
The oven comes with oven trays, a grill wire, and a chicken roasting skewer. Glass dishes and cake molds can also be used. When grilling, place the grill on the top shelf and an oven tray on the 3rd shelf to collect oils. For large wire grills, place a tray on a lower shelf with some water for easier cleaning. Oil the grill to prevent food from sticking.
Rotisserie Accessories:
To use the rotisserie, pass the skewer through the chicken, lock the clamps, and insert the skewer tip into the hole at the rear panel, ensuring it leans on the frame and fits the motor shaft. Turn the lid in front of the skewer insertion hole. Fit the skewer onto the skewer grid (on the third rack) or skewer bracket (in the tray holes). Remove the handle before closing the oven door; reattach it only for removing food after grilling. Ensure the oven is not operating during these operations.
Pan Anti-Tilting Wire:
To correctly locate the grid, push it to any rack until it reaches the end. The pan anti-tilting wire must be placed inside the cavity.
Maintenance Features
Cleaning:
- Always ensure all control switches are off and the appliance is cool before cleaning. Unplug the appliance.
- Use cleaning materials recommended by the manufacturer. Avoid caustic creams, abrasive powders, thick wire wool, or hard tools, as they can damage surfaces. Clean spills immediately.
- Inside of Oven: Clean the enameled interior when warm with a soft cloth dampened in soapy water. Rinse with a wet cloth and dry. Liquid cleaning materials can be used for thorough cleaning. Avoid dry and powder cleansers.
- Oven Cover: Use a glass cleaner for the inside and outside of the cover. Rinse and dry with a dry cloth.
- Removing the Oven Cover for Cleaning:
- Open the cover completely.
- Pass the metal pin through the holes on both hinges.
- Lift the cover slightly and pull outwards smoothly to remove it.
- To reattach, place the cover into the hinge holes while pinning it.
- Do not clean the oven cover while the glass panels are hot to prevent breakage.
- Vitroceramic Cooker: Wait for the cooker to cool completely before cleaning. Use cream or liquid detergent without abrasive particles. Clean with cold water and dry with a soft cloth. Use the provided pallet to remove food or residues. Sweet foods should be cleaned immediately after spills. Avoid steel cleaning materials. Color changes on ceramic surfaces are normal and do not affect functionality. The cleaning pallet is sharp and should be kept away from children. Be careful not to scratch the silicon adhesive on the glass edges.
Maintenance:
- Change of Oven Lamp: This should be done by an authorized technician. The ampoule rating should be 230V, 25Watt, Type E14. Ensure the oven is unplugged and cool before changing the lamp.
Troubleshooting (Before Contacting Service):
- Oven not operating: Check if it's plugged off, if there's a blow-out, or if the timer (if fitted) is regulated.
- Oven not heating: Check if the heat is adjusted with the oven's heater control switch.
- Interior lighting lamp not working: Check electricity supply and if the lamps are defective.
Transport Information:
- If possible, use the original packaging and follow transport signs.
- Tape the cooker's upper parts, hats, heads, and saucepan carriers to the cooking panels.
- Place paper between the upper cover and cooking panel, then tape the upper cover to the oven's side surfaces.
- Tape cardboard or paper onto the front cover's interior glass to protect the wire grill and trays from damage.
- Tape the oven's covers to the side walls.
- If original packaging is unavailable, protect external surfaces (glass and painted surfaces) from blows.