2
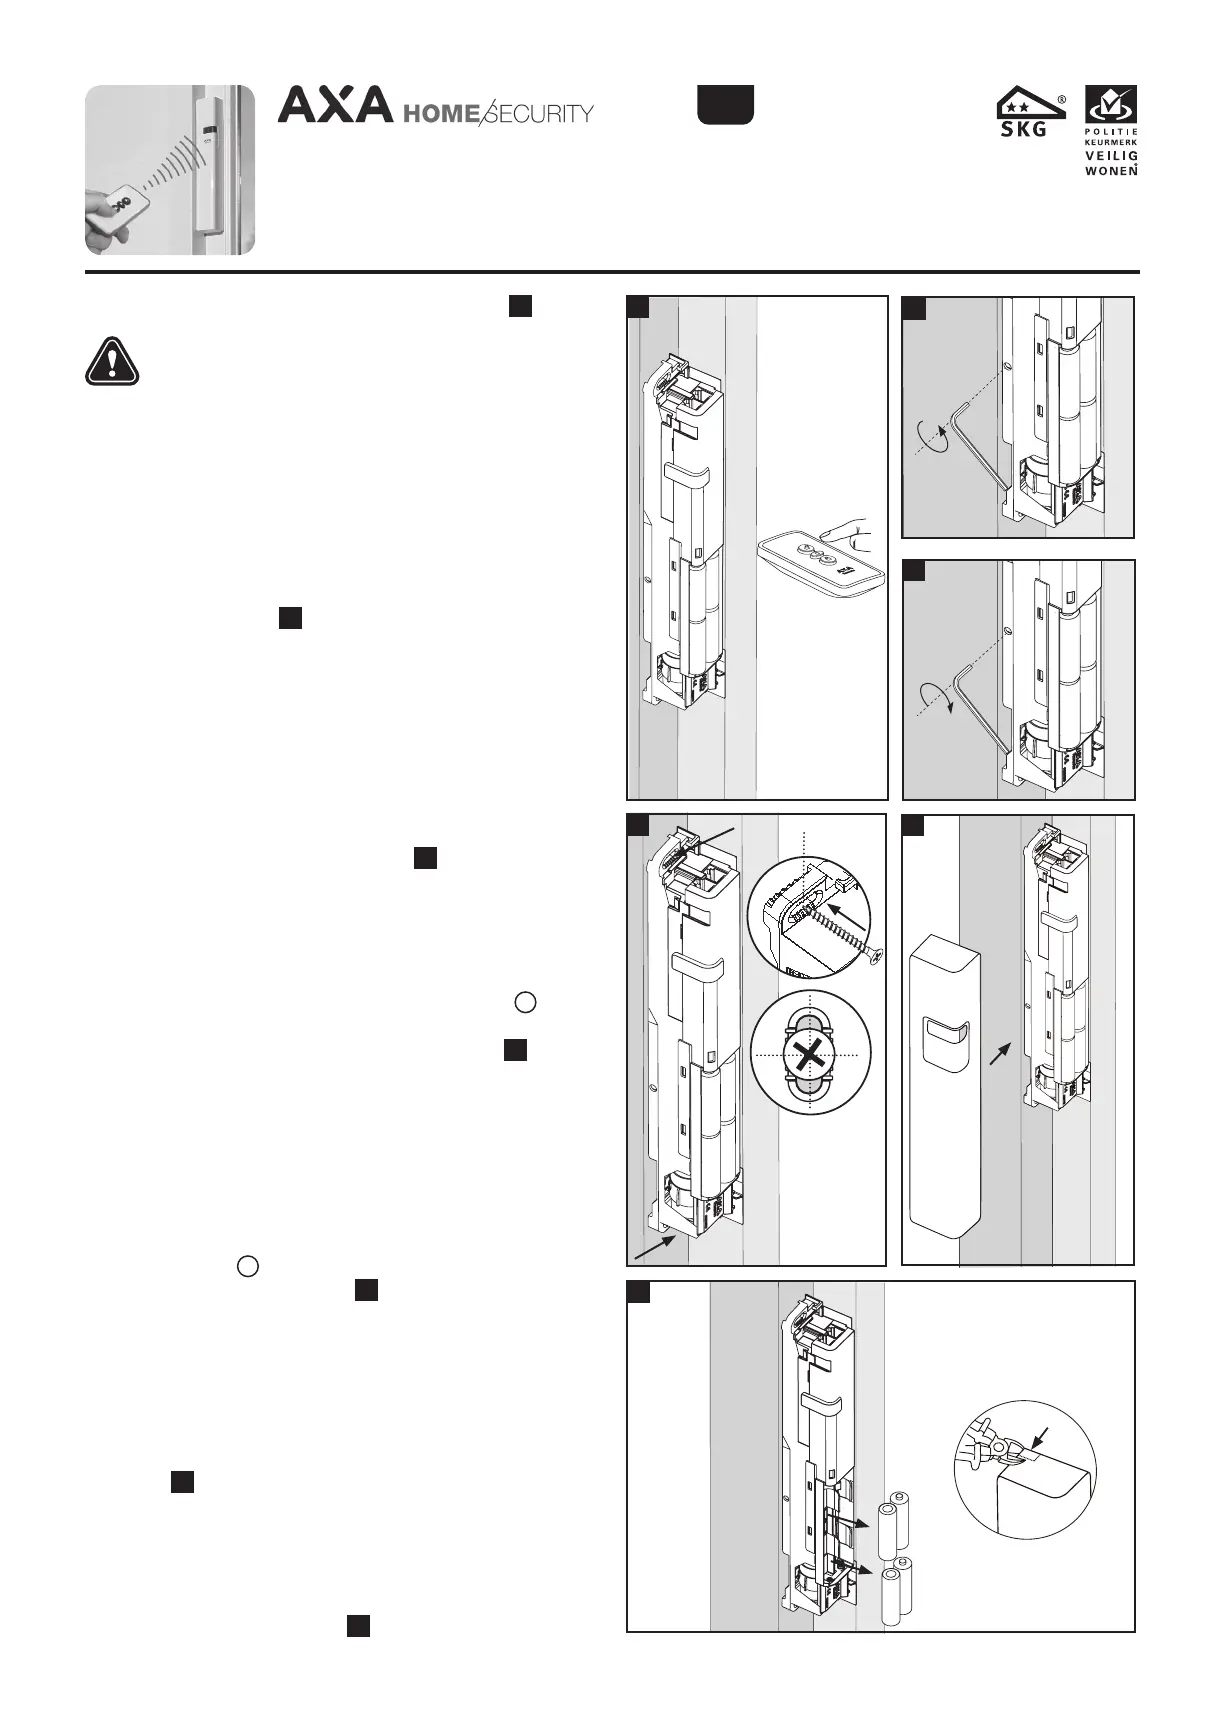
14 Close the window with the remote control (figure
M
).
When doing so, hold the closing unit and ensure it
stays parallel to the window.
Configuring the closing unit:
15 The closing unit will stop flashing once it is fully closed.
You can adjust the close-position using the adjustment
screw.
If the window does not close completely to normal position:
If the window is not closed enough (the window moves or a
draft comes through the window), you must turn the adjustment
screw to the left (figure
N
).
For the best operation and a longer working life per set
of batteries, we recommend not adjusting the closing unit too
tightly.
If the closing unit does not lock completely:
If the closing unit does not close properly, the LED light will
flash. In this case, the unit is too tight.
If the closing unit has been configured too tightly, you must turn
the adjustment screw to the right (figure
O
). Press the close
button on the remote control once again and check whether the
closing unit closes properly. Repeat this process until the unit
closes properly.
Final assembly
16 Screw the closing unit in place using the 2 screws
10
(4.0 x 40 mm, pre-drill Ø 2 mm), one on the left-hand side
and one on the right-hand side of the unit (figure
P
). When
screwing in place, ensure that the closing unit is at an equal
distance from the window casing.
17 Once again, check whether the window opens and closes
properly by fully closing and opening the window once.
Repeat step 15 if the window does not open or close proper-
ly.
Assembly cover:
18 Slide the cover
6
onto the closing unit, from front to back,
until it goes no further (figure
Q
).
19 The AXA Remote 2.0 is ready for use.
Assembly adapter version:
20 Assemble the window unit in the same way as the battery
version (step 1 to 19). Remove the battery before
connecting the adapter to the closing unit and the mains
(figure
R
).
21 Decide whether you want the adapter wire to exit the top or
bottom of the closing unit (depending on the location of the
power socket).
Use cutters to cut a small snippet from the cover in the
semi-perforated area (figure
R
) on the side chosen.
P
Q
N
M
R
AXA Remote 2.0
37-008.2 (2-17)
EMC 2004/108/EC
=
=
3
O
Remote-controlled window opener
EN
 Loading...
