AXIS Q7401 Installation Guide Page 5
ENGLISH
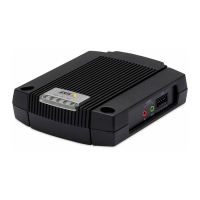
Install the hardware
Mount the video encoder
The video encoder is supplied with a mounting kit containing screws, plugs, and protective pads for
mounting the video encoder to a concrete wall:
1. Place the video encoder against the wall, and mark the location of the two mounting holes (See
page 4) through which the video encoder will be attached.
2. Remove the video encoder and drill the two mounting holes.
3. Punch out the four protective pads and apply them to the underside of the video encoder.
4. Insert the wall plugs into the wall, position the video encoder, and attach it to the wall using
the screws provided.
Connect the cables
1. Connect the encoder to the network using a shielded network cable.
2. Optionally connect external input/output devices, e.g. alarm devices. See page 12 for
information on the terminal connector pins.
3. Optionally connect an active speaker and/or external microphone.
4. Connect the camera.
5. Connect power, using one of the methods listed below:
• PoE (Power over Ethernet). If available, this is automatically detected when the network
cable is connected (see above).
• Connect the supplied indoor power supply to the power connector on the encoder.
6. Check that the indicator LED:s indicate the correct conditions. See the table on page 15 for
further details.
!
IMPORTANT! - The casing of the AXIS Q7401 is not approved for outdoor use - the
product may only be installed in indoor environments.