31
Setting the Riving Knive Gap
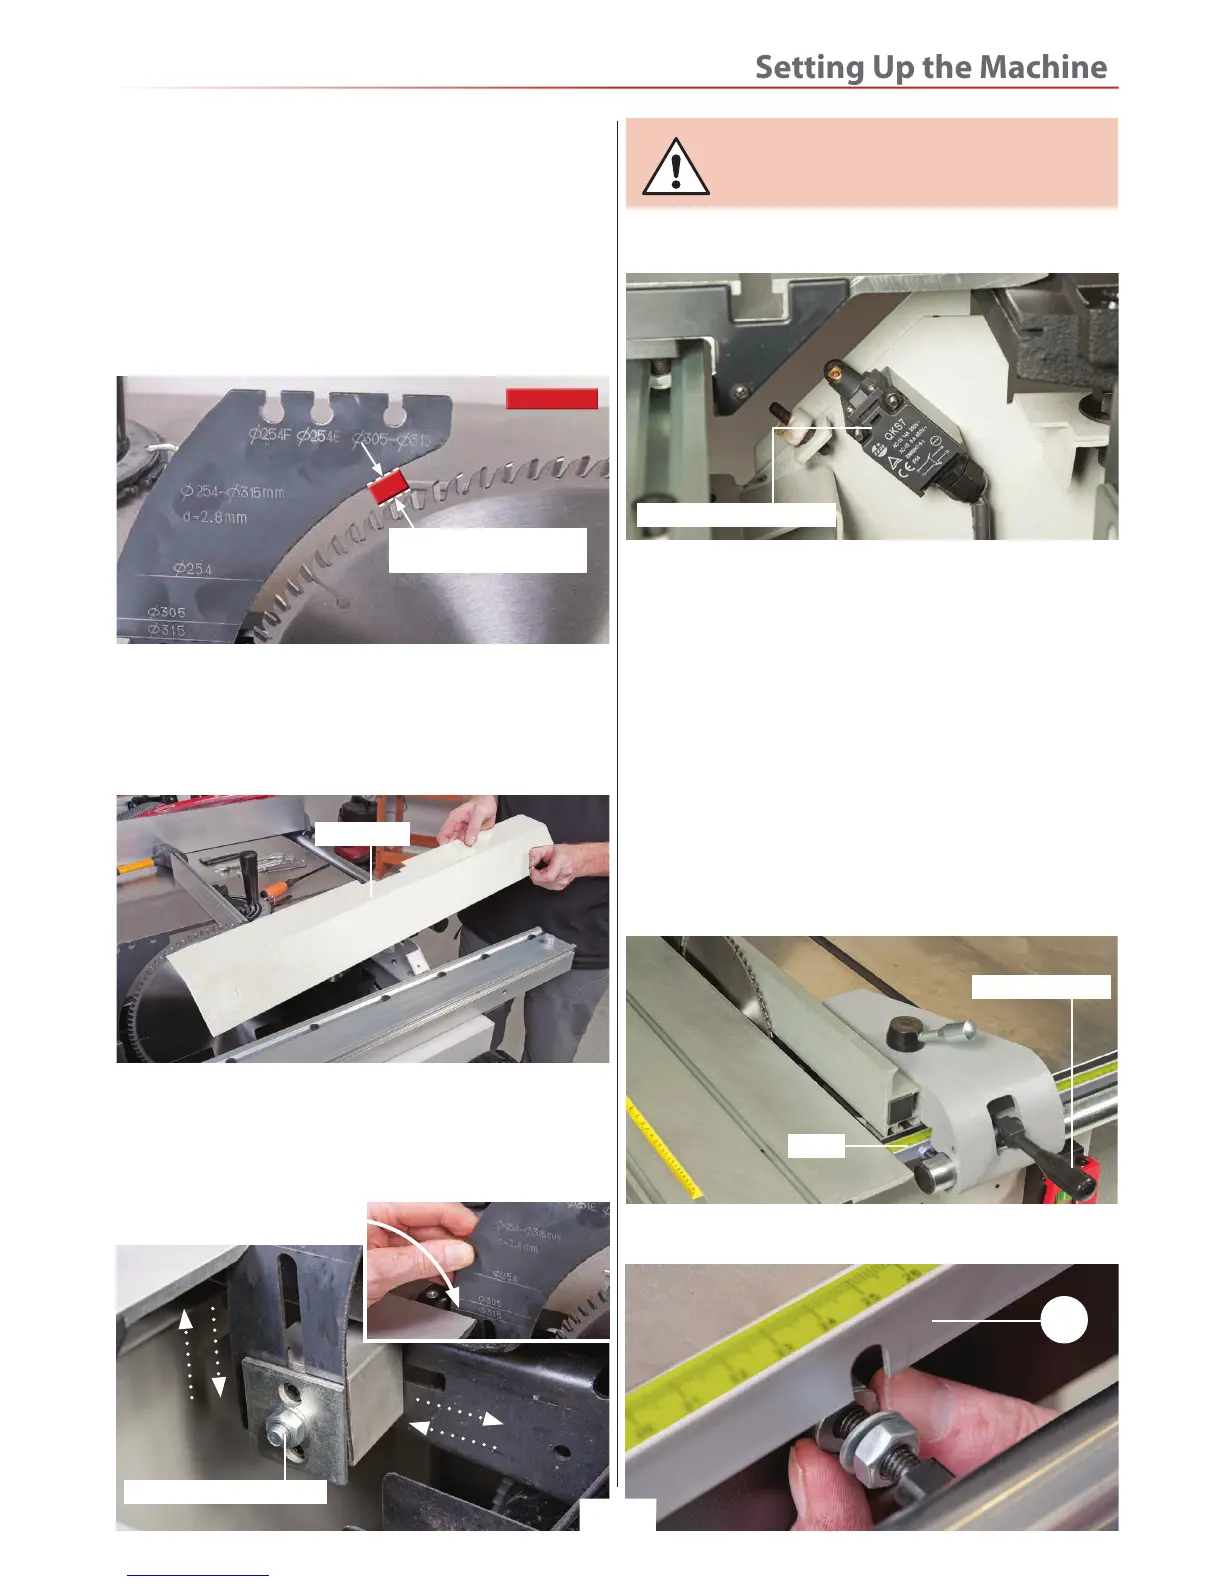
1. Raise the saw blade up to it maximum height and
remove the crown guard assembly.
2. Check the clearance between the riving knife and
the saw blade, it should have a gap of (MIN 3mm - MAX
8mm), see fig 111.
Fig 111
3-8mm Gap between the
riving knive and the blade
3. If adjustment is required, move the sliding table to one
side, remove the two Phillips screws holding the inner
guard assembly and place safely aside, see fig 112.
Fig 112
4. Loosen the nut holding the riving knive, see fig 113
and adjust the knife until the required distance is
correct. Make sure the graduation line for the size of
blade fitted is level with the sliding table surface,
retighten the nut and replace the inner guard.
Fig 113
NOTE: Make sure you replace the inner
guard over the micro switch, see fig 114
otherwise the panel saw will not run.
Fig 114
Inner guard
Riving knife clamping nut
Blade inner micro switch
Rip Fence
1. Lift up the clamping handle and slide the rip fence
up against the blade, push down the handle to lock the
fence assembly, check the fence lines up with the ‘0’ on
the scale, see fig 115.
2. If adjustment is required slacken the nuts holding
the rip fence scale (24), see fig 116 and adjust until
the ‘0’ on the scale lines up with the fence.
NOTE: Nip up the nuts evenly to prevent the rip
fence scale becoming misaligned.
Fig 115
Fig 116
Clamping handle
24
Scale
Clearance
Graduation Line
 Loading...