33
WARNING!! DO NOT PUSH THE WORKPIECE
TWO QUICKLY THROUGH OTHERWISE THE
BLADE MIGHT STALL OR KICKBACK.
WARNING!! ONLY USE AN EXTRACTOR
WITH AN AIR FLOW OF 1,000M3/HR OR
ABOVE WITH THIS PANEL SAW. CONTACT
OUR SPECIALIST AFTER SALES TEAM FOR
HELP. PHONE: 03332 406 406
Fig 121
1. Start the saw by pressing the ‘ON’ button on the NVR
switch, wait until the saw is at full speed and carefully
guide the workpiece safely through.
RECONNECT THE MACHINE TO THE MAINS!
9. CHECK the riving knife and saw blade has a gap
of a between 3-8mm, see ‘setting the riving knife’ on
page 33.
NOTE: The riving knife acting as a back guard stops
the wood from closing up onto the blade and being
ejected. The riving knife must be thicker than the
plate of the saw blade but less than the kerf
(this is the thickness of cut).
10. MAKE SURE your workpiece is securely clamped in
place.
Dust Extraction
The panel saw has a 100mm dust extraction outlet to
the rear of the machine, attach a chip extractor to the
machine.
NOTE: DURING OPERATION IF YOU
NOTICE A BUILD UP OF SAW DUST STOP
THE MACHINE AND FOLLOW THE
INSTRUCTIONS BELOW.
2. Once complete, turn off the saw, wait until the saw
comes to a complete stop before removing the
workpiece.
3. Wait until the saw has stopped and disconnect the
machine from the mains supply.
4. Move the sliding table (19) to one side, using a vacuum
cleaner clean out any build up of dust debris or resin
then slide the table to the opposite side and repeat the
procedure.
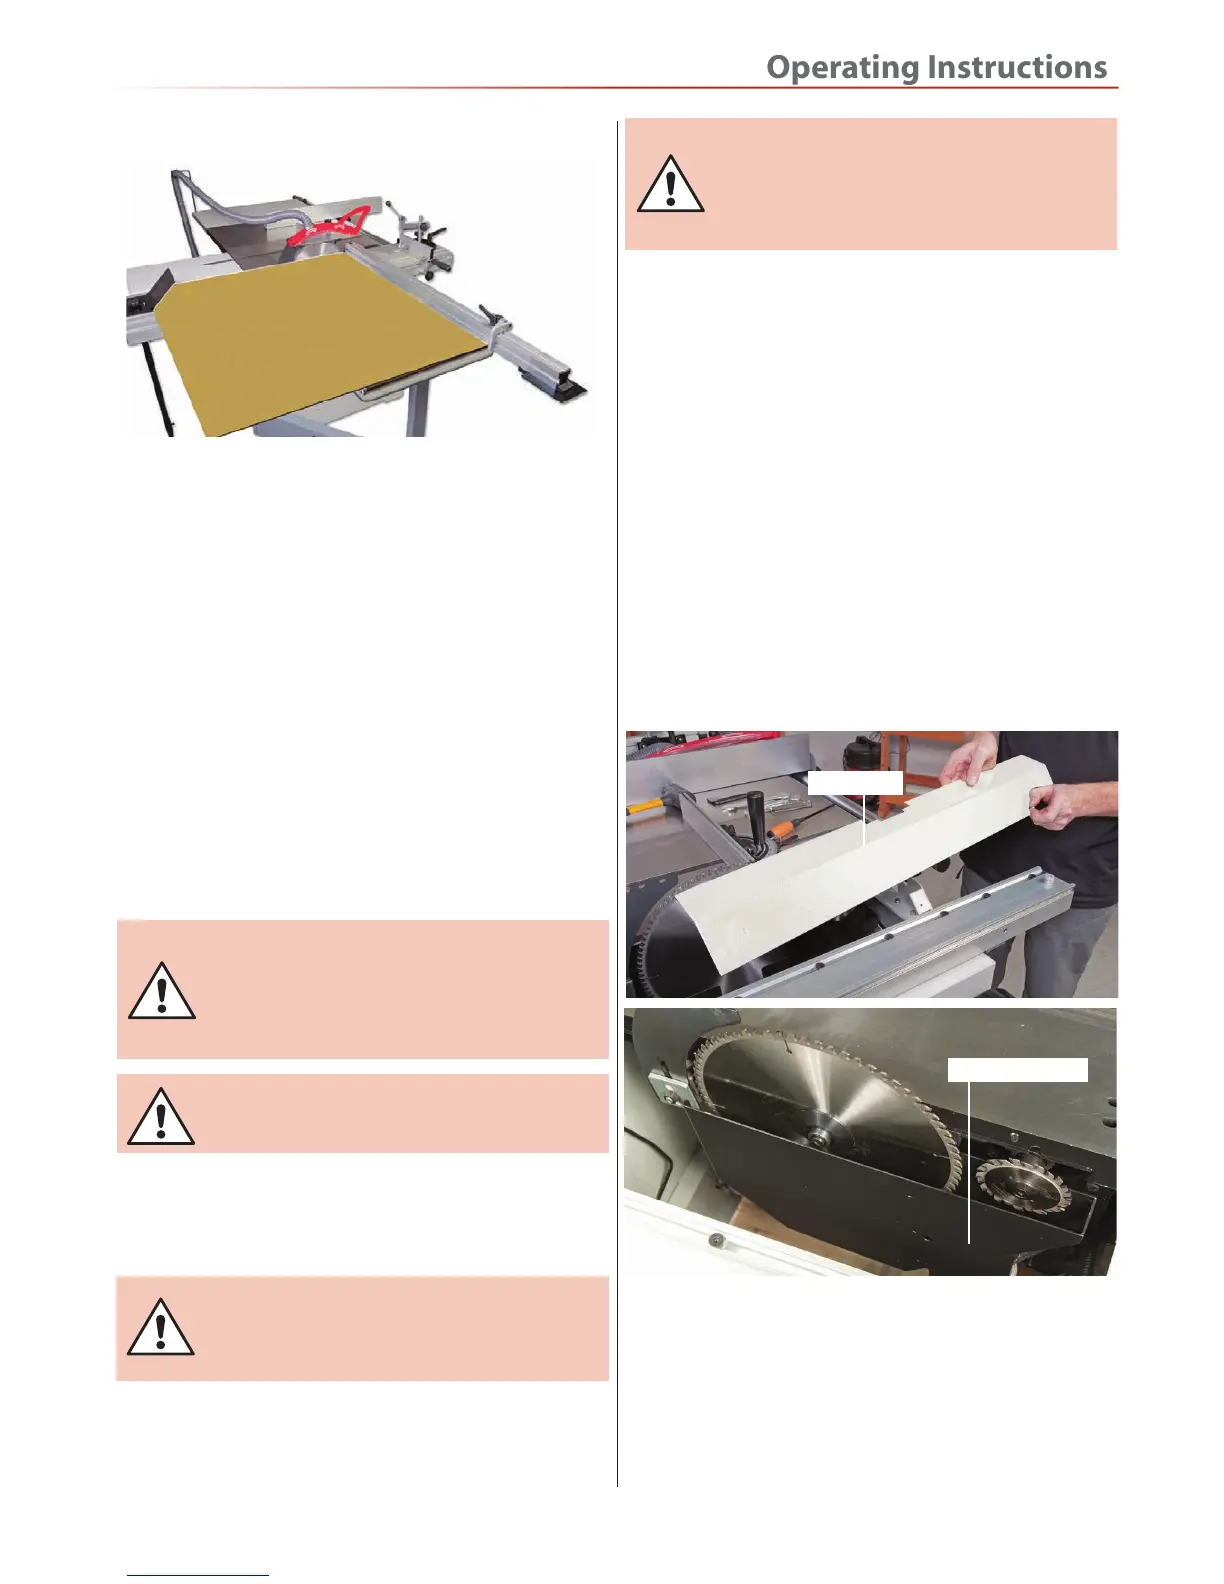
5. Remove the two Phillips screws holding the inner
guard assembly, see fig 122 and place safely aside.
Remove the build up of dust debris around the blades,
riving knife and the extractor housing.
NOTE: To gain full access to the extractor housing it
may be easier to remove the main blade, see fig 123.
(see the section on changing the blade)
Fig 122-123
6. Remove the hoses from the crown guard and
extraction moulding and clean out any build up of dust
and debris or resin from within. Once done replace the
hoses, saw blade, crown guard and inner guard.
7. Check your extractor and empty the collecting bags
if full, also check and make sure the filters are clean.
Inner guard
Extractor housing
 Loading...