36
Changing the Scoring Blade
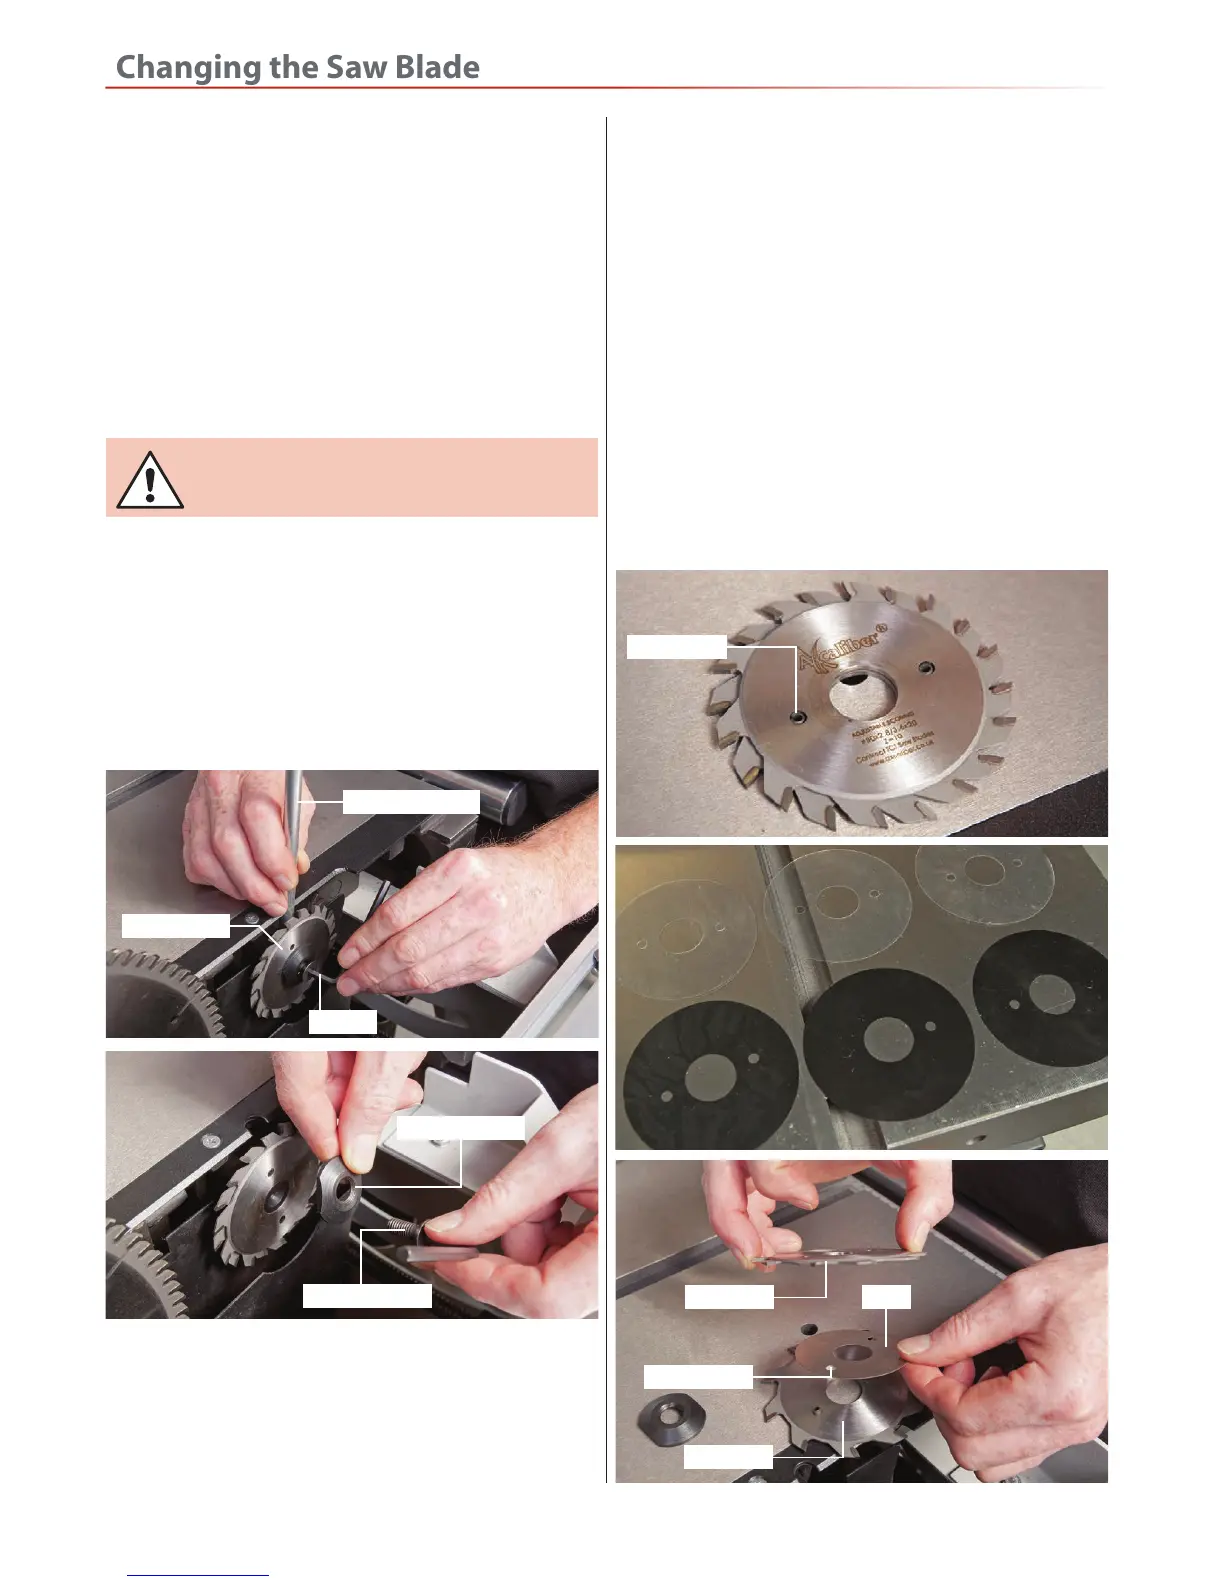
1. Refer to steps 1-2 for changing the main blade.
2. Using the Hex key provided and blade locking bar (C)
insert the Hex key into cap head screw, turn the scoring
saw until the locking bar hole is visible. Insert the
locking bar and turn the saw to allow it to rest against
the front edge of the saw slot.
Fig 131-132
WARNING!! DISCONNECT THE MACHINE
FROM THE MAINS BEFORE CONTINUING!
3. Remove the scoring blade, check the new blade for
damage, missing teeth, sharpness etc. then replace the
scoring blade and tighten, see fig 131-132. Replace the
inner guard assembly, slide the table back until the
locking knob pin engages the pin recess and replace
the saw crown guard.
8. Replace the inner guard assembly, slide the table
back until the locking knob pin engages the pin recess,
turn the saw blade once by hand to check it spins freely
and replace the crown guard. When everythinge is
satisfactory reconnect the machine to the mains supply.
9. Give the machine a test run ( i.e. quick ON-OFF) to
ensure everythinge is O.K. If everythinge is satisfactory,
continue to use the panel saw.
Saw plate washer
Cap head screw
Blade locking bar
Hex key
Scoring blade
Fitting Scoring Blade Shims
The scoring blade comes in two parts to allow the shims
to be inserted between so that the cut can be aligned
exactly with that of the main blade.
1. Remove the scoring blade as instructed previously
and place on the main table, see fig 133.
2. Lift away the upper half of the blade and locate the
shims. Place one or more on top of the lower half,
inserting holes in the shims over the locating pins on
the blade. Replace the upper half of the blade making
sure it seats down correctly, see fig 134-135.
3. Replace the blade and tighten.
Fig 133-134-135
Upper half
Locating hole
Lower half
Shim
Locating pin
 Loading...