35
Continues Over....
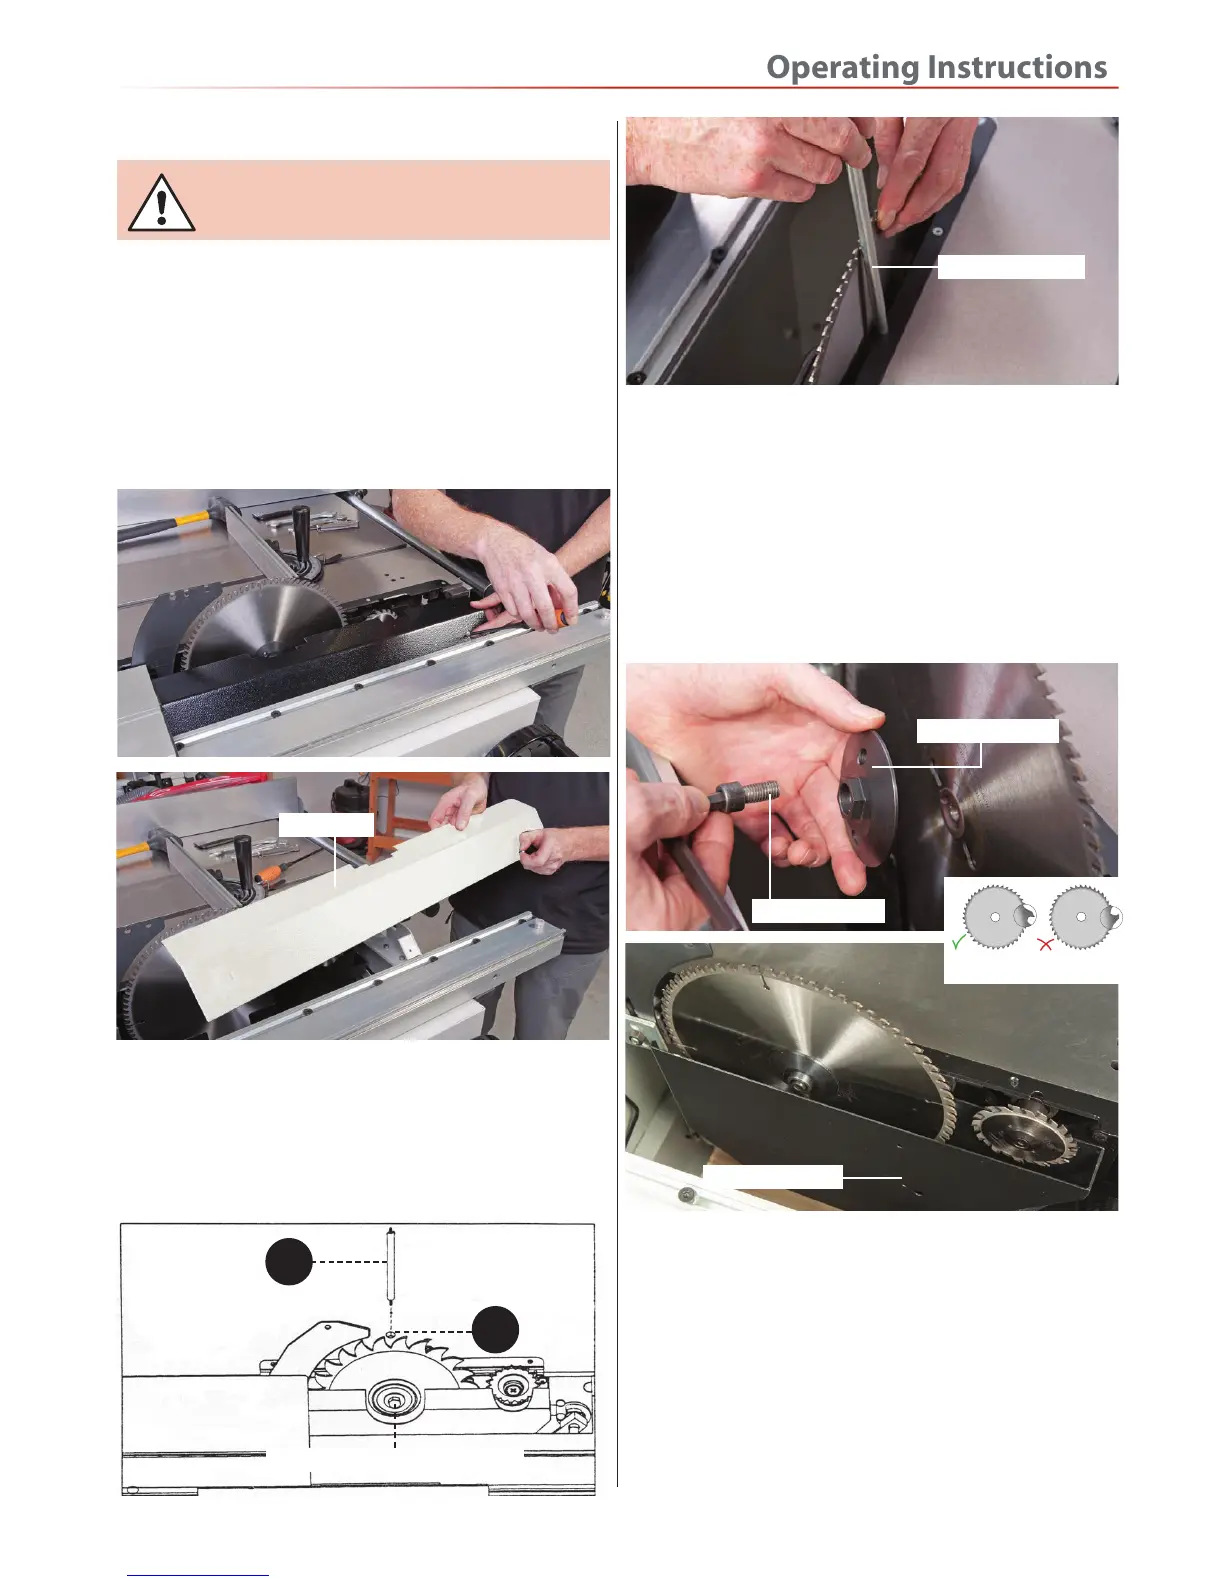
Changing the Main Blade
1. Raise the saw blade to it’s highest point. Remove the
saw blade crown guard and place to one side. Pull the
sliding table locking knob towards you and slide the
table to the side exposing the blades.
2. Remove the two Phillips screws holding the inner
guard and place both safely to one side, see fig 125-126.
WARNING!! DISCONNECT THE MACHINE
FROM THE MAINS BEFORE CONTINUING!
Fig 125-126
3. Find the 8mm Hex key (H) and the blade locking bar
(C). Turn the saw until the locking bar hole (a) is visible
and insert the locking bar (C) into the hole, see fig
127-128.
Fig 127-128
a
C
Cap head screw/ saw plate washer
Blade locking bar
4. Remove the cap head screw with the Hex key (H),
(remember left hand thread). Remove the saw plate
washer and the saw blade and place to one side, see fig
129.
5. Now is a good time to give the interior of the machine,
the dust extraction channels, etc. a thorough clean, see
fig 130.
Fig 129-130
Saw plate washer
Cap head screw
6. Check the new blade for damage, missing teeth,
sharpness etc. Fit the new blade, ensure that the teeth
are pointing towards the front of the machine. Put the
saw plate washer onto the shaft and replace the cap
head screw until finger tight and check the saw is
correctly seated.
7. Tighten up the cap head screw, using the blade locking
bar (C) to hold the shaft steady. Check the riving knife is
aligned with the saw blade, and correctly positioned, (see
setting the riving knife gap on page 32) .
Inner guard
Extractor housing
Teeth pointing front
 Loading...