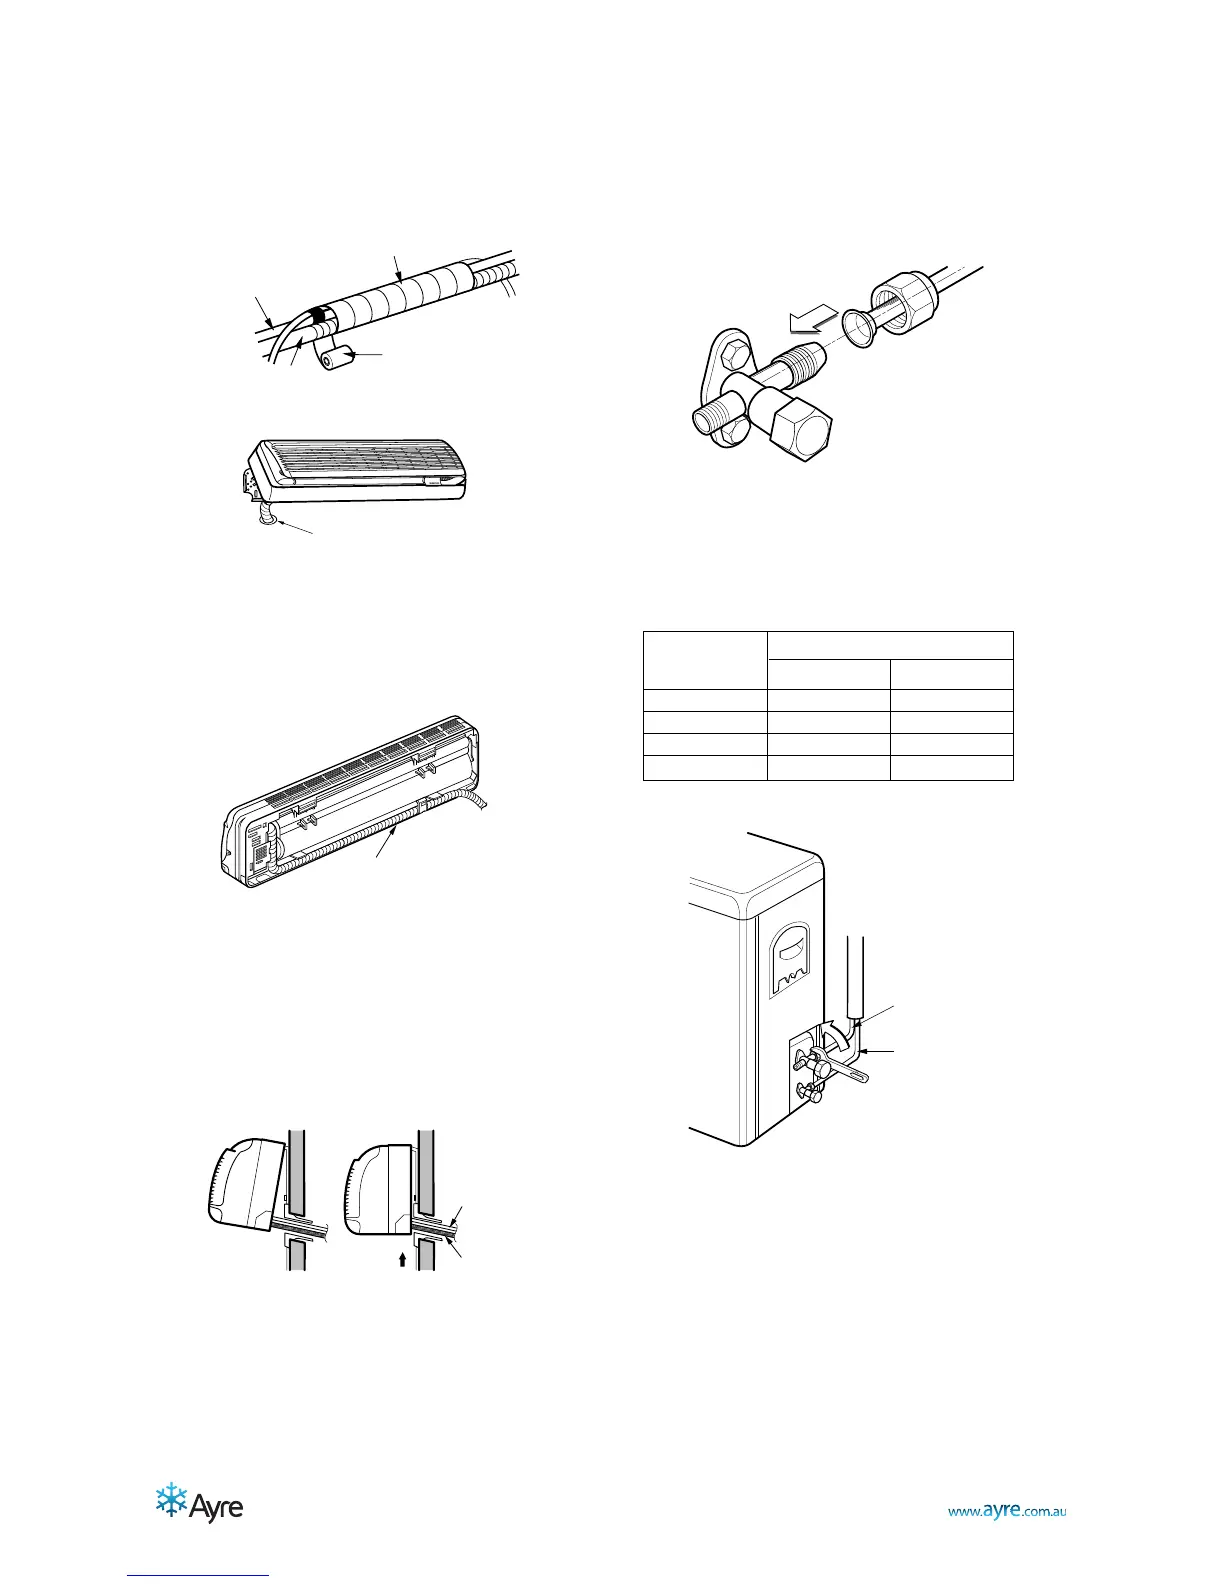
3.5.3 Connection of the pipes-Outdoor
A. Align the center of the pipings and sufficiently tighten
the flare nut by hand.
B. Finally, tighten the flare nut with torque wrench until
the wrench clicks.
• When tightening the flare nut with torque wrench,
ensure the direction for tightening follows the arrow on
the wrench.
Liquid side piping
(Smaller diameter)
Gas side piping
(Bigger diameter)
Torque wrench
Outdoor unit
H. Reroute the pipings and the drain hose across the
back of the chassis.
I. Set the pipings and the drain hose to the back of the
chassis with the tubing holder.
• Hook the edge of tubing holder to tap on chassis and
push the bottom of tubing holder to be engaged at the
bottom of chassis.
J. Indoor unit installation
1) Remove the spacer.
2) Ensure that the hooks are properly seated on the
installation plate by moving it left and right.
Drain hose
Connecting
cable
Piping for
passage through
piping hole
Wrap with vinyl tape
Vinyl tape
Drain hose
Pipe
• Bundle the piping and drain hose together by wrapping
them with cloth tape over the range within which they fit
into the rear piping housing section.
Press the lower left and right sides of the unit against
the installation plate until the hooks engage into their
slots(clicking sound).
3/8"[4.2kg
.
m]1/4"[1.8kg
.
m]
1/2"[5.5kg
.
m]1/4"[1.8kg
.
m]
7.0kW 5/8"[6.6kg
.
m]3/8"[4.2kg
.
m]
Pipe Size[Torque]
Capacity
(kW)
GAS LIQUID
3.2kW, 5.0kW
2.7kW
Installation Instructions • T-series Split System Air Conditioner
 Loading...