2-11
Chapter 2: Installation
■ Supply air pressure connection to reversing relay
Connect the pipe for supply air pressure to the reversing relay.
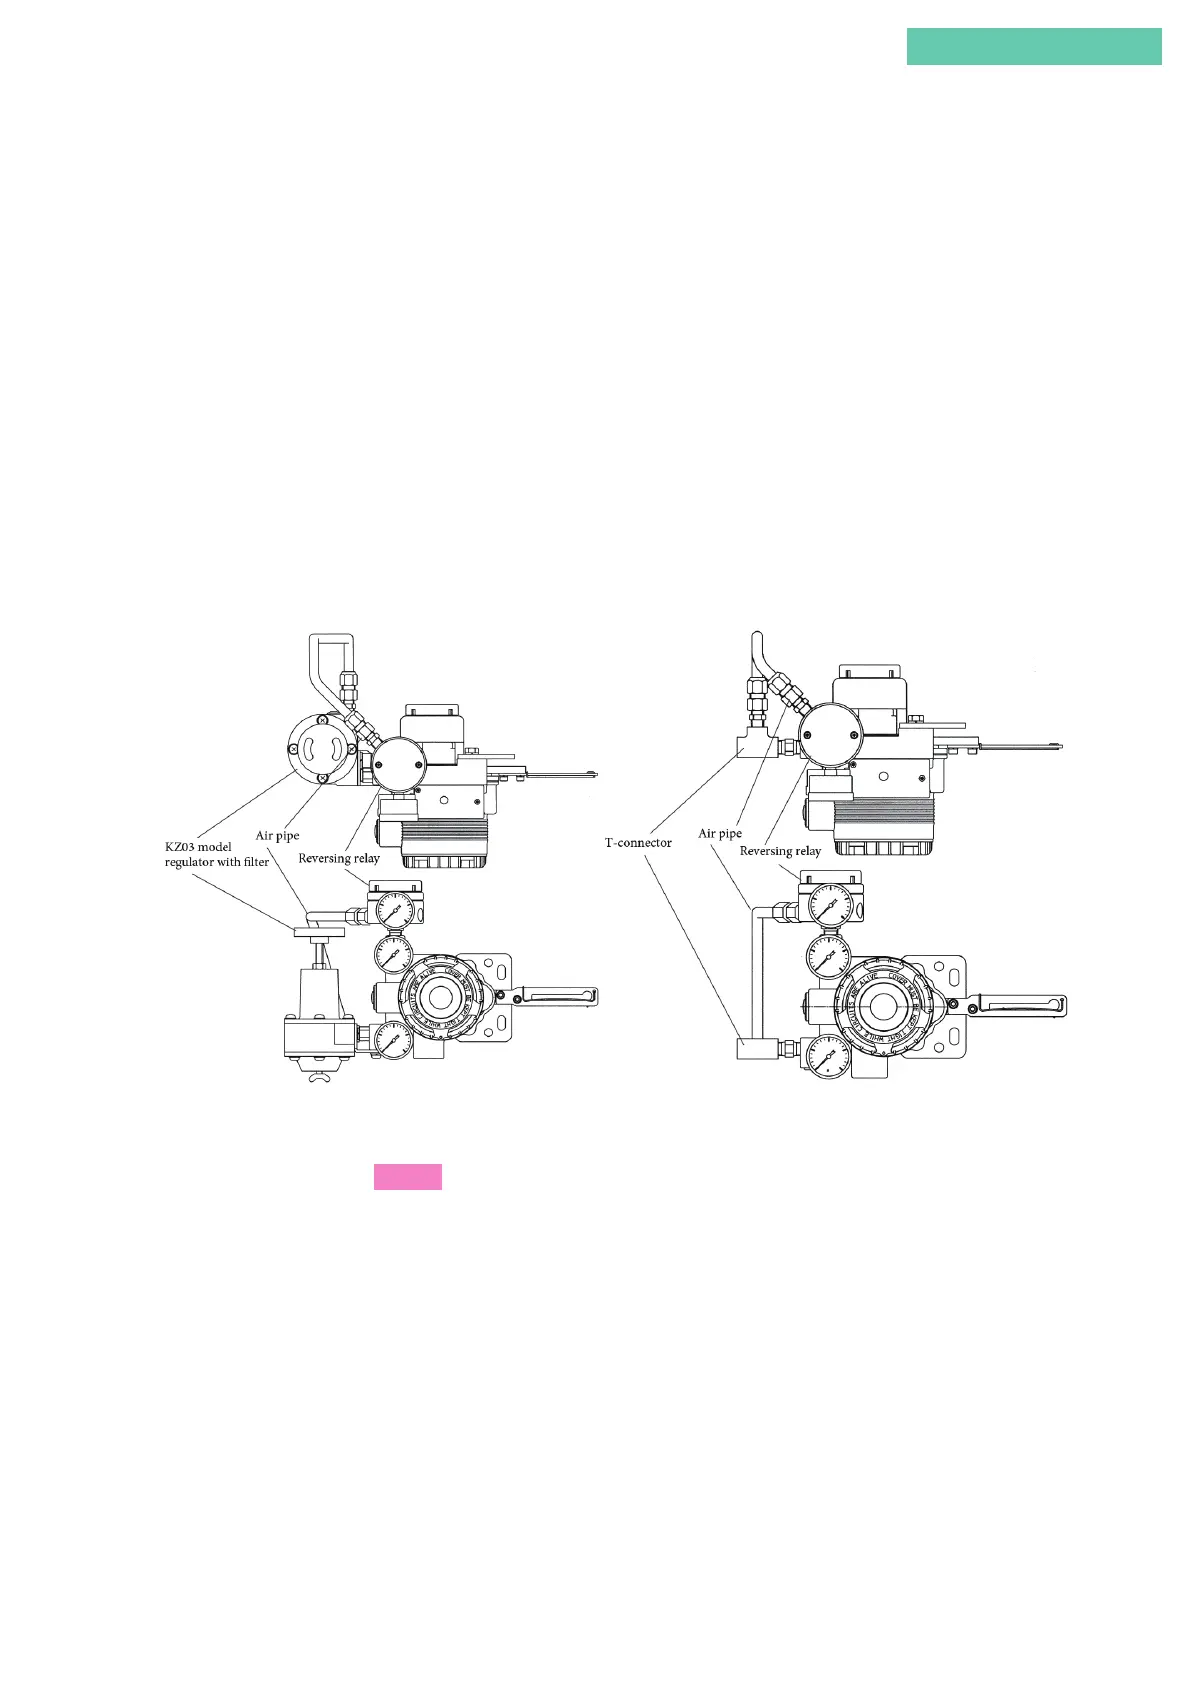
Installing a model KZ03 pressure regulator with filter to the body of the device
The model KZ03 pressure regulator with filter has two output air connections. Connect
one of the output air connections on the model KZ03 to the supply air connection on
the body of the device using the special-purpose metal fittings, and connect the gap be-
tween other output air connection and the supply air connection (SUP) on the reversing
relay using air pipes and joints.
Installing a model KZ03 pressure regulator with filter or other pressure regulator
with filter separate from the body of the device
Using a T-connector or the like, separate the output air pressure of the pressure regula-
tor with filter into two branches. Then, using air pipes and joints, connect one branch to
the air supply connection on the body of the device, and the other branch to the air sup-
ply connection (SUP) on the reversing relay.
Figure 2-10. Air Pipe to Reversing Relay when Model KZ03
Is Installed Integrally
Figure 2-11. Air Pipe to Reversing Relay when Pressure
Regulator Is Installed Separately
Note
Be sure to use branches of the output of only one regulator for the supply air to this
device and reversing relay combination, and make the supply air pressure the same to
both.
 Loading...