Do you have a question about the azuga SafetyCam and is the answer not in the manual?
Verify GPS device compatibility, ensuring it's a 4G-LTE device for SafetyCam functionality.
Plug the SafetyCam into the vehicle's diagnostic port after confirming it's the latest device.
Confirm vehicle mapping in the Azuga Fleet App, especially if SafetyCam and GPS devices were bundled.
Select your preferred method for mounting and powering the SafetyCam, with default options provided.
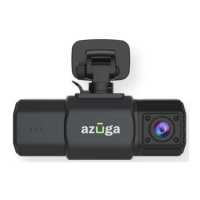
Install the SafetyCam using the mirror mount by following detailed steps for clip attachment and securing.
Mount the SafetyCam using the 3M adhesive tape holder, ensuring a clean and dust-free mounting location.
Attach the SafetyCam using the suction cup holder, ensuring a clean and dust-free mounting location.
Route the power cable through the vehicle's interior panels and connect it to the OBD-II port.
Connect the SafetyCam's USB cable to the Cigarette Lighter Adapter for power.
Connect the three-wire system (red, black, yellow) under the dash for a hardwired power setup.
Access the Azuga Fleet app, log in, and navigate to the Devices tab under Admin.
Within the Devices tab, select the SafetyCam tab to view connected devices.
Locate your SafetyCam by searching and click the edit icon (pencil) to make changes.
Select the correct vehicle from the dropdown list to associate it with the SafetyCam.
| Category | Digital Camera |
|---|---|
| Model | SafetyCam |
| GPS | Yes |
| G-sensor | Yes |
| Resolution | 1080p |
| Night Vision | Yes |
| Field of View | 140 degrees |
| Storage | MicroSD card |