10
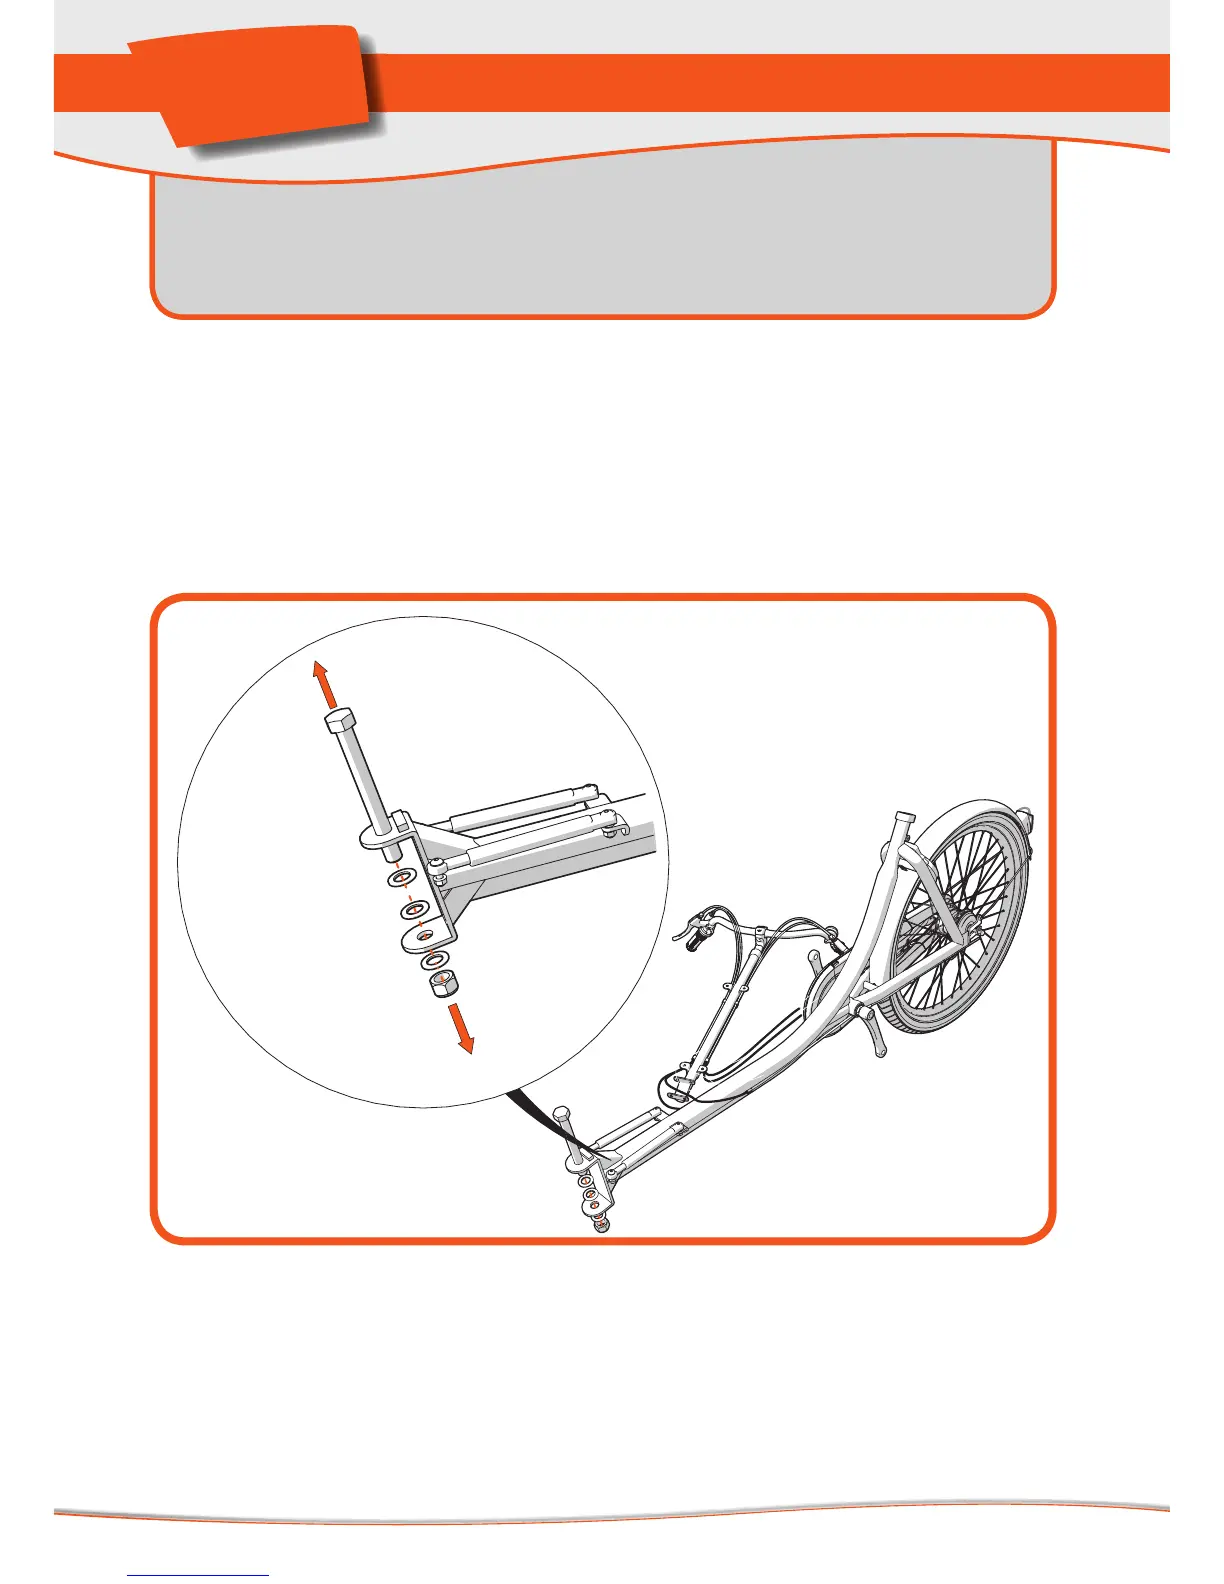
Step 3: Connec ng the front and rear frame
Note: Ask for assistance from someone for this step. It will be a lot easier if you do.
1. Get the rear frame out of the box and remove the protec ve packaging
materials.
2. Posi on the front frame onto the wheels, allowing it to rest on the lt guards.
3. The rear frame includes an a achment piece with a large bolt (see Fig. 4). This
bolt has been pre- ghtened for transport purposes only; remove the bolt.
Keep the removed bolt, nut and washer at hand for later.
Parts needed:
- The rear frame (Box II)
- The front frame
Tools needed:
- Open-end spanner # 30 /
Bahco / adjustable spanner
4.
 Loading...