16
Step 5.3: A aching the saddle
Important! Adhere to the specifi ed order of sub-steps for this part of the
assembly. If you a ach the saddle pin fi rst, you run the risk of the saddle pin
falling down into the saddle tube. Therefore, make sure to start with a aching
the saddle onto the saddle pin fi rst.
For the sake of the steps to follow, it is useful to secure the saddle now (fi nal
posi oning will take place a er the assembly is fi nished).
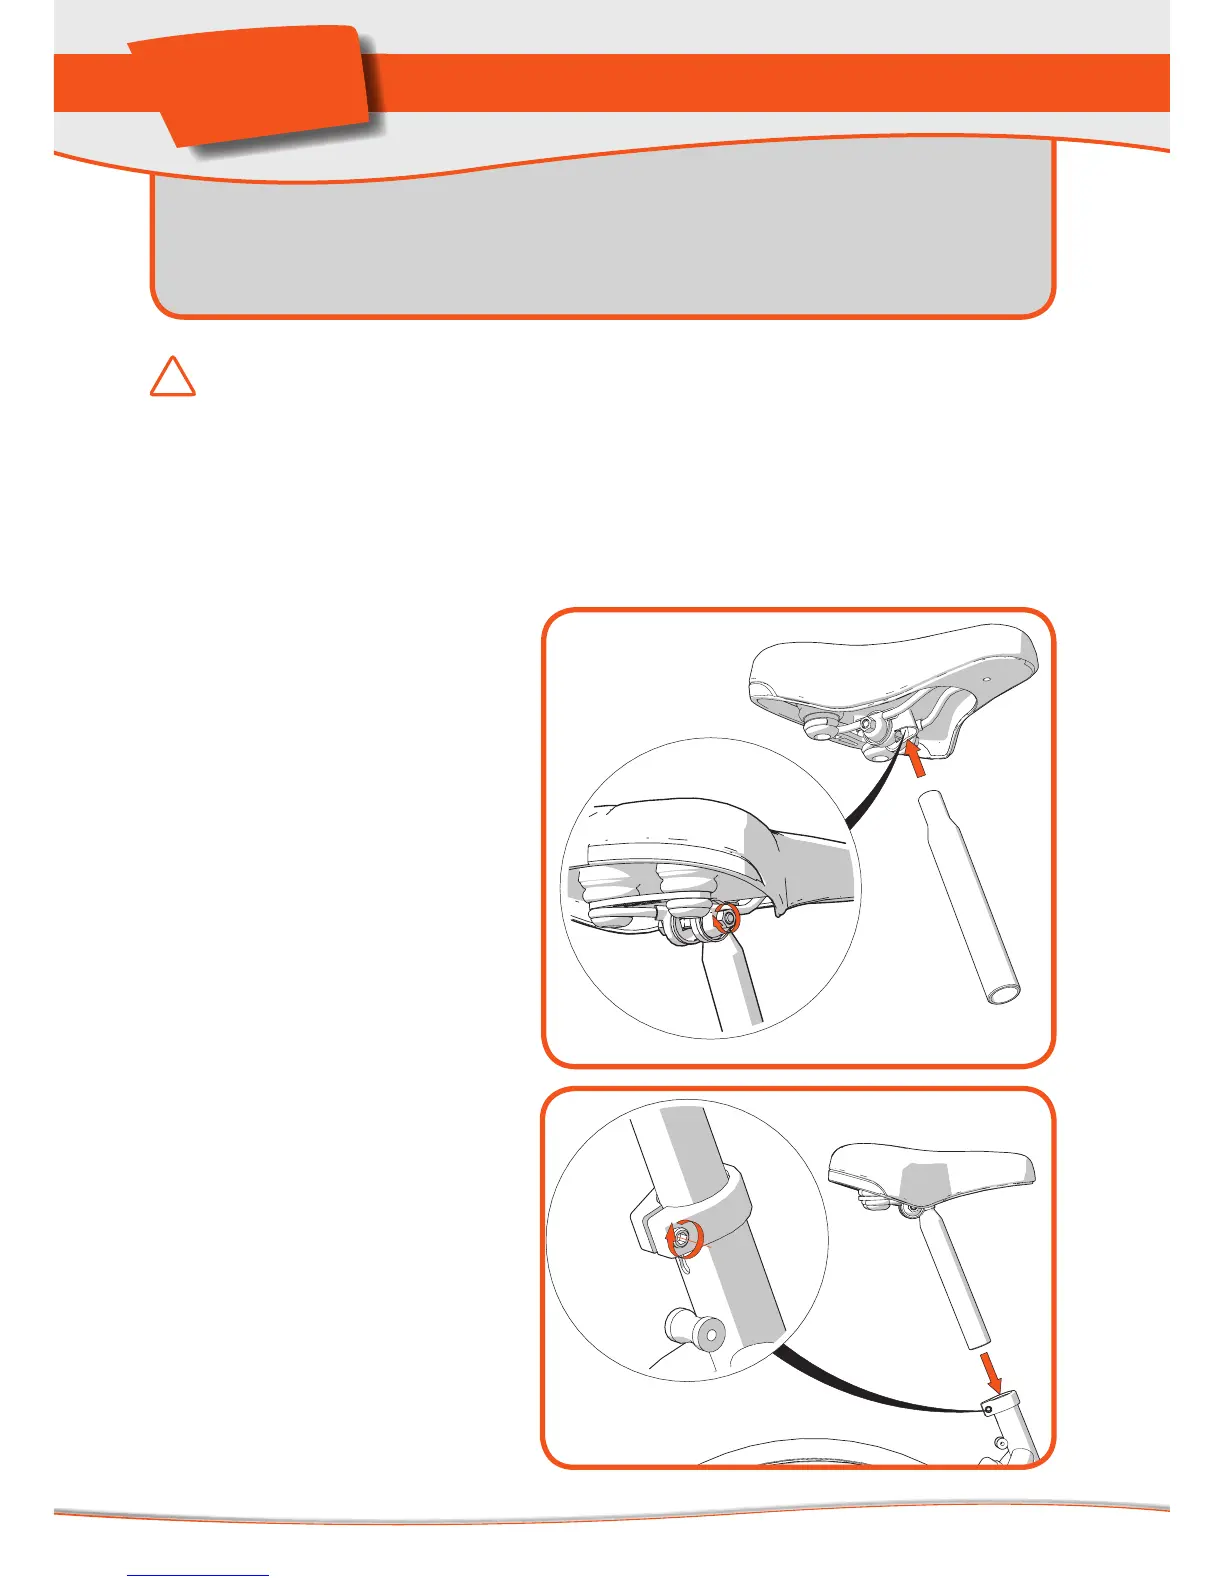
1. A ach the saddle to the
narrow end of the separate
saddle pin using open-end
spanner # 13 (see Fig. 13).
The a achment fi ngs are
already fi ed to the underside
of the saddle (see detail
picture F).
2. Slide the saddle pin into the
saddle tube approximately up
to the desired height (see Fig.
14). Hand-secure the saddle
pin by ghtening the hex bolt
at the top of the saddle tube
(see detail picture G).
Parts needed:
- Saddle and saddle pin
Tools needed:
- Open-end spanner # 13
- Allen key # 5
13.
F.
14.
G.