22
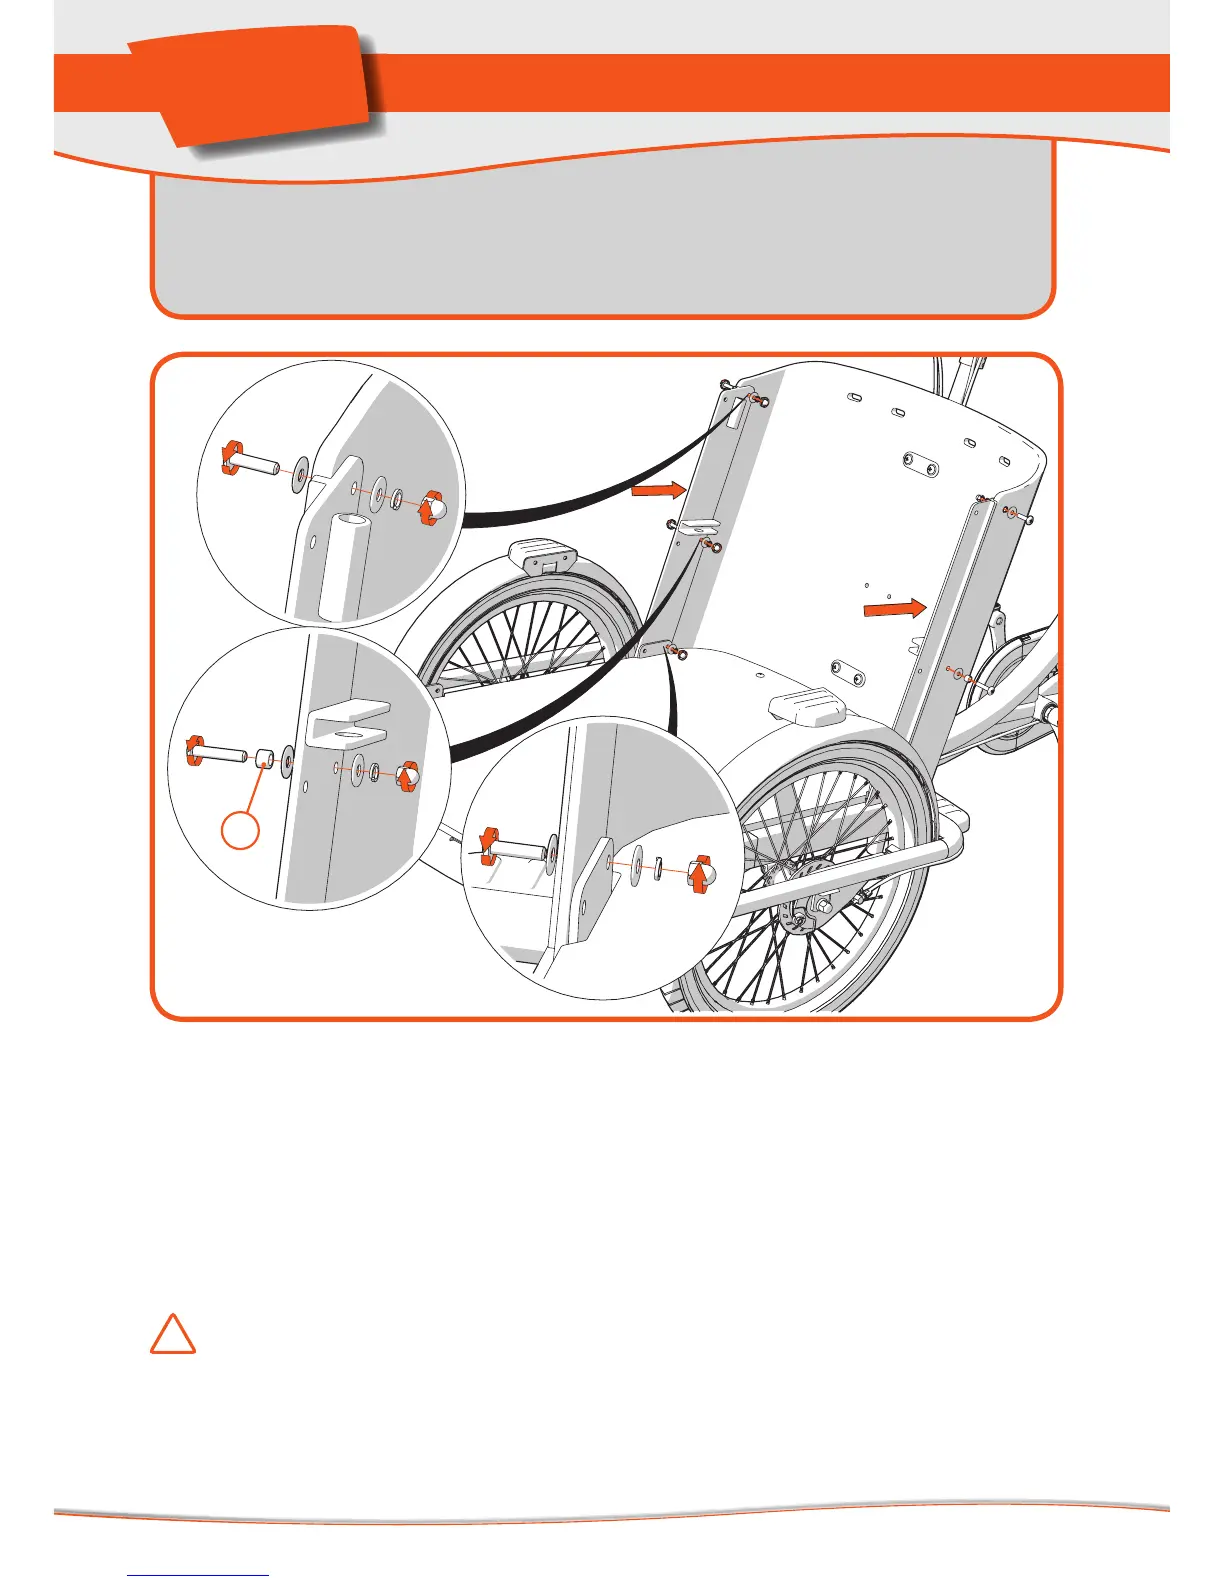
Step 7.3: A aching the connec on profi les (rear)
1. A ach both connec on profi les (rear) to the back plate by inser ng a short
bolt in the upper hole (see Figure 24, detail picture K).
2. Use the longer bolts for the middle hole (detail picture L) and the bo om hole
(detail picture M). A tube must be a ached to the exposed end of the middle
bolt (see detail picture L)(1). This tube can be used later on for a achment of
features like the rain cover, rain tent or other accessories.
Important! Adhere to the specifi ed order for nuts, bolts and washers etc. (see
detail pictures K, L and M).
Parts needed:
- 2x connec on profi les (the longest steel profi les in Box II)
- Sachet E (2x M6 bolts (short), 4x M6 bolts (long), 6x M6 cap
nuts, 6x M6 spring washers, 12x M6 washers, 2x tube pieces)
Tools needed:
- Open-end spanner # 10
- Philips screwdriver