Do you have a question about the Baby Lock Ovation and is the answer not in the manual?
Steps for attaching the elastic foot and adjusting elastic pressure.
Step-by-step guide for inserting elastic and sewing it to fabric.
Guide for threading and sewing fishing line using the elastic foot.
Instructions for folding bias strip around cording and guiding it.
Steps for inserting the quilt bar into the foot and adjusting it for parallel stitching.
Steps to secure the attachment, feed the bias strip, and align for sewing.
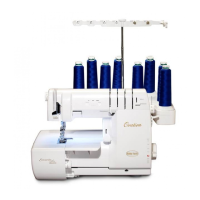
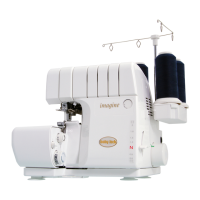
The Ovation 22 Serger Accessory/Feet Kit provides a comprehensive set of tools designed to enhance the versatility and performance of your Baby Lock Ovation serger. This kit includes various specialized presser feet and binders, each tailored to specific sewing tasks, allowing you to achieve professional-quality finishes on a wide range of projects. From delicate embellishments to sturdy hems and decorative trims, these accessories streamline complex techniques and expand your creative possibilities.
The Beading Foot (BLE8-BF) is engineered to simplify the process of attaching pearls, piping, cording, and other embellishments to fabric edges. Its design ensures that these decorative elements are serged with ease and speed, resulting in a professional finish. To use this foot, you typically remove the left needle and set your machine to a narrow rolled hem. After replacing the standard presser foot with the beading foot, you adjust the stitch length according to the size of the beads. The beads are then positioned into the foot's guide, and the fabric edge is placed underneath for stitching. It's recommended to perform a test sew to confirm the correct stitch length for your specific project.
The Belt Loop Binder (BLE8-S12 for 3/4 inch/19mm and BLE8-S11 for 1-1/2 inch/38mm) is an invaluable tool for creating straps, drawstrings, decorative trim, purse handles, and belt loops. This binder eliminates the need for manual folding and pressing of bias strips, making the process quick and effortless. It works best with triple cover stitch or wide cover stitch settings, and lightweight woven fabrics cut on the bias. To use, you cut bias fabric strips to the specified width, feed the strip into the attachment with the right side facing up, and pull it through to the needles. After securing the stitch, you align the attachment with the needle position to ensure the folded fabric is caught correctly. Allowing extra bias strip at the beginning and end of the project is advised for trimming. A test sew is always recommended before attaching the bias to your main project.
The Blindhem Foot (BLE8-BLHF) is specifically designed to create invisible hems on your serger, offering a quick and easy solution for a clean finish. It can also be used for precise stitching along fabric edges. For hemming, the fabric is folded as shown in the diagram, and the garment is placed wrong side up under the presser foot. Before serging, it's crucial to check the needle dropping position to ensure it just catches the fold of the fabric. Once this position is determined, the adjustable guide on the foot is set to the fabric's fold edge by loosening and retightening a screw on top of the foot. This foot typically uses a 2-thread narrow hem stitch with specific needle and stitch width settings.
The Clear Foot (BLE8-CLF) offers enhanced visibility, which is particularly beneficial when attaching ribbon and lace or guiding lightweight decorative stitching. Its raised guidelines ensure accurate stitching. This foot is ideal for decorative construction and for utilizing the Baby Lock exclusive Wave Stitch. While any stitching application can be used, it's important to check your instruction book for specific length and width settings. To begin, all threads are cut to a specific length, the fabric is placed under the presser foot, and the foot is lowered. Turning the handwheel forms initial stitches, and then you can sew slowly, trimming excess threads after the first few stitches. The serger feeds the fabric evenly, so pushing or pulling is unnecessary.
The Cover/Chain Stitch Foot (BLE8-CCF) improves visibility and control when stitching curves, turning tight corners, and attaching tape and ribbons. It accommodates various cover stitch and chain stitch settings. To use, snap on the foot and set up the machine for your desired stitch. After raising the presser foot, place the fabric underneath. If using ribbon or tape, insert it into the front slot of the foot (up to 8mm wide). Lower the presser foot, form initial stitches by turning the handwheel, and then sew slowly. After a few stitches, trim excess threads. It's important to test sew a sample for the desired effect and avoid pushing or pulling the fabric. This foot is not recommended for heavy or bulky areas, and seam allowances should be clipped or trimmed to reduce bulk.
The Curving Foot (BLE8-CVF) is characterized by its short length and flat sole, making it an excellent choice for stitching curves and sewing over cross seams. Its compact size is also advantageous for working around cuffs, necklines, and children's wear, especially with cover stitches. While most stitching applications can be used, it's important to note that the curving foot does not work with differential feed when serging, as it doesn't fully contact the feed dogs. It also won't produce a chain-off with the chain stitch. Releasing and replacing the presser foot involves specific steps, including raising the presser foot lever, lowering the cutting blade, raising needles, pushing the release lever, and carefully turning or sliding the foot.
The Double Fold Bias Binder (BLE8-S3 for 1-1/8 inch/28mm and BLE8-S2 for 1-1/2 inch/36mm) allows you to double fold and sew bias strips onto your project in one quick step, using either a chain or cover stitch. This binder is secured to the table with guide fixing screws. After cutting bias fabric strips to the appropriate size, you raise the presser foot and use tweezers to feed the strip into the attachment, then up to the needles. Turning the handwheel secures the stitching. The fabric to be bound is then placed into the attachment's slot, in front of the presser foot. The guide fixing screws are loosened to align the attachment with the needle position. A test sew is crucial for proper alignment.
The Elastic Foot (BLE8-EF) simplifies the process of serging elastic, providing consistent pressure to prevent pulling and tugging on the needles. Its adjustable guide and tension dial ensure a uniform stretch and professional finish. The guide holes also allow for projects requiring fishing line. Before attaching the foot, loosen the elastic pressure adjustment screw, raise the pressure plate, and insert the elastic until it reaches behind the foot, then slightly tighten the screw. After replacing the standard foot, adjust the elastic pressure adjustment screw while stitching to achieve the desired effect. For fishing line, thread it through the guide holes and under the back of the foot, then place the fabric under the foot with the fishline to the right of the needle.
The Lace Applicator Foot (BLE8-LF) is designed for guiding lace onto fabric with a 2-thread flatlock, attaching ribbon under a cover stitch, or combining an overlock stitch with a chain stitch for decorative trim. After snapping on the foot and setting up the machine, loosen the adjustable screw on top of the foot. Raise the presser foot, place the fabric right side up under the foot, and insert the lace right side down into the guide. Align the right edge of the guide with the lace and move the guide to align with the needles. Lower the presser foot, check the guide position, and tighten the screw. A test sew is recommended to ensure the desired effect.
The Pintuck Foot (BLE8-PTF) adds beautiful texture to garments by creating perfectly spaced pintucks. It allows for precise pintucking when making corded and hollow tucks, as well as parallel and curved forms. To use, change to the sewing table, set needles C2 and C3, and open the side cover to place one of the guides on the needle plate. Guide A is for raised, non-corded pintucks, while Guide B is for corded pintucks, with the cord slid into the guide. Place the fabric under the presser foot and sew. This foot typically uses a narrow cover stitch with specific stitch width and length settings.
The Piping/Cording Foot 5mm (BLE8-CF) is used to create decorative stitching over cording on single and double layers of fabric. It ensures that cords up to 5mm lie flat and perfectly parallel, preventing tangling. For piping in a seam, use a 4-thread overlock stitch. For covered piping, fold a bias strip around the cording and place it under the presser foot into the cord groove, guiding the raw edges along the needle plate to trim excess fabric. For piping in the fabric center, fold fabric around the cording, place it under the presser foot into the cord groove, and use a 2-thread chain stitch. For a different corded look, a 7-thread stitch combining C1 and C2 cover stitch with 4-thread overlock settings can be used.
The Plain Hemmer Foot 1/2 inch (13mm) (BLE8-S6) guides fabric into a perfectly straight hem without pre-project pressing, designed for straight hemming only. One seam of the garment should be left open, and sewn closed after hemming. To use, secure the attachment, turn under and press 1/2 inch of fabric, then slide the fabric into the attachment with the wrong side facing up. Use a sewing awl to slide the folded fabric under the presser foot. Lower the presser foot, turn the handwheel to secure the fabric, and align the attachment with the needles. Keep the hem turned with the right hand while guiding the folded fabric with the left. For polar fleece or sweatshirt fleece, turn the fabric once, avoiding a double roll.
The Plain Hemmer Foot 1/4 inch (6.5mm) (BLE8-S7) functions similarly to the 1/2 inch version, guiding fabric into a perfectly straight hem without pre-project pressing. It is also designed for straight hemming only, with one seam left open and sewn closed afterward. The process involves securing the attachment, turning under and pressing 1/4 inch of fabric, sliding the fabric into the attachment with the wrong side facing up, and using a sewing awl to guide the folded fabric under the presser foot. After lowering the presser foot and securing the fabric with the handwheel, align the attachment with the needle and guide the hem with both hands. This foot is suitable for firm broadcloth, trigger, weaver's cloth, and lightweight denim, but not for polar fleece or sweatshirt fleece.
The Quilt Guide (BLES8-QG) is an essential tool for aligning exact rows of parallel cover or chain-stitching, ensuring they are equally spaced. To use, insert the stem of the quilt bar into the hole at the rear of the presser foot bar and tighten the quilt bar fixing screw. Adjust the stem so that the guide aligns with the seam that has already been sewn. As you continue to serge, the guide will follow the previous row of stitching, maintaining consistent spacing for your quilting projects.
The Ruffling Foot (BLE8-RF) makes it easy to create and attach ruffles while simultaneously finishing the edge, all in one simple step. It produces perfectly spaced ruffles for garments, pillows, and home décor items, working well with all fabric types, though gathering is best with fine fabrics. For gathering fabric, place one layer under the presser foot and feed generously. For shirring, place the fabric to be gathered right side up under the presser foot and separator. Position the fabric to the needles, turn the handwheel to catch the fabric, then place the fabric to attach the gather right side down on top of the separator. Gently guide both the upper and lower fabrics while sewing.
The Single Fold Bias Binder (BLE8-S4 for 1-1/8 inch/28mm and BLE8-S5 for 1-5/8 inch/40mm) allows you to single fold and sew bias strips onto your project in one quick step, using either a chain or cover stitch. This binder is secured to the table with guide fixing screws. Feed the bias strip into the attachment with the wrong side facing you, then use tweezers to pull the folded strip up to the needles and under the presser foot. Turn the handwheel to secure the stitching. Ensure the attachment is aligned with the right needle position, which should be sewing in the doubled fold on top of the fabric. For proper attachment, use wide or triple cover stitch. A test sew is recommended for alignment.
The Single Downturn Feller (BLE8-S10 for 1/4 inch/6.5mm, BLE8-S8 for 5/8 inch/16mm, and BLE8-S9 for 1 inch/25mm) turns the fabric downward into a perfectly straight single turn hem, eliminating the need to press hems beforehand. To use, secure the attachment to the table with guide fixing screws. Finger press under 1/4 inch for 3-4 inches to start the hemming. Feed the fabric (right side up) through the attachment and pull it to the needles and under the presser foot, ensuring the fabric remains folded. Keep the fabric turned under while feeding to ensure it rolls under when sewing. This feller works with various lightweight fabrics but not polar fleece or sweatshirt fleece for the smaller sizes, though it can work with two layers of lightweight polar fleece with no seams for the larger sizes.
| Type | Serger |
|---|---|
| Number of Threads | 8 |
| Maximum Stitch Length | 4mm |
| Differential Feed | Yes |
| Foot Lift | Yes |
| LCD Screen | Yes |
| Stitch Speed | 1500 stitches per minute |
| Stitches | Multiple |
| Automatic Thread Cutter | Yes |
| Speed Control | Yes |
| Stitch Types | Overlock, Coverstitch, Chainstitch |
| Built-in Stitches | Multiple |
| Presser Feet | Multiple |