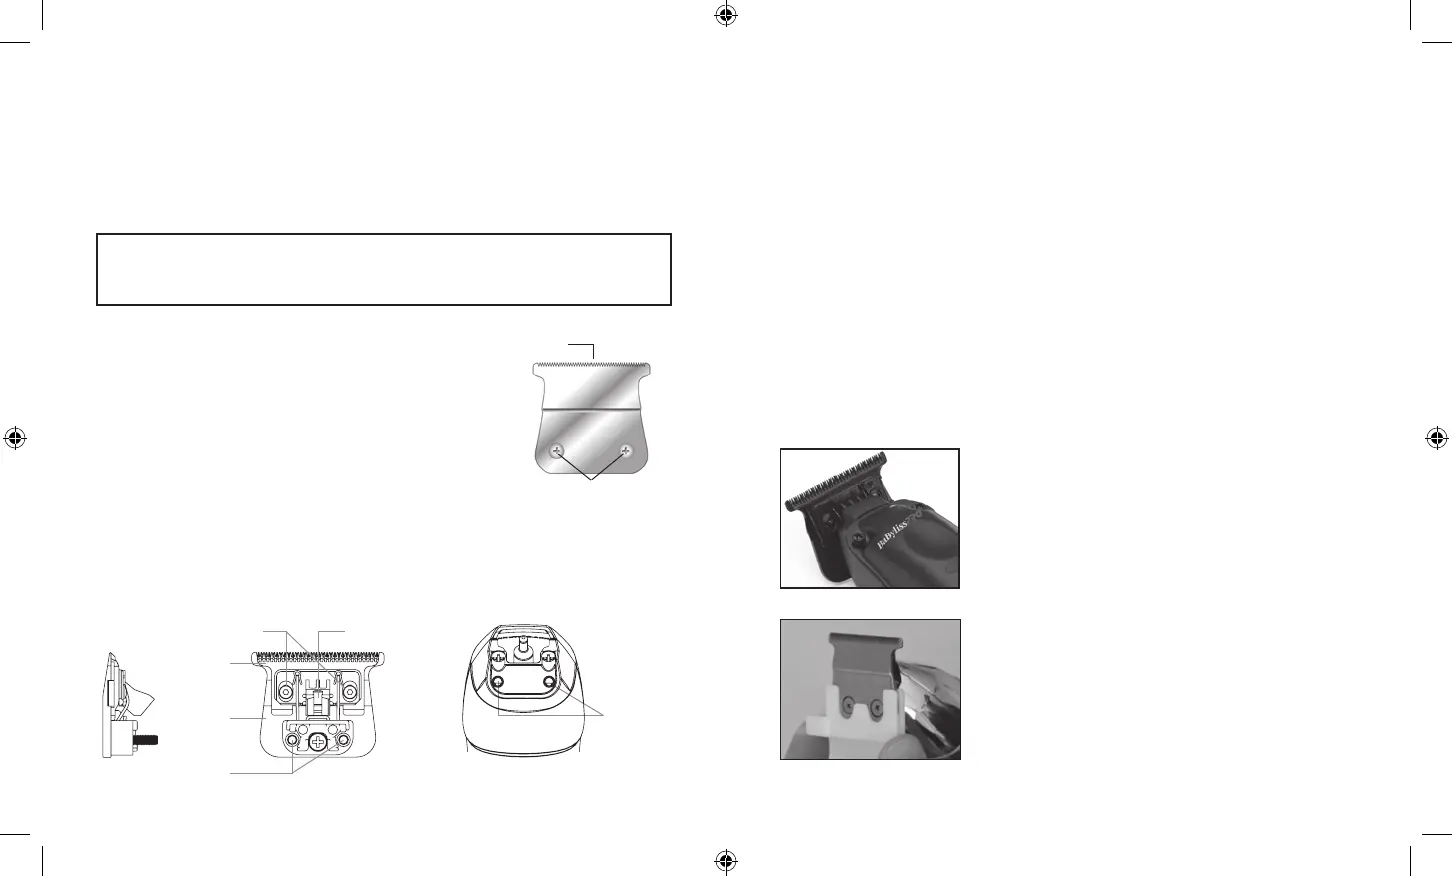
To install or replace your trimmer blade set, reverse the procedure, aligning the blade
cushion shaft into the moving blade cushion (see Fig. 2). With the blade held in place,
replace blade screws and loosely tighten. Turn the trimmer over and align the blade set
parallel to the trimmer’s upper housing.
REPLACING (REMOVING) BLADE SET
To remove the blade set, turn the trimmer to the "0" (OFF)
position. Turn the trimmer upside down so that the teeth of
the trimmer are facing down. Place the trimmer on a flat
surface and using the included screwdriver, loosen the
fastening screws from the blade set. Remove the blade set
from the trimmer (see Fig. 1).
Fig. 1
Blade screws
Blade set
Fig. 2
Screws
Blade cushion
Fixed blade
Moving blade
Screws
Screw holes
BLADE CARE
Because the trimmer blades are precision-made for a very special use, they should
always be handled with care and cleaned and oiled regularly to ensure maximum
performance. Each time you finish using the trimmer, take the cleaning brush provided
and brush away any loose hair that has collected in the blades. To oil, apply a few drops
of oil to the blades and wipe off any excess oil with a dry cloth. Wipe the housing clean
with a dry cloth.
Any other servicing should be performed by an authorized service representative, since
the appliance has no other user-serviceable parts. This product is for commercial use.
DO NOT RINSE BLADE, TRIMMER, BATTERY, OR CHARGER
ZERO-GAP ADJUSTMENT TOOL
IMPORTANT! Only attempt to zero gap the blades by using the adjustment tool and
following these instructions very precisely. The adjustment tool is required to adjust the
blades to zero gap, which will achieve a closer, more precise cut.
Step 1 – Using the screwdriver included, gently loosen
the two small screws on each side of the blade.
OPERATING INSTRUCTIONS
ON/OFF SWITCH
To operate trimmer, simply slide switch to the ON (“I”) position. To stop operation, slide
switch to the OFF (“0”) position. Make sure the switch is in the OFF (“0”) position when
the trimmer is not being used.
VERY IMPORTANT: Blades must be cleaned and oiled on a regular basis for proper
functioning. Failure to regularly clean and oil the blades will void the warranty.
Step 2 – Slide the zero-gap tool over the gold fixed blade
until it is tight against the back portion of the moving
cutting blade.
FX729 IB-18147.indd 7-8FX729 IB-18147.indd 7-8 2023/8/8 16:162023/8/8 16:16