Step 4 – MAKE SURE THE MOVING CUTTING BLADE
DOES NOT EXTEND PAST THE FIXED BLADE. WARNING:
IF THE CUTTING BLADE EXTENDS PAST THE FIXED
BLADE YOU CAN POTENTIALLY CUT YOURSELF.
Step 5 – Once the blade is adjusted to zero gap or your
liking, gently tighten the two screws on each side of
the blade while holding the zero gap tool in place. If the
blade is not adjusted to satisfaction after testing, repeat
the adjusting process.
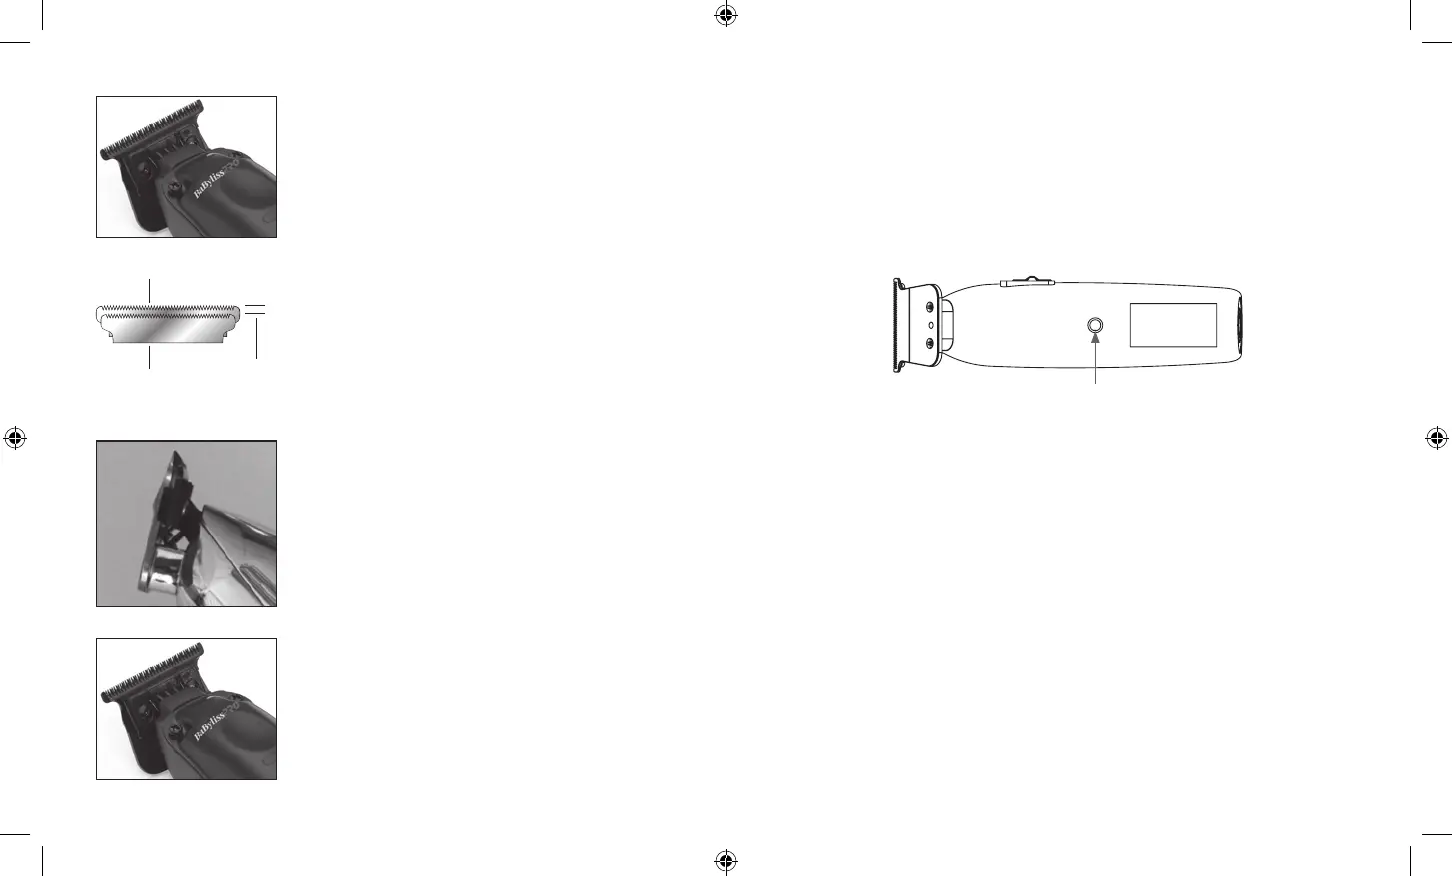
Step 3 – Using your fingers on each side of the zero-gap
tool, push up until the black cutting blade is even with or
slightly below the gold fixed blade.
Be sure that the blades are aligned properly. The teeth of
the smaller blade (cutter) should rest slightly below the
upper edge of the larger blade (comb) — approximately
1/64" to 1/32" apart (see Fig. 3). If the blades are not
correctly aligned, they may cut or scratch your skin
when trimming. Once the blades have been aligned,
tighten the screws firmly.
Fig. 3
Comb (large blade)
Cutter (small blade)
1/64" – 1/32"
Battery Release Button
BATTERY REMOVAL AND INSTALLATION
The FX729 trimmer features a removable, rechargeable, and interchangeable
battery, so you can cut and style for extended amounts of time with minimal
interruption. Be sure trimmer is in the OFF (“0”) position before removing or
installing the battery.
1. To remove the battery, press on the battery release button on the back of the
trimmer handle toward the middle of the unit.
2. The battery will partially eject but needs to be pulled from the bottom of the
trimmer to remove completely.
3. To install the battery, line up the keyway of the trimmer with the battery housing,
aligning the arrow mark on the battery with the arrow mark on the trimmer.
Insert the battery into the opening and push into the housing until the locking
mechanism engages.
FX729 IB-18147.indd 9-10FX729 IB-18147.indd 9-10 2023/8/8 16:162023/8/8 16:16