EasyManua.ls Logo

Bacharach Leakator Jr. User Manual

Default Icon
3 pages
To Next Page IconTo Next Page
Page #1 background imageLoading...
Page #1 background image
Combustible Gas Leak Detector
Instruction 19-9336
Rev. 1 – November 2010
Audible Alarm
Instrument Ready - Slow beep. The beep
rate is about once per second with no gas
detected.
Combustible Gas Indication - Beeps at
a rate that increases along with the gas
concentration.
Sensitivity - Produces an increasing
frequency tone when sensitivity changes
from low to high, and produces a decreasing
frequency tone when sensitivity changes
from high to low.
Dead Batteries - High frequency tone, fol-
lowed by the instrument turning itself OFF.
Sensor Error - Rapidly changing high and
low frequency tones.
Visual Alarm LED
Power ON - Rapidly ashes green during warm-
up (approximately 60 seconds).
Power OFF - Glows red just before power OFF.
Instrument Ready - Slowly ashes green. The
ash rate is about once per second with no gas
detected.
Combustible Gas Indication - Flashes green at
a rate that increases with the gas concentration.
Sensitivity Change - Color changes from red to
green.
Low Battery - Flashes orange instead of green
when checking for gas leaks. Typically 1 hour
of operation left after LED changes to orange.
Change batteries as soon as convenient.
Dead Batteries - Glows red, followed by the
instrument turning itself OFF.
Sensor Error - Flashes alternating green and red.
One Button Control
Press once for half second to turn instrument ON.
Press and hold for 2 seconds to turn instrument OFF.
Double press to toggle sensitivity between high and low.
Combustibles Sensor
& Sensor Cover
Battery Door
12 Inch
Flexible Probe
www.GlobalTestSupply.com
Find Quality Products Online at: sales@GlobalTestSupply.com
Question and Answer IconNeed help?

Do you have a question about the Bacharach Leakator Jr. and is the answer not in the manual?

Bacharach Leakator Jr. Specifications

General IconGeneral
BrandBacharach
ModelLeakator Jr.
CategorySecurity Sensors
LanguageEnglish

Summary

Alarm Indications

Audible Alarm Functions

Covers beep patterns for instrument ready, gas detection, sensitivity, dead batteries, and sensor error.

Visual LED Indicators

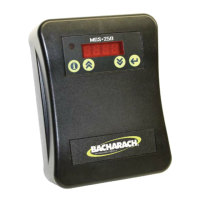
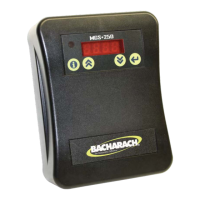
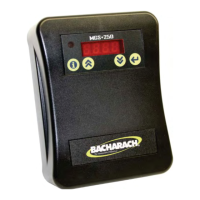
Explains LED colors/patterns for power, ready, gas detection, low battery, and sensor error.

One Button Control

Instrument Operation

Details how to turn the instrument ON/OFF and adjust sensitivity.

Features

Compact Gas Leak Detector

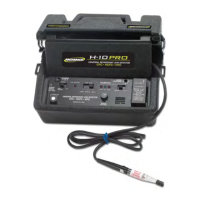
Detects and pinpoints combustible gas leaks in various applications and environments.

Wide Variety of Combustibles Detected

Lists the extensive range of combustible gases the Leakator Jr. can identify.

Compact and Ergonomic Design

Highlights the one-button operation and flexible probe for easy handling.

Leak Indication

Explains how audible and visual alarms indicate gas concentration levels.

Automatic Self Check

Details the automated self-check performed during warm-up in fresh air.

Selectable Sensitivity

Allows users to choose between high and low sensitivity modes for pinpointing leaks.

Power and Battery Management

Covers battery life, low battery warnings, and auto shut-off features.

UL 913 Classification

States intrinsic safety for hazardous locations Class I, Division 1, Groups A, B, C, D.

Sensor Error Indicator

Mentions a dedicated indicator for sensor malfunction.

Low Power Metal Oxide Sensor

Specifies the type of sensor used for detecting combustible gases.

Microprocessor Controlled Circuitry

Notes the advanced internal control system of the instrument.

Testing For a Gas Leak

Step 1: Turn Instrument ON

Instructions to turn the instrument on and allow for warm-up.

Step 2: Readiness Check

The instrument is ready when the audible alarm begins to beep.

Step 3: Locate Leak

Use the flexible probe tip to check areas for gas presence.

Step 4: Monitor Indication

Observe LED blinking and beep rate for gas concentration changes.

Step 5: Adjust Sensitivity

Lower sensitivity to pinpoint leaks once gas is confirmed.

Replacement Parts

Sensor

Part number for replacing the combustible gas sensor.

Sensor Cover

Part number for the protective sensor cover.

Battery Door

Part number for the battery compartment door.

Replacing the Sensor

Turn Instrument OFF

Initial step to power down the instrument before replacement.

Remove Sensor Cover

Instructions to pull off the sensor cover.

Remove Old Sensor

How to pull out and discard the used sensor.

Install New Sensor

Guide for plugging in the new sensor, aligning tabs with the socket.

Install Sensor Cover

Final step to reattach the sensor cover.

Related product manuals