Releasing the seat belt
Press the red release button; the buckle will be
ejected from the plug-in socket.
• The belt is designed for one person and
must not be put around a child seated on
someone’s lap.
• The belt is suitable for retaining most child
seats and boosters.
• The belt should always be used according to
these instructions and adjusted accordingly.
• Never wear a slack seat belt.
• When installed correctly the seat belt should
pass across the centre of the shoulder and
x into the plug-in socket beside the hip.
• It is important that the strap is not twisted
during use as this can cause damage.
• Webbing must not be allowed to rub against
sharp surfaces as this could lead to strap
damage. If a belt is showing signs of wear
(frayed, damaged or stressed) it should be
replaced.
• Always replace a seat belt after an impact.
• Always check the anchorage points after an
impact; if these are deformed the seatbelt
frame will need to be replaced.
• Never modify the belt.
• Inspect your seat belt on a regular basis.
Jacking
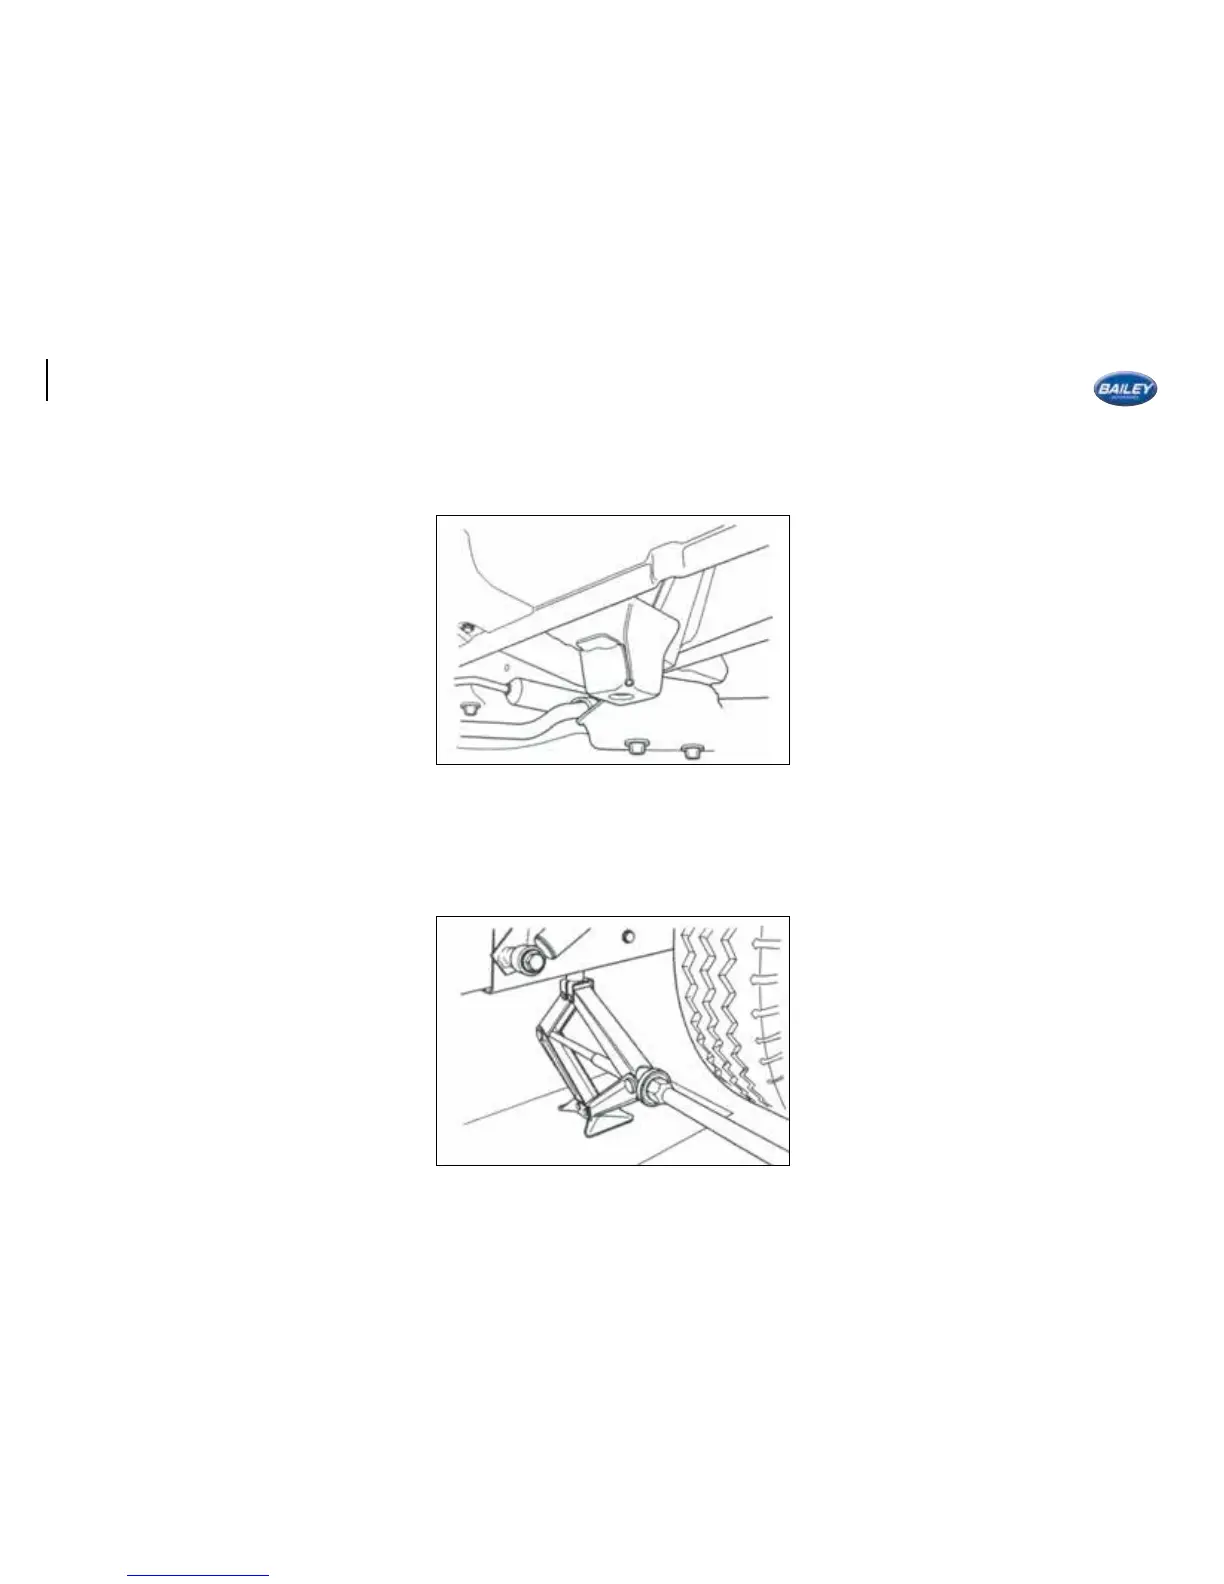
Position the jack in the hole provided as shown.
Rear jacking points are located in the shock
absorber mounts on the left and right, in front
of the axle.
When changing a rear wheel raise the vehicle
to the maximum extent of the jack. In order
to clear the skirt when removing the wheel, tilt
the bottom of the wheel under the vehicle and
allow the top of the wheel to fall outwards and
clear of the hub.
Reverse the procedure to t the new wheel.
Removing the spare wheel
Changing the wheel
General Notes
Do not use the jack for loads that are greater
than the load given on the jack rating plate.
Ensure the vehicle is on a level, rm surface.
Changing front wheels
Select rst or reverse gear.
Apply the handbrake and chock the remaining
wheel.
Onboard tools and chocks are usually located
underneath the driver‘s seat.
Changing rear wheels
Select rst or reverse gear.
Do not apply the handbrake but t chocks
under the remaining wheels.
Onboard tools and chocks are usually located
underneath the driver‘s seat.
Spare Wheel Location
The spare wheel is located at the rear under
the vehicle oor.
The spare wheel carrier tted in your vehicle is
much like that tted into modern cars.
To lower the spare wheel:
1. Remove the plastic stopper in the oor.
Remove the winder from its storage location
and insert the hooked end of the crank in the
spare wheel retaining attachment.
2. Continue tolower the wheel by turning the
crank anti-clockwise. Lower the wheel
a little bit at a time and guide it until it is
securely seated against the oor.
3. Draw the spare wheel towards you from
under the vehicle.