Do you have a question about the Baldor MicroFlex e100 and is the answer not in the manual?
MicroFlex e100 is supported by four M5 screws, spaced as shown in the diagram.
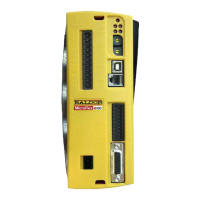
MicroFlex e100 must be fixed to a smooth vertical metal surface to ensure effective cooling.
The 3A model requires no additional cooling.
The 6A model requires additional forced air cooling at 1.0m/s or greater.
The 9A model requires additional forced air cooling at 2.5m/s or greater.
Quoted air velocities allow full drive rated current at ambient temperatures up to 45°C.
MicroFlex e100 accepts 105-250VAC 50/60Hz, 1-phase or 3-phase.
For three-phase supplies, connect phases to L1, L2, and L3.
For single-phase supplies, connect to any two line inputs, e.g., L1 and L2.
The AC supply must incorporate a circuit breaker (or fuse) and the specified filter for ideal earthing.
Protective earth must be connected to the MicroFlex e100 case using an M4 screw in the top of the metal heatsink.
Connect the optional regeneration resistor to R1 and R2 to dissipate excess power.
Connect the motor to the U, V, and W outputs. Ensure correct terminal connection.
Motor earth and cable shield must be connected to the MicroFlex e100 case.
MicroFlex e100 requires a 24VDC (20-30VDC), 1A supply for control electronics.
Connect a CAT5 Ethernet cable for demand signals and feedback with EPL compatible controllers.
Connect the supplied USB cable to the host PC for USB1.1 communication.
Apply 24VDC (12-30VDC) to the drive enable input to enable the MicroFlex e100.
Connect motor feedback signal to connector X8 for incremental, SSI, EnDat, or SinCos encoders.