This document outlines the assembly process for the Bambu Lab Wireless Mouse Components Kit-002. It serves as a comprehensive guide, detailing each step from preparing the 3D-printed parts to the final pairing of the mouse with a computer. The kit appears to be designed for users who wish to assemble their own wireless mouse, likely leveraging 3D printing technology for the external casing.
Function Description:
The Bambu Lab Wireless Mouse Components Kit-002, once assembled, functions as a standard wireless computer mouse. It allows users to control a computer's cursor and interact with graphical user interfaces wirelessly. The mouse utilizes a 2.4G module for wireless communication, ensuring a stable connection to the computer via a USB receiver. Key functionalities include left-click, right-click, and scroll wheel operations, which are standard for most modern mice. The design also incorporates a toggle switch, likely for power management or mode selection, and a sensor for tracking movement. The assembly process emphasizes careful alignment of components and proper wire management to ensure optimal performance and longevity of the device.
Important Technical Specifications (Inferred from components and assembly steps):
- Wireless Technology: 2.4G Module. This indicates a standard wireless connection, typically requiring a USB dongle for the computer.
- Power Source: Single battery (likely AA or AAA, given the size and typical mouse power requirements, though not explicitly stated). The assembly guide shows a single cylindrical battery being inserted.
- Input Mechanisms:
- Left-click button
- Right-click button
- Scroll wheel (with integrated button functionality)
- Toggle switch (functionality not explicitly stated, but typically for power on/off or DPI adjustment)
- Tracking: Optical sensor (indicated by the presence of a lens and a sensor surface on the PCB).
- Construction: Primarily 3D-printed components for the casing (upper shell, base plate, PCB cover plate) combined with pre-manufactured electronic components (PCB, scroll wheel, 2.4G module, toggle switch, power wires, screws, mouse foot pads).
- Connectivity: USB receiver for the 2.4G module.
- Screws: BT2x8 Screws (x6) are specified for securing internal components and the casing.
Usage Features:
- Wireless Operation: Provides freedom of movement without the constraints of a cable, enhancing user comfort and desk aesthetics.
- Standard Mouse Functionality: Offers essential left-click, right-click, and scroll wheel actions, making it suitable for general computing tasks, browsing, and productivity.
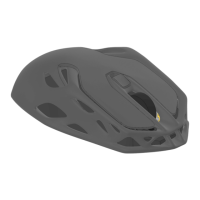
- Ergonomic Design (Inferred): The shape of the assembled mouse suggests an ergonomic design, potentially offering a comfortable grip for extended use. The visible contours and finger rests imply user comfort was considered in the 3D-printable shell design.
- Customizable Aesthetics (Inferred): As the casing is 3D-printed, users have the potential to customize the color and material of their mouse, adding a personal touch to their peripheral.
- DIY Assembly Experience: Provides an educational and engaging experience for users interested in understanding the internal workings of computer peripherals and practicing assembly skills.
- Pairing Procedure: A clear pairing process is outlined for initial setup or re-connection, ensuring users can easily establish a wireless link between the mouse and the computer. This involves holding down specific buttons while powering on the mouse and placing it near the receiver, followed by a power cycle.
Maintenance Features:
- Battery Replacement: The design allows for easy insertion and removal of the battery, indicating that battery replacement is a straightforward maintenance task. The battery cover is designed to snap on and off.
- Component Accessibility (Inferred): Given that the mouse is assembled from individual components, it is likely that internal parts (like the PCB or scroll wheel) could be accessed for troubleshooting or replacement if necessary, though this would require disassembly.
- Cleaning: The external 3D-printed shell can be cleaned as per standard practices for plastic peripherals.
- Troubleshooting Pairing Issues: The manual provides a detailed procedure for re-pairing the mouse if it disconnects, which is a common maintenance step for wireless devices. This includes steps like ensuring the mouse is powered off, inserting the receiver, placing the mouse close to the receiver, holding down specific buttons (left, right, scroll wheel) while powering on, continuing to hold for 4-5 seconds, powering off when the on-screen arrow changes, and then powering on again for normal use.
- Wire Management: The assembly guide emphasizes gently tucking the positive (red) wire into a designated groove and avoiding pressure on wires from the PCB cover plate. This attention to wire management during assembly contributes to the mouse's long-term reliability and prevents potential issues like pinched wires or short circuits, thus reducing the need for future maintenance related to wiring.
- Protective Film Removal: The instruction to remove the protective film from the sensor surface is a critical initial step that ensures optimal tracking performance, preventing a common issue that might otherwise be mistaken for a malfunction.
The Bambu Lab Wireless Mouse Components Kit-002 offers a unique blend of DIY engagement and practical utility, allowing users to build a functional wireless mouse while gaining insight into its construction.