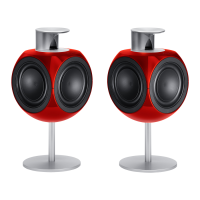
Do you have a question about the Bang & Olufsen BeoLab 3 6881 and is the answer not in the manual?
| Brand | Bang & Olufsen |
|---|---|
| Model | BeoLab 3 6881 |
| Category | Speakers |
| Language | English |
Guidance on servicing BeoLab 3 at the customer's home for electrical or mechanical parts.
Details the contents of the service suitcase, including electrical parts and tools.
Procedure for changing voltage supply by adjusting a jumper on module 01.
Table detailing variants, types, jumper settings, and mains cables for BeoLab 3.
Use of ESD-mat and cotton gloves to protect sensitive internal electronics from static electricity.
Careful handling of surfaces, cleaning with lint-free cloth, and removal of aluminum chips.
List of part numbers, descriptions, and associated items for BeoLab 3 components.
Details and dimensions of screws and washers used in the BeoLab 3 assembly.
List of packing materials and wire bundles connecting various PCBs.
List of items not visually depicted, including product cover and special tools.
Catalog of Power Link cables in various lengths and colors, and Line/PL cables.
List of parts for the Floor Stand 2165, including tube, cover, bottom, foot, and spikes.
List of parts for the Table Stand 2166, including washer, tube, bottom, and foot.
List of parts for the Wall Bracket 2167, including bag, plate, and fitting.
Guide to understanding BeoLab 3 LED for fault indication and common internal errors.
Procedure for measuring bass and treble driver units using an Ohm-meter for resistance checks.
Table correlating stated driver unit values to click-potentiometer positions for bass adjustment.
Table correlating stated driver unit values to click-potentiometer positions for treble adjustment.
Illustration showing the BeoLab 3 positioned for service access.
Illustration demonstrating the procedure for replacing the top plate of the BeoLab 3.
Step-by-step visual guide for removing and replacing the acoustic lens.
Instructions and illustrations for removing the tweeter cover.
Detailed steps for replacing the tweeter unit, including ESD precautions.
Visual guide for removing and replacing the Bezel of the BeoLab 3.
Procedure for replacing the woofer, including ESD safety measures.
Visual instructions for replacing the passive radiator, including ESD safety.
Steps for replacing PCB 5, involving removal of several components and ESD precautions.
Detailed procedure for replacing the main chassis, requiring removal of multiple components.
Procedure for converting the mains voltage supply by adjusting a jumper on the main chassis.
Procedure for insulation testing BeoLab 3 at the service center using an insulation tester.
Method for performing insulation resistance test at the customer's site using a multi-meter.
Caution to avoid skin contact during testing to prevent measurement interference.