5
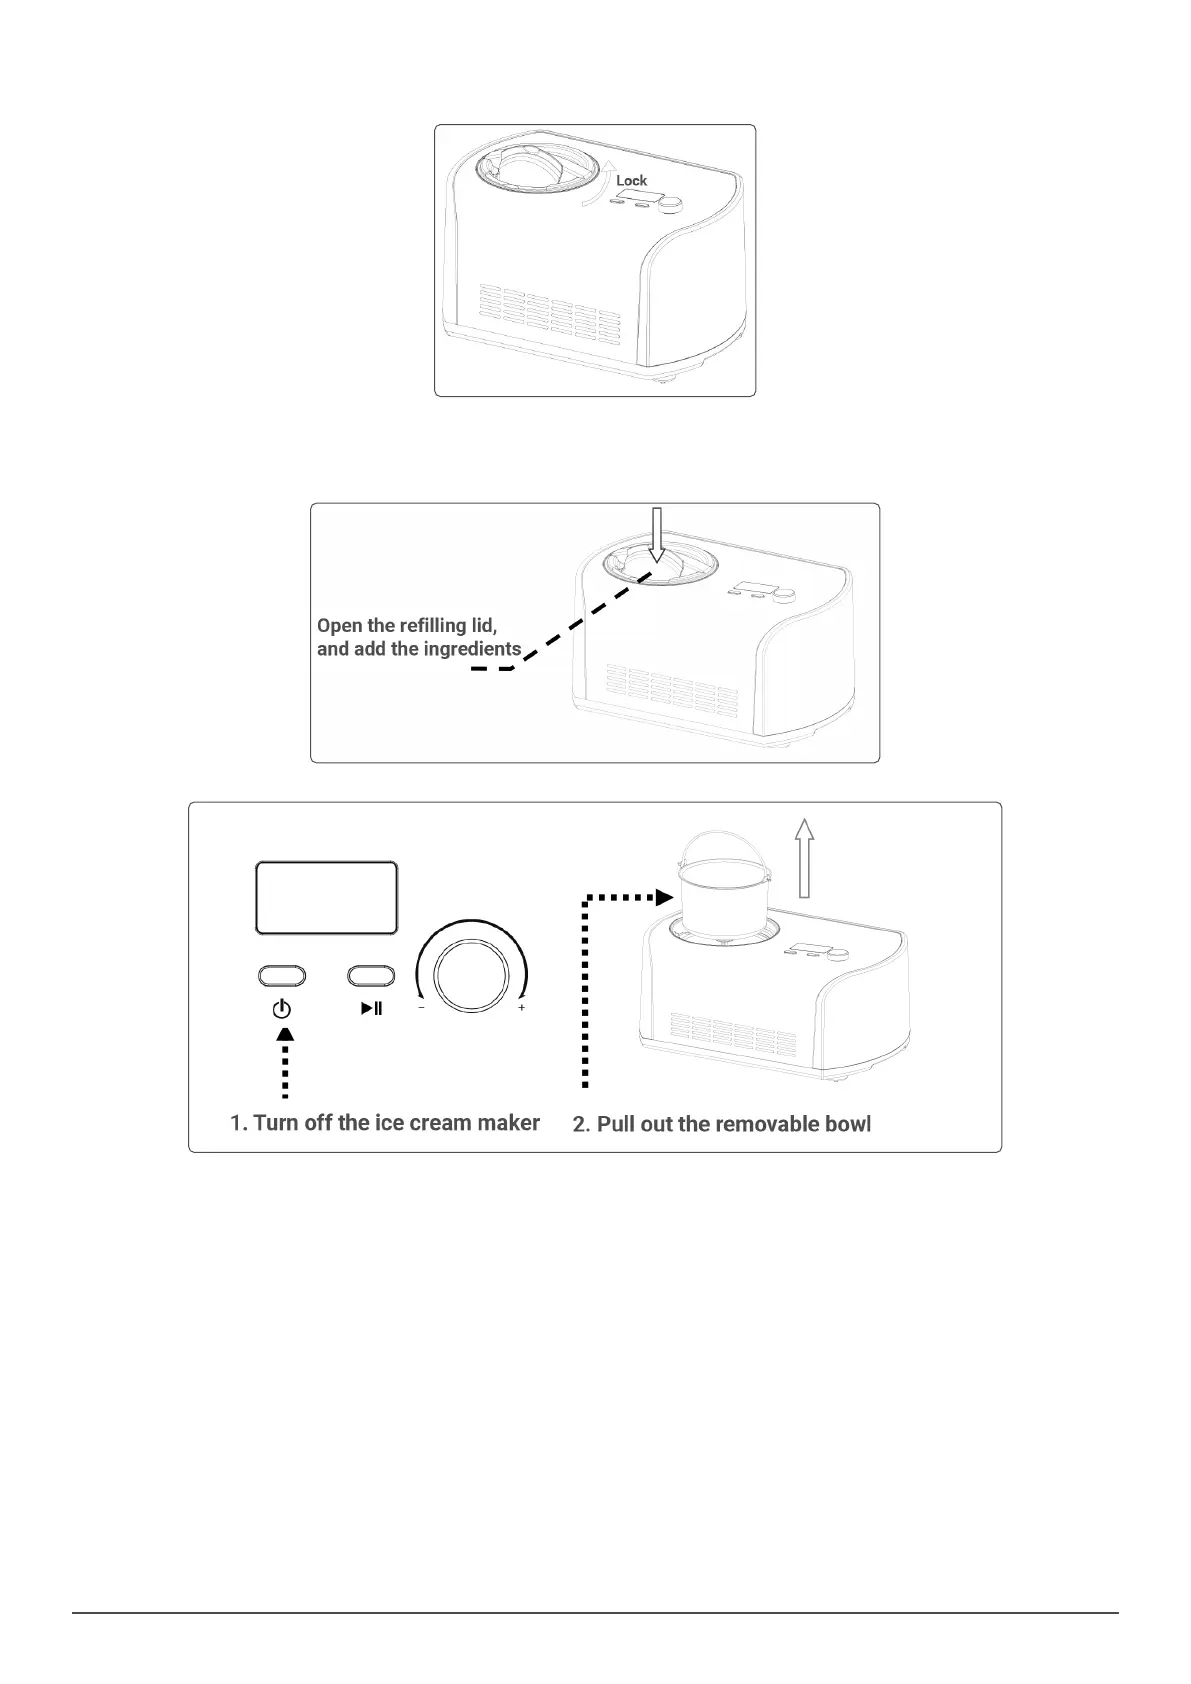
• Step 4. Place the mixing blade into the removable bowl and make sure the mixing blade bottom hole tted securely to the motor axis. Then put
the transparent lid onto the machine and lock it anticlockwise (See below picture).
• Step 5. Touch the Power button.
• Step 6. Turn the Time setting knob to choose the working time
• Step 7. Touch the start/ pause button to start the ice cream making cycle.
• Step 8. You can add the favourite ingredients by opening the rell cover (See below picture).
• Step 9. After the ice cream making cycle is over, turn off the machine rst, and then pull the removable bowl out.
OPERATION
• Keep cool function
• After the ice cream making cycle is nished the ice cream make will automatically start the keep cool function. This can keep the nished ice
cream cool for 1 hour, after which time, the machine will enter the standby state.
• Motor self-protection function
• When the ice cream becomes harder, the mixing motor may get jammed on the solid ice cream. The motor protection device will stop the mixing
motor by detecting its temperature this is to ensure the life of the motor.
• Controlling the Volume of the Ingredients
• To avoid overow and waste, please make sure that the ingredients DO NOT exceed 60% of capacity of the removable bowl (Ice cream expands
when being formed).
MAINTENANCE
Warning: Unplug the ice cream maker before cleaning to avoid electric shock.
• 1 Take out the mixing blade, wipe it with a dampened cloth
• 2 Take out the removable bowl, clean it with a dampened soft cloth
• 3 Wipe the transparent lid and rell lid with a dampened cloth
• 4 Remove the dirty water on the body or other places with a dampened cloth, and DO NOT pour water on cord, plug and ventilation, immerse the
appliance in water or any other liquid
• 5 Allow drying thoroughly with a dry cloth, then return the component to the home position.