Crankaxle dis- and reassembly
Chain:
Remove pedal transmission chain by loosening the
connector.
Left side crank:
Remove cotterpin nut and drive out the pin while
supporting the crank (see pict. 16).
Pict. 16
Crankaxle and pulley:
First remove bushing B and retaining washer C and next
the crankaxle by turning and pulling at the same time.
Keep pulley supported when removing axle to avoid
damages (see pict. 17).
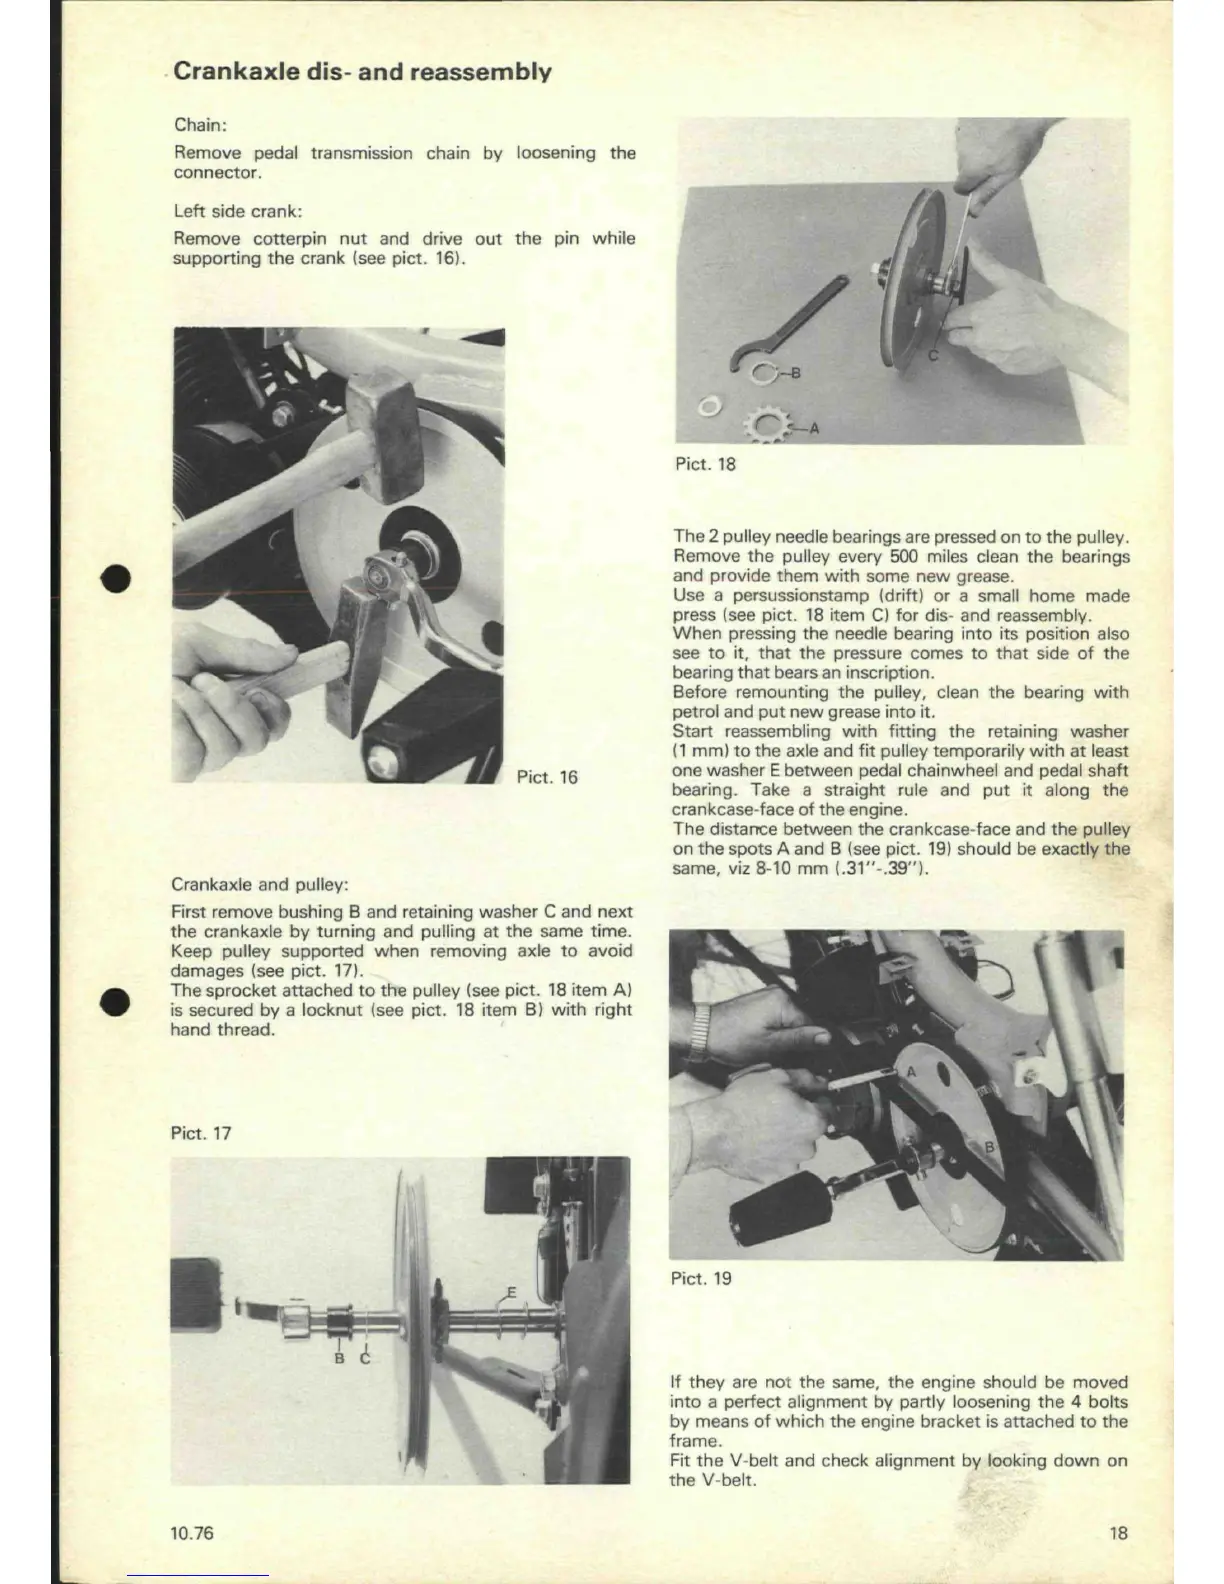
The sprocket attached to the pulley (see pict. 18 item A)
is secured by a locknut (see pict. 18 item B) with right
hand thread.
Pict. 17
Pict. 18
The 2 pulley needle bearings are pressed on to the pulley.
Remove the pulley every 500 miles clean the bearings
and provide them with some new grease.
Use a persussionstamp (drift) or a small home made
press (see pict. 18 item C) for dis- and reassembly.
When pressing the needle bearing into its position also
see to it, that the pressure comes to that side of the
bearing that bears an inscription.
Before remounting the pulley, clean the bearing with
petrol and put new grease into it.
Start reassembling with fitting the retaining washer
(1 mm) to the axle and fit pulley temporarily with at least
one washer E between pedal chainwheel and pedal shaft
bearing.
Take a straight rule and put it along the
crankcase-face of the engine.
The distance between the crankcase-face and the pulley
on the spots A and B (see pict. 19) should be exactly the
same,
viz 8-10 mm
(.31"-.39").
^
Pict. 19
If they are not the same, the engine should be moved
into a perfect alignment by partly loosening the 4 bolts
by means of which the engine bracket is attached to the
frame.
Fit the
V-belt
and check alignment by looking down on
the V-belt.
10.76
18