Argo 2011 ver.02 2 2011
2. IMPORTANT
Before installing ARGO, it is necessary to set up the following facilities:
1. a water connection (tap with hose holder); ARGO will be connected to the hose
holder through the WATER INLET by means of a rubber tube which must have a
pressure capacity of at least 10 ATM. (diameter of water inlet 8/13 mm); it must
be fixed tightly with 2 hose clamps. N.B.: before inserting the rubber tube into
ARGO hose holder, you must exhaust a few litres of water in order to clean the
conduit;
2. an electrical outlet protected and suitable to ARGO power.
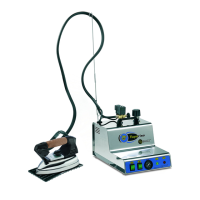
3. OPENING OF PACKAGE
1. Open the box containing ARGO from the upper side marked as ALTO , take the
instructions manual and read it carefully.
2. Remove the ARGO from the box, fix the cable support to the ironing board,
connect the iron plugs to the steam tubes (fig. 1), fix the iron cables to the cable
support hook. ATTENTION: the irons must be placed on their iron rests on the
board.
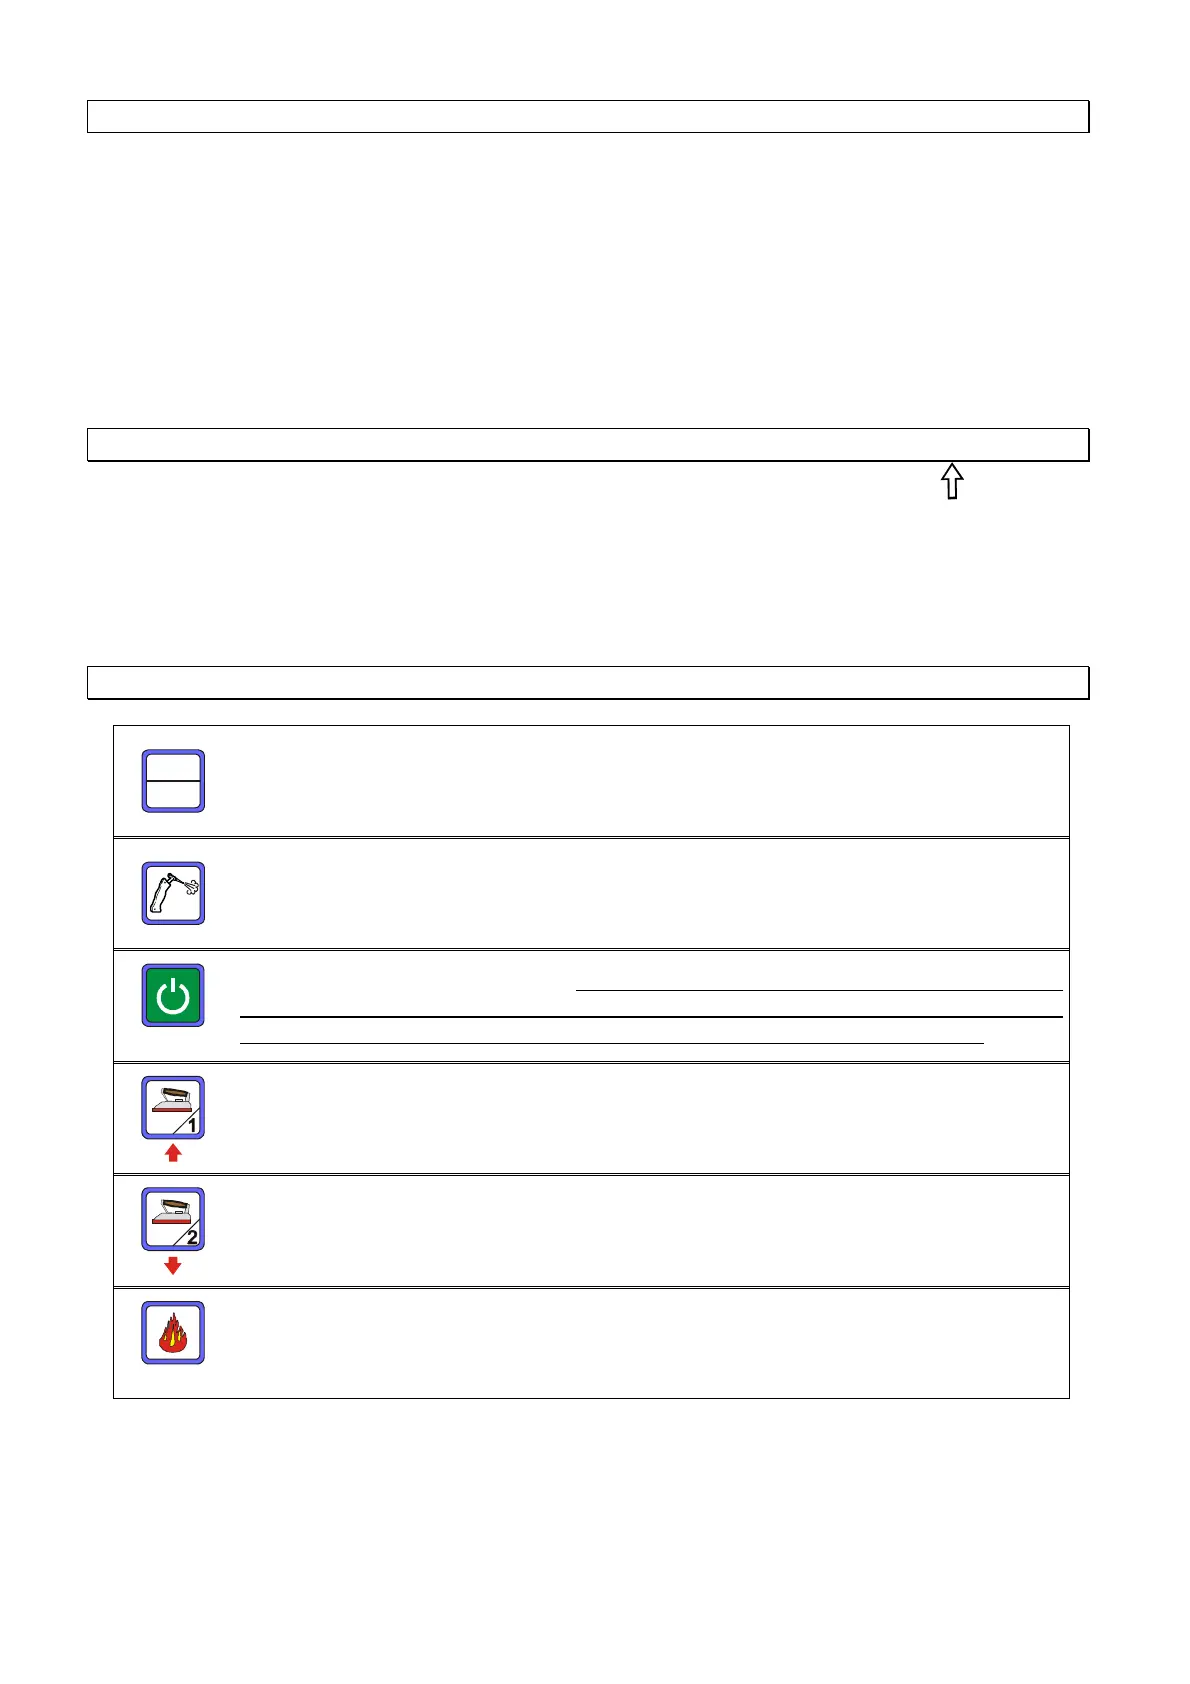
4. STANDARD MODE
SET
Reset
Key to enter the menu and reset the various warnings.
“Pistol/brush” on/off key (optional accessory)
“Electronic card” on/off key.
N.B.: the electronic board will continue to
receive power from the mains supply. At the end of each working day it
suggested to always turn the machine off by using the main switch
“Iron 1” on/off key –
at the same time of switching on/off the iron the
vacuum motor is switched on/off.
(same valid for the version vacuum + blowing)
“Iron 2” on/off key. (optional accessory)
“Boiler” on/off key – at the same time of switching on/off the boiler the
table top heating is switched on/off.