Page 10 ;&(%$*4.8"4,7%<'*#$"&8#=%/7*,#*%4,77%>?@@@?@AA?BCDC1 Item 64530
EF;6GH IJ6KFGLIM NFLMG6MFMO6E6GPJ
I/*(,$"83%L8#$('4$"&8#
%K*,9%$.*%6MGLK6%LNJIKGFMG%EF;6GH%LM;IKNFGLIM%#*4$"&8%,$%$.*%+*3"88"83%&2%$."#%
5,8',7%"847'9"83%,77%$*Z$%'89*(%#'+.*,9"83#%$.*(*"8%+*2&(*%#*$%'/%&(%'#*%&2%$."#%/(&9'4$1
G&&7%E*$%P/
GI%JK6!6MG%E6KLIPE%LMiPKH%;KIN%FOOLU6MGFT%IJ6KFGLIM-%
N,X*%#'(*%$.,$%$.*%G("33*(%"#%"8%$.*%&22?/&#"$"&8%,89%'8/7'3%$.*%$&&7%2(&5%"$#%
*7*4$("4,7%&'$7*$%+*2&(*%/*(2&(5"83%,8V%/(&4*9'(*%"8%$."#%#*4$"&81
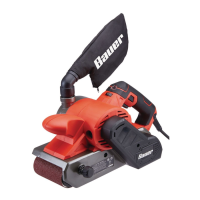
1. Secure the Dust Bag to the tool. 2. Before use, make sure that the Sanding Belt is
on-center. To check this, plug in the sander and
hold the Belt clear while carefully turning on the tool.
If the Belt moves to one side or the other during
use, turn the Tracking Knob until it stays on-center.
Q&(X/"*4*%,89%Q&(X%F(*,%E*$%P/
1. Designate a work area that is clean and well-lit.
The work area must not allow access by children
or pets to prevent distraction and injury.
2. Route the power cord along a safe route to reach
the work area without creating a tripping hazard or
exposing the power cord to possible damage. The
power cord must reach the work area with enough
extra length to allow free movement while working.
3. Secure loose workpieces using a vise or clamps
(not included) to prevent movement while working.
4. There must not be objects, such as utility lines,
nearby that will present a hazard while working.
R*8*(,7%I/*(,$"83%L8#$('4$"&8#
1. Make sure that the Trigger is not
engaged, then plug in the tool.
2. To start the tool, squeeze the Trigger;
release the Trigger to stop. For continuous
operation squeeze the Trigger and push
the Trigger Lock to lock the tool on.
3. The front light will illuminate when
the sander is operating.
4. To turn the tool off with Trigger Lock engaged,
squeeze the Trigger once and then release.
5. Adjust the sander speed to suit different working
material. Turn the Speed Control Knob to a higher
number for a faster speed or to a lower number
for a slower speed. Determine the optimum
speed by testing on a scrap piece of material.
M&$*- Using the correct speed for the job increases
the life of the tool. When sanding, use both hands to
hold the tool and sand along the grain for best results.
6. Hold the tool lightly on the workpiece and allow
the tool to do the work. Do not push down on the
Belt Sander or move it along the surface too fast.
7. To prevent accidents, turn off the tool and
unplug it after use. Clean, then store the
tool indoors out of children’s reach.

 Loading...