Page 7;&(%$*4.8"4,7%<'*#$"&8#=%/7*,#*%4,77%>?@@@?@AA?BCDC1Item 57933
EF;6GHIJ6KFGLIMNFLMG6MFMO6 E6GPJ
N,"8$*8,84*%,89%E*(W"4"83
%J(&4*9'(*#%8&$%#/*4"2"4,77V%*Y/7,"8*9%"8%$."#%5,8',7%
5'#$%+*%/*(2&(5*9%&87V%+V%,%<',7"2"*9%$*4.8"4",81
O7*,8"83=%N,"8$*8,84*=%,89%T'+("4,$"&8
1. Wipe unit with a dry, lint-free cloth.
Do not use solvents or abrasives.
2. Remove batteries if not in
use for long periods.
3. Store unit in a dry location.
4. Other than the batteries, there
are no replaceable parts on this
unit. K*/,"(#%#.&'79%+*%9&8*%
+V%,%<',7"2"*9%$*4.8"4",81
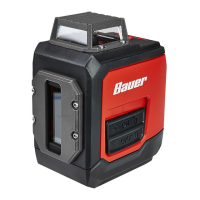
S,$$*(V%K*/7,4*5*8$
1. Turn the Self-Leveling Switch
and Laser Button Off.
2. Remove battery cover by pressing
the Latch and removing the cover.
3. Remove batteries. Replace with four
new AA batteries and follow polarity.
M&$*- Do not install old and new batteries
together. Do not install alkaline, carbon-
zinc or rechargeable batteries together.
Position batteries in proper polarity. Do
not use swollen or leaking batteries.
4. Replace battery cover and be sure
the Latch connects securely.
S,$$*("*#
T,$4.
O,7"+(,$"&8
Have the Laser Level calibrated by a qualified technician every year.
K*4&(9%E*(",7%M'5+*(%X*(*-%
%
M&$*- If product has no serial number, record month and year of purchase instead.
M&$*- Replacement parts are not available for this item.
Reference UPC 193175427052.

 Loading...