5
Assembly Instructions
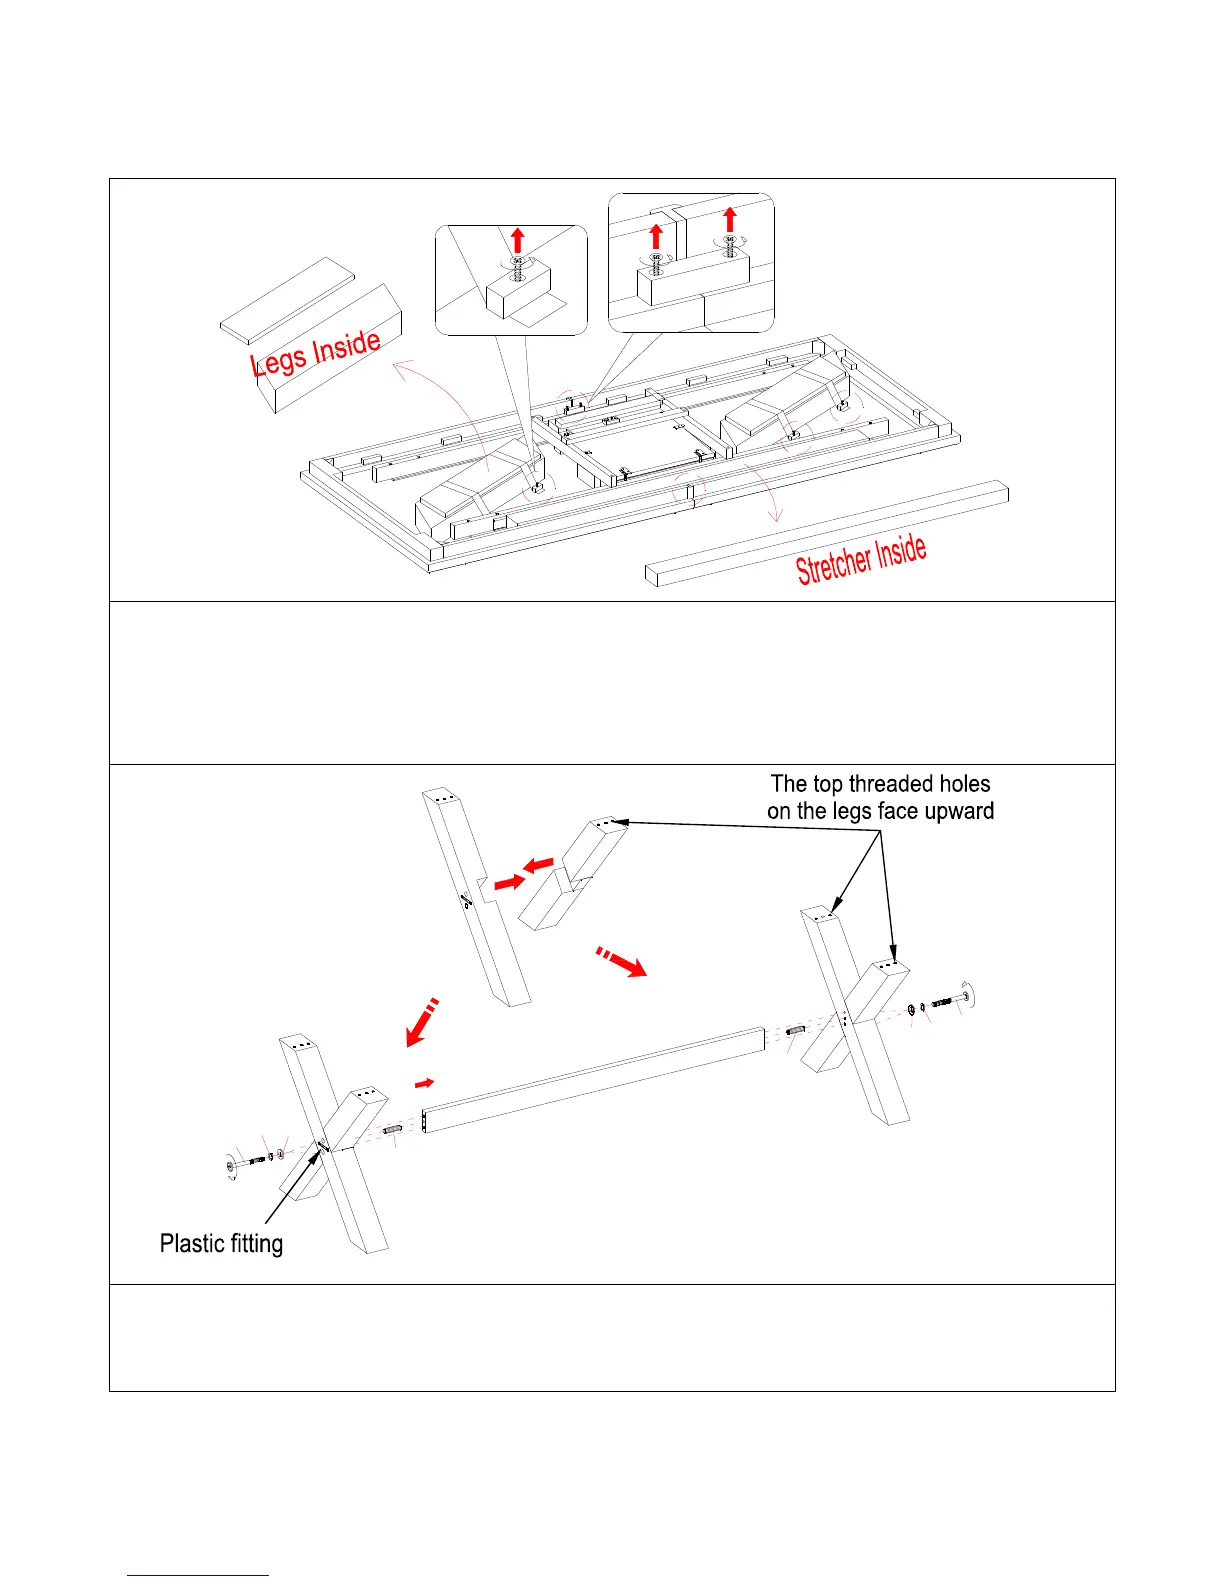
1. Unpack the unit and confirm that you have all the hardware and required parts. Position the table top (A)
upside down on a smooth and protective surface.
2. Remove the legs (B and C), the mounting boards (E) and the stretcher (D) from the table top (A) by
unscrewing the wood blocks which hold the nylon straps in place, using a Phillips screwdriver.
3. Remove the additional cleats attached at the center joints of the table top (A) by unscrewing the wood
screws. These are used for shipping purposes only. After removing them, please discard.
4. Combine one outer leg (B) and one inner leg (C) together by fitting the cutouts properly.
5. Insert two wood dowels (EE) into the drilled holes on the stretcher (D) at both ends and attach it between
the leg assemblies with four bolts (BB) and four washers (CC and DD).
A
B
C
BB
CC
DD
B
C
EE
BB
CC
DD
EE
B
C
D