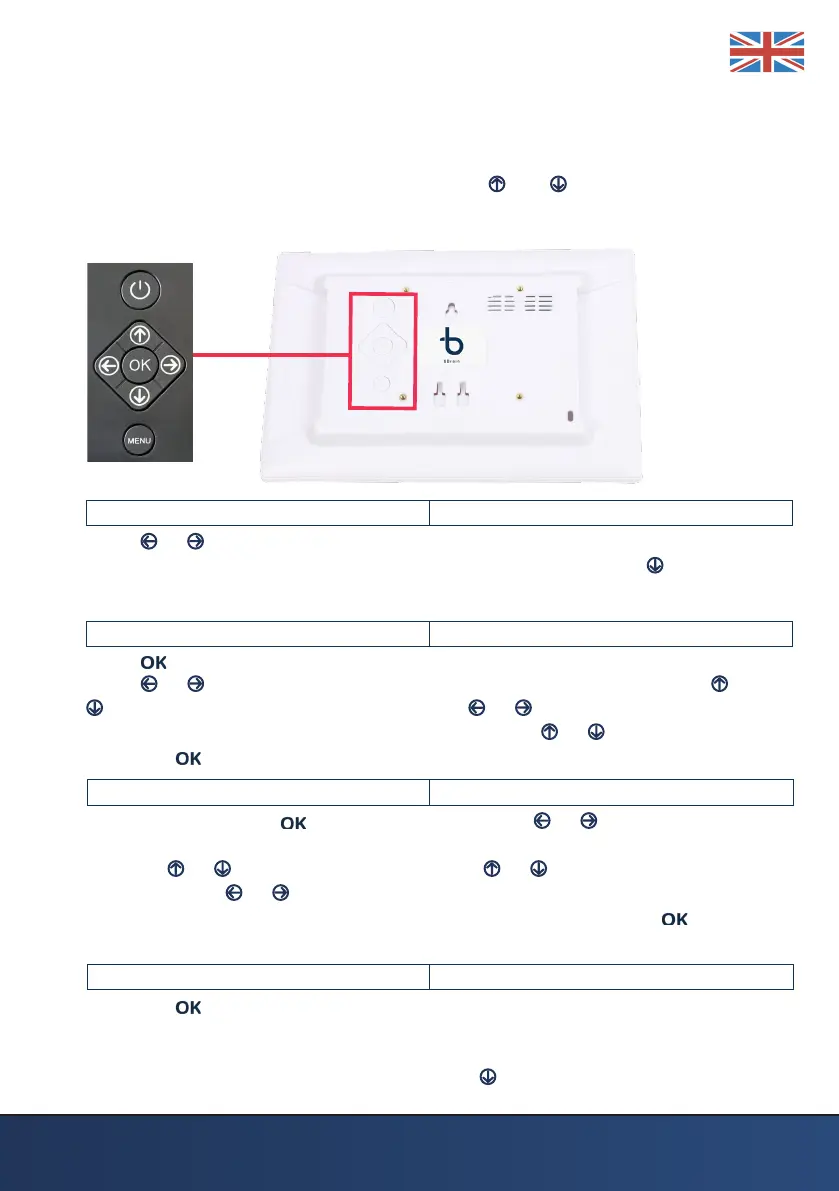
4. Installation of the calendar clock
Press MENU to enter the settings. The settings will be displayed in the screen.
Start the navigation in the menu by pressing and and then choose the
settings you want to adjust. When everything is set, click the MENU to return
to the clock.
LANGUAGE <ENGLISH>
Press or to select the language: Dutch, German, French, Italian, Spanish,
Polish, Danish, Norwegian, Finnish, Swedish and English. Press to continue in
the menu.
TIME < 00:00 >
Press to set the time. To mark the hours or minutes with a white underline
press or . 13:00, the rst two digits left of the : are the hours. Use or to
set the hours. To set the minutes, press or to select the minutes. 15:00
the last two digits of the : are the hours. Press the or to set the minutes.
Press the button to conrm the time.
DATE < 00-00-2019 >
To set the date press . By pressing the buttons or the day, month
or year will be marked with a white underline. You can adjust each part by
pressing or . Example: 01-01-2019 , use or to choose the right day.
Then press the or buttons to choose the month. The month wil be
marked 01-01-2019. Repeat the steps to change the year. Press to conrm
the date.
TIME MODE < 24 Hours >
Press the button to select the 12-hour (AM / PM) or 24-hour clock. It is
important to choose the 24-hour mode before the right time is set, so that the
clock ‘knows’ whether it is 3 o’clock in the afternoon or 3 o’clock at night. Is 3
hours PM 3 pm in the 24-hour mode. Press to continue in the menu.