Do you have a question about the BC Strength Thruster and is the answer not in the manual?
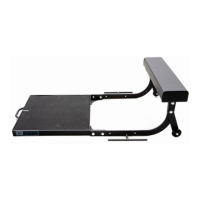
The main structural base of the thruster.
The non-slip surface mat for the thruster base.
Two L-shaped brackets that form the sides of the thruster.
Brackets with wheels for mobility.
Bracket to attach the back pad.
Padded support for the user.
Eight large bolts used in assembly.
Sixteen large washers for bolts.
Eight lock nuts used for securing bolts.
Four small bolts used in assembly.
Four small washers for bolts.
Position the base frame on a flat surface.
Insert the rubber mat into the base frame, aligning marked arrows.
Attach J-shaped sides using bolts and washers, tightening lightly.
Attach wheel brackets to J-shaped sides with bolts and washers.
Secure the back pad to the bracket using small bolts and washers.
Fully tighten all bolts to complete the thruster assembly.
| Brand | BC Strength |
|---|---|
| Model | Thruster |
| Category | Fitness Equipment |
| Color | Black |
| Material | Steel |