ENGLISH
1514
Operating InstructionsOperating Instructions
Fine Search: The ne
search is the nal part of
the transceiver search,
which is performed on
foot with the transceiver
positioned at or near
the snow surface. The
objective of the ne
search is to locate where
the signal is strongest
(distance reading is
lowest) and to reduce
the area to be probed.
Move Tracker3 slowly
in a straight line along
the surface of the snow
during the nal three
meters of the ne search.
The directional lights do
not illuminate in the nal
two meters, so only pay
attention to the distance
readings. From the point where you have located the smallest reading,
“bracket” at 90-degree angles to the left and then to the right in search of
a lower reading (Figure H). Repeat if necessary along both axes. Begin
probing at the lowest distance reading.
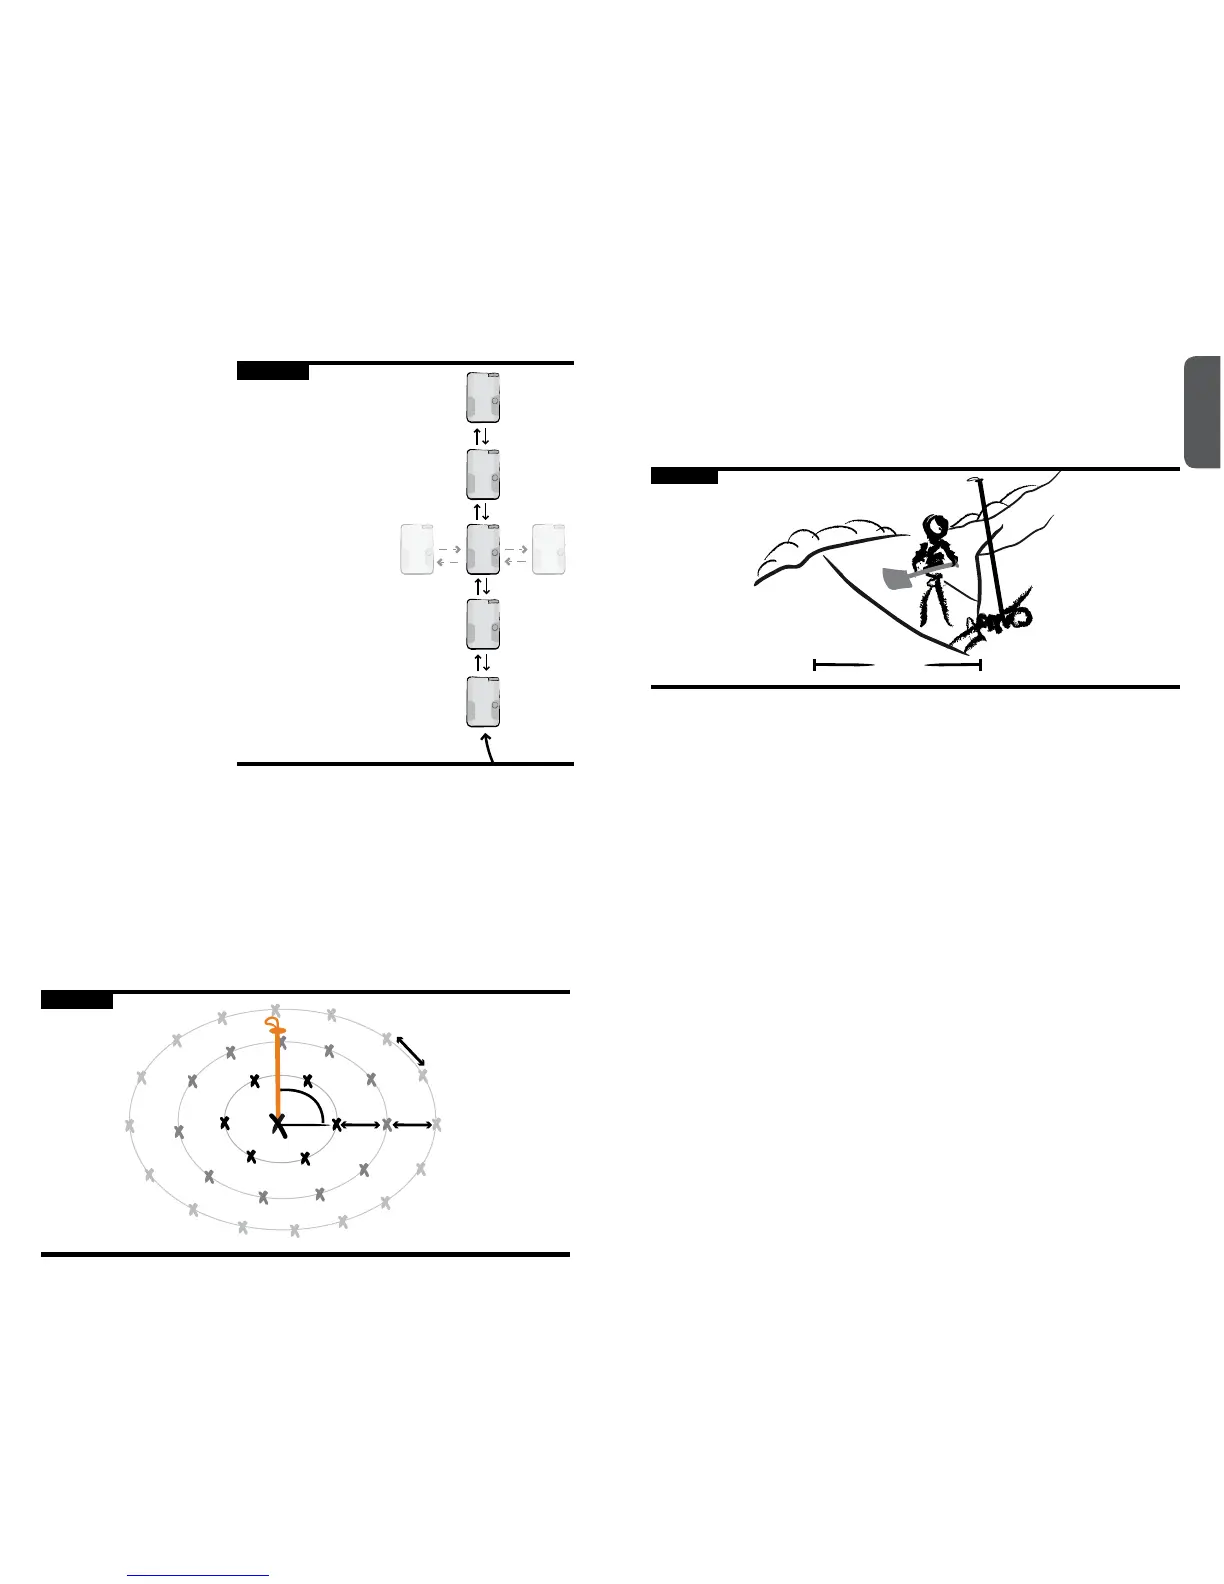
Pinpointing/Probing
At your lowest distance reading, probe in concentric circles, with each
probe hole about 10 inches (25 cm) apart (Figure I). Your probe should
enter the snow perpendicular to the slope. Once you have conrmed the
victim’s location, leave the probe in the snow.
90°
10” 10”
25 cm 25 cm
10”
25 cm
Figure I
Shoveling
Shoveling is dicult and consumes the majority of time during an avalanche
rescue. For best results, start shoveling just downhill of the probe (Figure J).
Make sure your hole is at least one “wingspan” wide. In burials deeper than
one meter, excavate downhill about 1.5 times the burial depth.
1.5 x
burial depth
Figure J
Multiple Burials
When more than one transmitting victim is within the receiving range
of Tracker3, the multiple burial icon
q
will illuminate and stay solid.
(Note: this icon can occasionally illuminate irregularly in the presence
of electromagnetic noise or when detecting older analog transceivers).
If there are more than two transmitting victims within range, then the
“+” icon will illuminate.
If the multiple burial icon is illuminated and/or Tracker3 displays more than
one distance and direction, then there are probably several victims within
range. Stay in search mode and focus on the closest distance reading,
attempting to engage that signal in the center search light.
Once you are signicantly closer to one signal than the other, Tracker3
will “lock” onto that signal and mask out the others. Once this signal
is isolated, Tracker3 will behave very similar to how it does in a single
transceiver search. Once you have located and excavated the rst victim,
turn his or her transceiver o if you determine the conditions are safe.
If you have a clear signal, then begin searching for the next victim.
If it is not possible to turn o the rst victim’s transceiver—and you have
enough people to begin shoveling—then we recommend isolating the
next signal using Signal Suppression.
3.0
2.0
1.0
2.0
3.0
1.6
1.6
Bracketing: Make sure
you go well past the
low reading to conrm
it is the lowest. When
bracketing, ignore the
directional lights, which
no longer illuminate at
less than two meters.
Do not rotate the
transceiver during
this process, as it can
change the distance
readings.
Figure H