This document serves as a comprehensive instruction manual for a mini oven, providing both Dutch and English language sections. It outlines general safety precautions, detailed operating instructions, technical specifications, and maintenance guidelines.
Function Description:
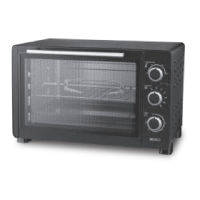
The mini oven is designed for household use, offering versatile cooking functions such as roasting, baking, and reheating. It features various heating element configurations and a convection function to ensure efficient and even cooking. The oven is equipped with a timer for precise cooking control and an indicator light to show when the heating elements are active.
Key Components:
The oven comprises several main parts:
- Housing: The outer casing of the oven.
- Temperature Control Knob: Allows users to select desired temperatures ranging from 100°C to 220°C.
- Indicator Light: Illuminates when the heating element is turned on.
- Function Button: Used to select different cooking modes.
- Timer: Activates the timer function, with a bell sounding at the end of the programmed time. It can be turned clockwise for grilling or as a general timer.
- Control Panel Right: Houses the control knobs.
- Oven Foot: Provides stability for the appliance.
- Oven Handle: For opening and closing the oven door.
- Lower Door Frame & Upper Door Frame: Structural components of the oven door.
- Left Panel: Side panel of the oven.
- Baking Tray: Used for grilling and roasting various foods, and also serves as a drip tray to collect oil.
- Grid: Suitable for roasting, baking, and general cooking in casseroles and standard pans.
- Grill Handle: For safely handling hot components.
- Grill-Rotisserie Set: Used for rotisserie cooking.
Important Function Settings:
The oven offers several heating configurations:
- Frying (top two heating elements): Activates the top two heating elements for frying.
- Baking (bottom two heating elements): Activates the two lower heating elements for baking.
- Upper and Lower Heating Elements: Both upper and lower heating elements work together.
- Upper and Lower Heating + Convection: Combines both upper and lower heating elements with the convection fan.
- Upper and Lower Heating Element + Grill: Combines both upper and lower heating elements with the grill function.
- Upper and Lower Heating Elements + Convection + Grill: All heating elements, convection, and grill functions work together.
Usage Features:
Before First Use:
- Read all instructions in the manual.
- Ensure the oven is unplugged and the timer is in the "OFF" position.
- Wash all accessories (baking tray, grid, rotisserie set) in warm water or a dishwasher, then dry thoroughly.
- Reassemble accessories and plug in the oven.
- It is recommended to run the oven on the highest temperature (220°C) using the grill function for approximately 15 minutes to burn off any manufacturing residues and initial odors. Some smoke and odors may be present during this initial run, which is normal.
Roasting:
- Preheat the oven to 220°C for 15 minutes for best results.
- Place the dish on the grid in the top position, ensuring it is close to the top heating element without touching.
- Place the baking tray on the lowest position to catch drips.
- Set the temperature knob to the desired temperature.
- Brush dishes with sauces or oil as desired.
- Set the function knob to "upper heating element".
- Set the timer to the desired cooking time.
- Turn the dish halfway through the cooking time.
- Once roasting is complete, turn the function control to "OFF".
Baking:
- Note that the BAKE function uses only the lower heating elements. Preheat to 220°C for 15 minutes for best results.
- Set the temperature control to the desired temperature.
- Place the grid on the lower or middle support of the rack.
- Place the food on the grid, ensuring it is close to the lower heating element without touching.
- Brush dishes with sauces or oil as desired.
- Set the timer to the desired cooking time.
- Turn the function control to "lower heating element".
- Turn the dish halfway through the cooking time.
- Once baking is complete, turn the function knob to "OFF".
Reheating:
- The reheating function uses all heating elements.
- Place food on the grid in the middle position.
- Set the temperature control to the desired temperature.
- Set the function knob to "upper and lower heating element".
- Ensure the back plate is in place.
- Set the timer knob to the desired cooking time.
- The bell will ring to indicate the end of the toast cycle.
- Once toasting is complete, turn the function control to "OFF".
Grill/Rotisserie Function:
- Not recommended for meat pieces over 1.8-2.25 kg. Tie chicken parts with string to prevent them from falling apart and ensure smooth rotation.
- Preheat the oven to 220°C for 15 minutes for best results.
- Set the temperature control to the desired temperature.
- Place poultry on the rotisserie skewer, securing it with clamps and wing screws, ensuring it is centered.
- Insert the pointed end of the skewer into the drive opening on the right oven wall, and rest the square end on the skewer carrier on the left oven wall.
- Slide the baking tray to the lowest position to collect moisture.
- Set the function control to "lower and upper heating element + grill" or "upper and lower heating element + convection + grill" position.
- Set the timer to the desired cooking time.
- Once cooking is finished, the oven bell rings, turn the function control off.
- Remove the skewer using the grill skewer handle, lifting the left side first, then pulling it out of the drive opening. Carefully remove meat from the skewer and place it on a cutting board or dish.
Convection Function:
- Convection cooking combines hot air movement via a fan with conventional functions, leading to faster and more even cooking.
- The fan gently circulates air, browning food quickly while retaining moisture and flavor.
- This allows for cooking at lower temperatures, saving energy and keeping the kitchen cooler.
- The convection fan operates when the convection and grill knob is in the convection position, and the timer is set.
Important Technical Specifications:
- Power: 1500W
- Voltage: 220-240V~ 50-60Hz
- Safety: The appliance is fitted with an earthed plug. Ensure the socket in your home is properly grounded.
Maintenance Features:
Cleaning and Maintenance (After Each Use):
- Unplug the appliance and allow it to cool completely.
- Clean the baking tray, grid, and removal mechanism with warm water and a small amount of washing-up liquid. Rinse thoroughly and dry well.
- Clean the inside and outside of the oven and the door with a damp cloth, then dry well.
- Return all items to the oven and store it.
- Always ensure the plug is removed from the socket before cleaning.
- Never use corrosive or abrasive cleaning agents or sharp objects (knives, hard brushes) to clean the appliance.
- Never immerse the appliance, power cord, or plug in water or any other liquid.
Warranty:
- BCC B.V. offers a 2-year warranty against hidden defects that render the appliance unfit for normal use.
- The warranty starts from the date of purchase; retain your proof of purchase.
- Manufacturing and material defects will be rectified free of charge through repair, part replacement, or exchange of the device.
- Warranty repairs require proof of purchase within the warranty period.
- The warranty is void if defects result from accidents, incorrect use, neglect (e.g., improper cleaning), or unauthorized repairs outside BCC B.V.'s service workshop.
- The warranty does not cover damage from incorrect voltage, failure to follow the manual, or normal wear and tear.
- The warranty does not cover damage from not descaling devices in time, regardless of water type (applicable to steam irons, coffee makers, kettles).
- BCC B.V. is not liable for material damage or personal accidents due to connection in violation of safety regulations and technical standards.
- All other damage claims are excluded unless legally required.
Service:
- For questions, contact BCC B.V. Customer Service at 020-3348888.
- For defects, contact your nearest BCC B.V. store for resolution.
- Repairs outside the warranty period are possible, but at a cost.
Environmental Waste Processing:
- The product is marked with the European Directive 2012/19/EU, indicating it should not be disposed of with household waste.
- To protect the environment and human health, and promote raw material reuse, dispose of the product responsibly at designated collection points or the store where it was purchased. They will accept the product for environmentally friendly disposal.