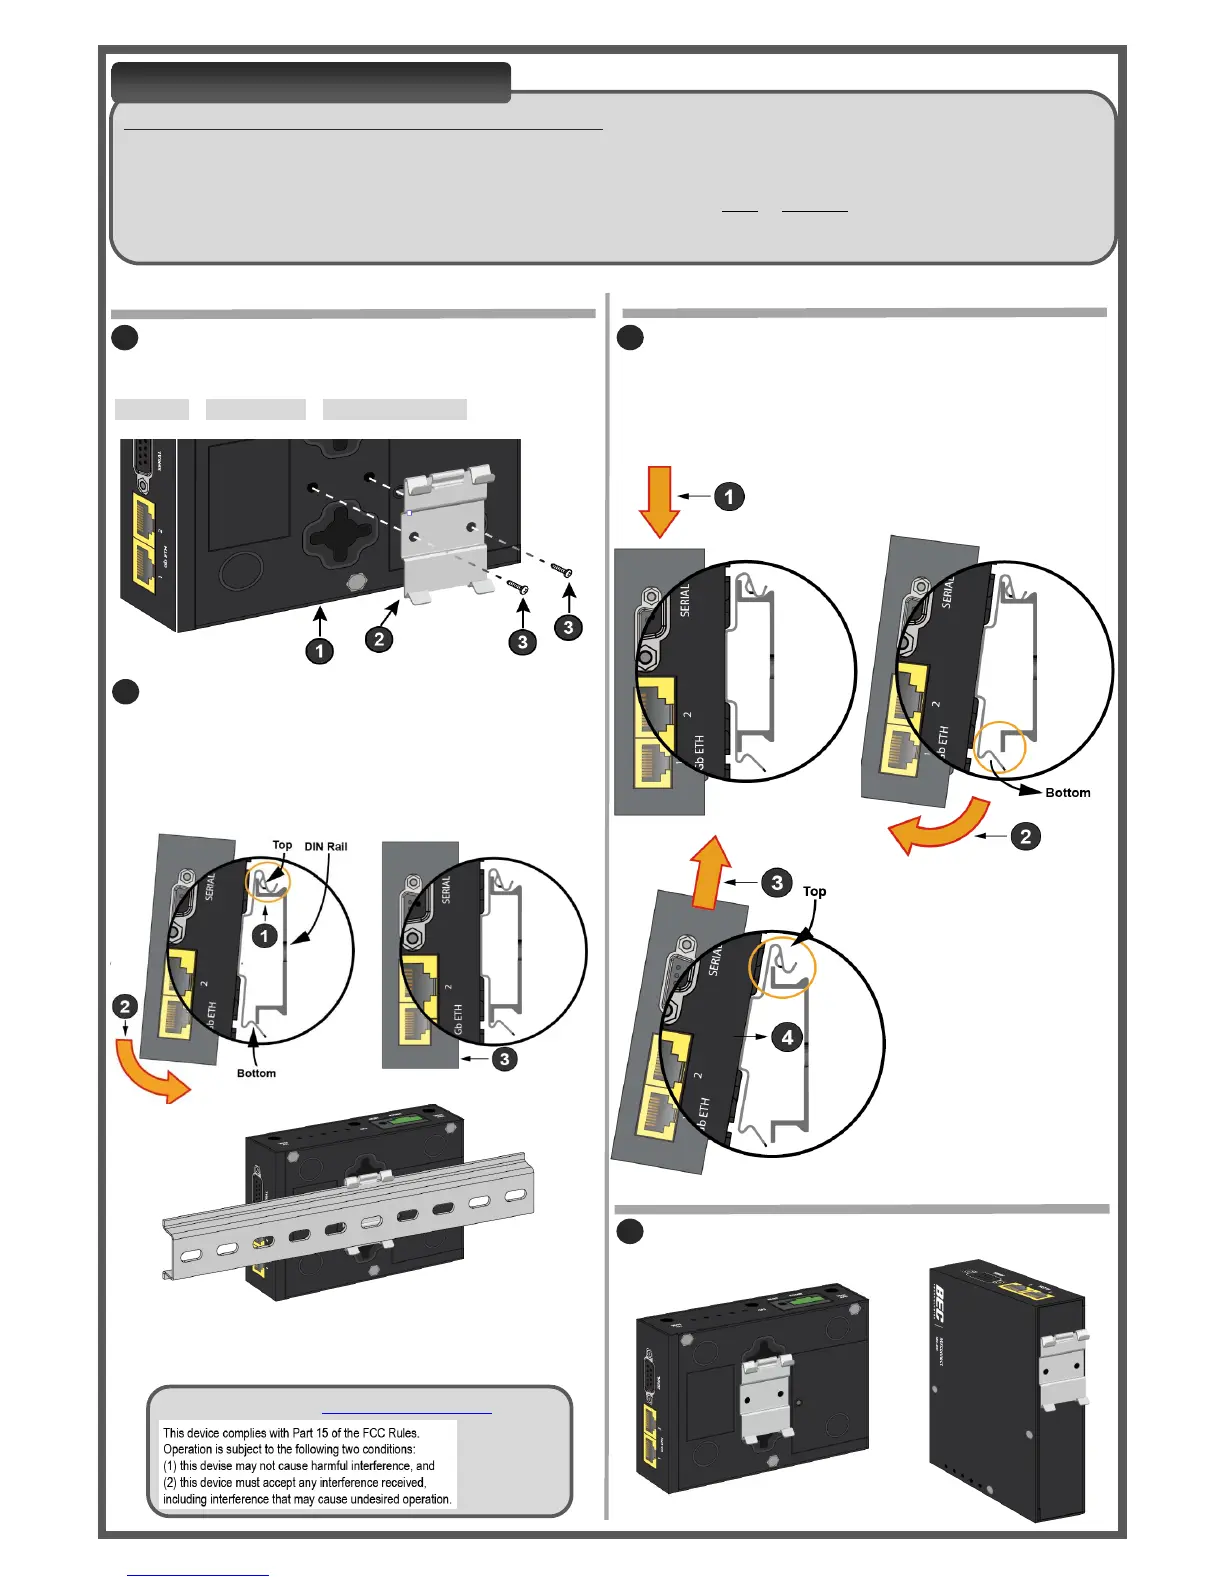
ATTACHING TO A DIN RAIL REMOVING FROM A DIN RAIL
MOUNTING POSITIONS
Remove MX-200 from a DIN rail.
1-2. Push down the MX-200 to free the bottom of the clip
from the DIN rail.
3. Unhook the top of the clip and pull the MX-200
away from the DIN rail
DIN RAIL MOUNTING
DIN RAIL MOUNTING OPTIONS
KIT CONTAINS: DIN Rail Clip and Six (6) Clip Mounting Screws
The DIN Rail mounting kit is designed to securely attach and clip the MX-200 onto a TS35 or standard 35mm top hat (EN
500022/BS 5584) DIN rail in the horizontal position.
Two (2) mounting locations to mount the DIN rail clip on the surface of MX-200, back or rear side.
Please follow the steps to complete DIN rail mounting installation.
Clip and secure the MX-200 onto a DIN rail.
1. Hook the top of the clip onto the top edge of the DIN
rail. Make sure the clip is firmly against the rail.
2. Push down the bottom of the MX-200 to snap it onto
the lower edge of the DIN rail.
3. The MX-200 is now mounted on the DIN rail.
Attach and fasten the DIN rail clip (known as clip)
to the back or rear side of the MX-200 using two (2) clip
mounting screws included in this mounting kit.
1.MX-200 2.DIN rail clip 3.Mounting Screws
Install clip in either vertical or horizontal position
SUPPORT: Visit us at www.bectechnologies.net.
 Loading...