Setting Programmable Position
Adjust the head and foot to your desired position.
To adjust a saved position, repeat step 1 and 2 and the new position
will be saved.
Press and hold the LED on/off button first, then press and hold one
of the picture programmable buttons for 5 seconds until you hear
a beep sound. The position is then saved.
1 2
STEP 1:
STEP 2:
STEP 3:
HEAD FOOT
1
STOP
2
Pairing Remote
Make sure the batteries are good. Replace
them when needed.
Unplug the power cord from the power source. If 9V backup batteries
were installed in the power supply, remove them.
Press and hold and simultaneously until the blue
backlights of the remote control are off.
STEP 1:
STEP 2:
STEP 3:
STEP 4:
Plug the power cord back into the power source. You will hear an activation
sound in 2 seconds, indicating the remote is paired to the adjustable base.
AAA
AAA
AAA
The original remote that comes in the box is already
paired to the foundation. No further action is required.
In the event when the remote is not paired with the
foundation, follow the pairing instructions below.
Install two spacing connectors to ensure the gap between the two
adjustable bases is consistent.
Spacing Connector for TXL/T/CKS (Optional)
(2) SPACING CONNECTOR (TXL/T/CKS ONLY)
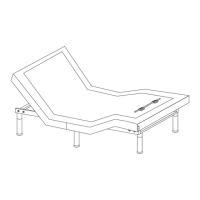
Lift the head and foot end of the bed by remote control. Install the spacing
connector as shown.
Spacing
Connector
Bed Frame
Bed Frame
(Not Included)
- 9 -