Tools Required
Benötigtes Material / Accessoires / Herramientas
Strumenti da lavoro / Benodigdheden
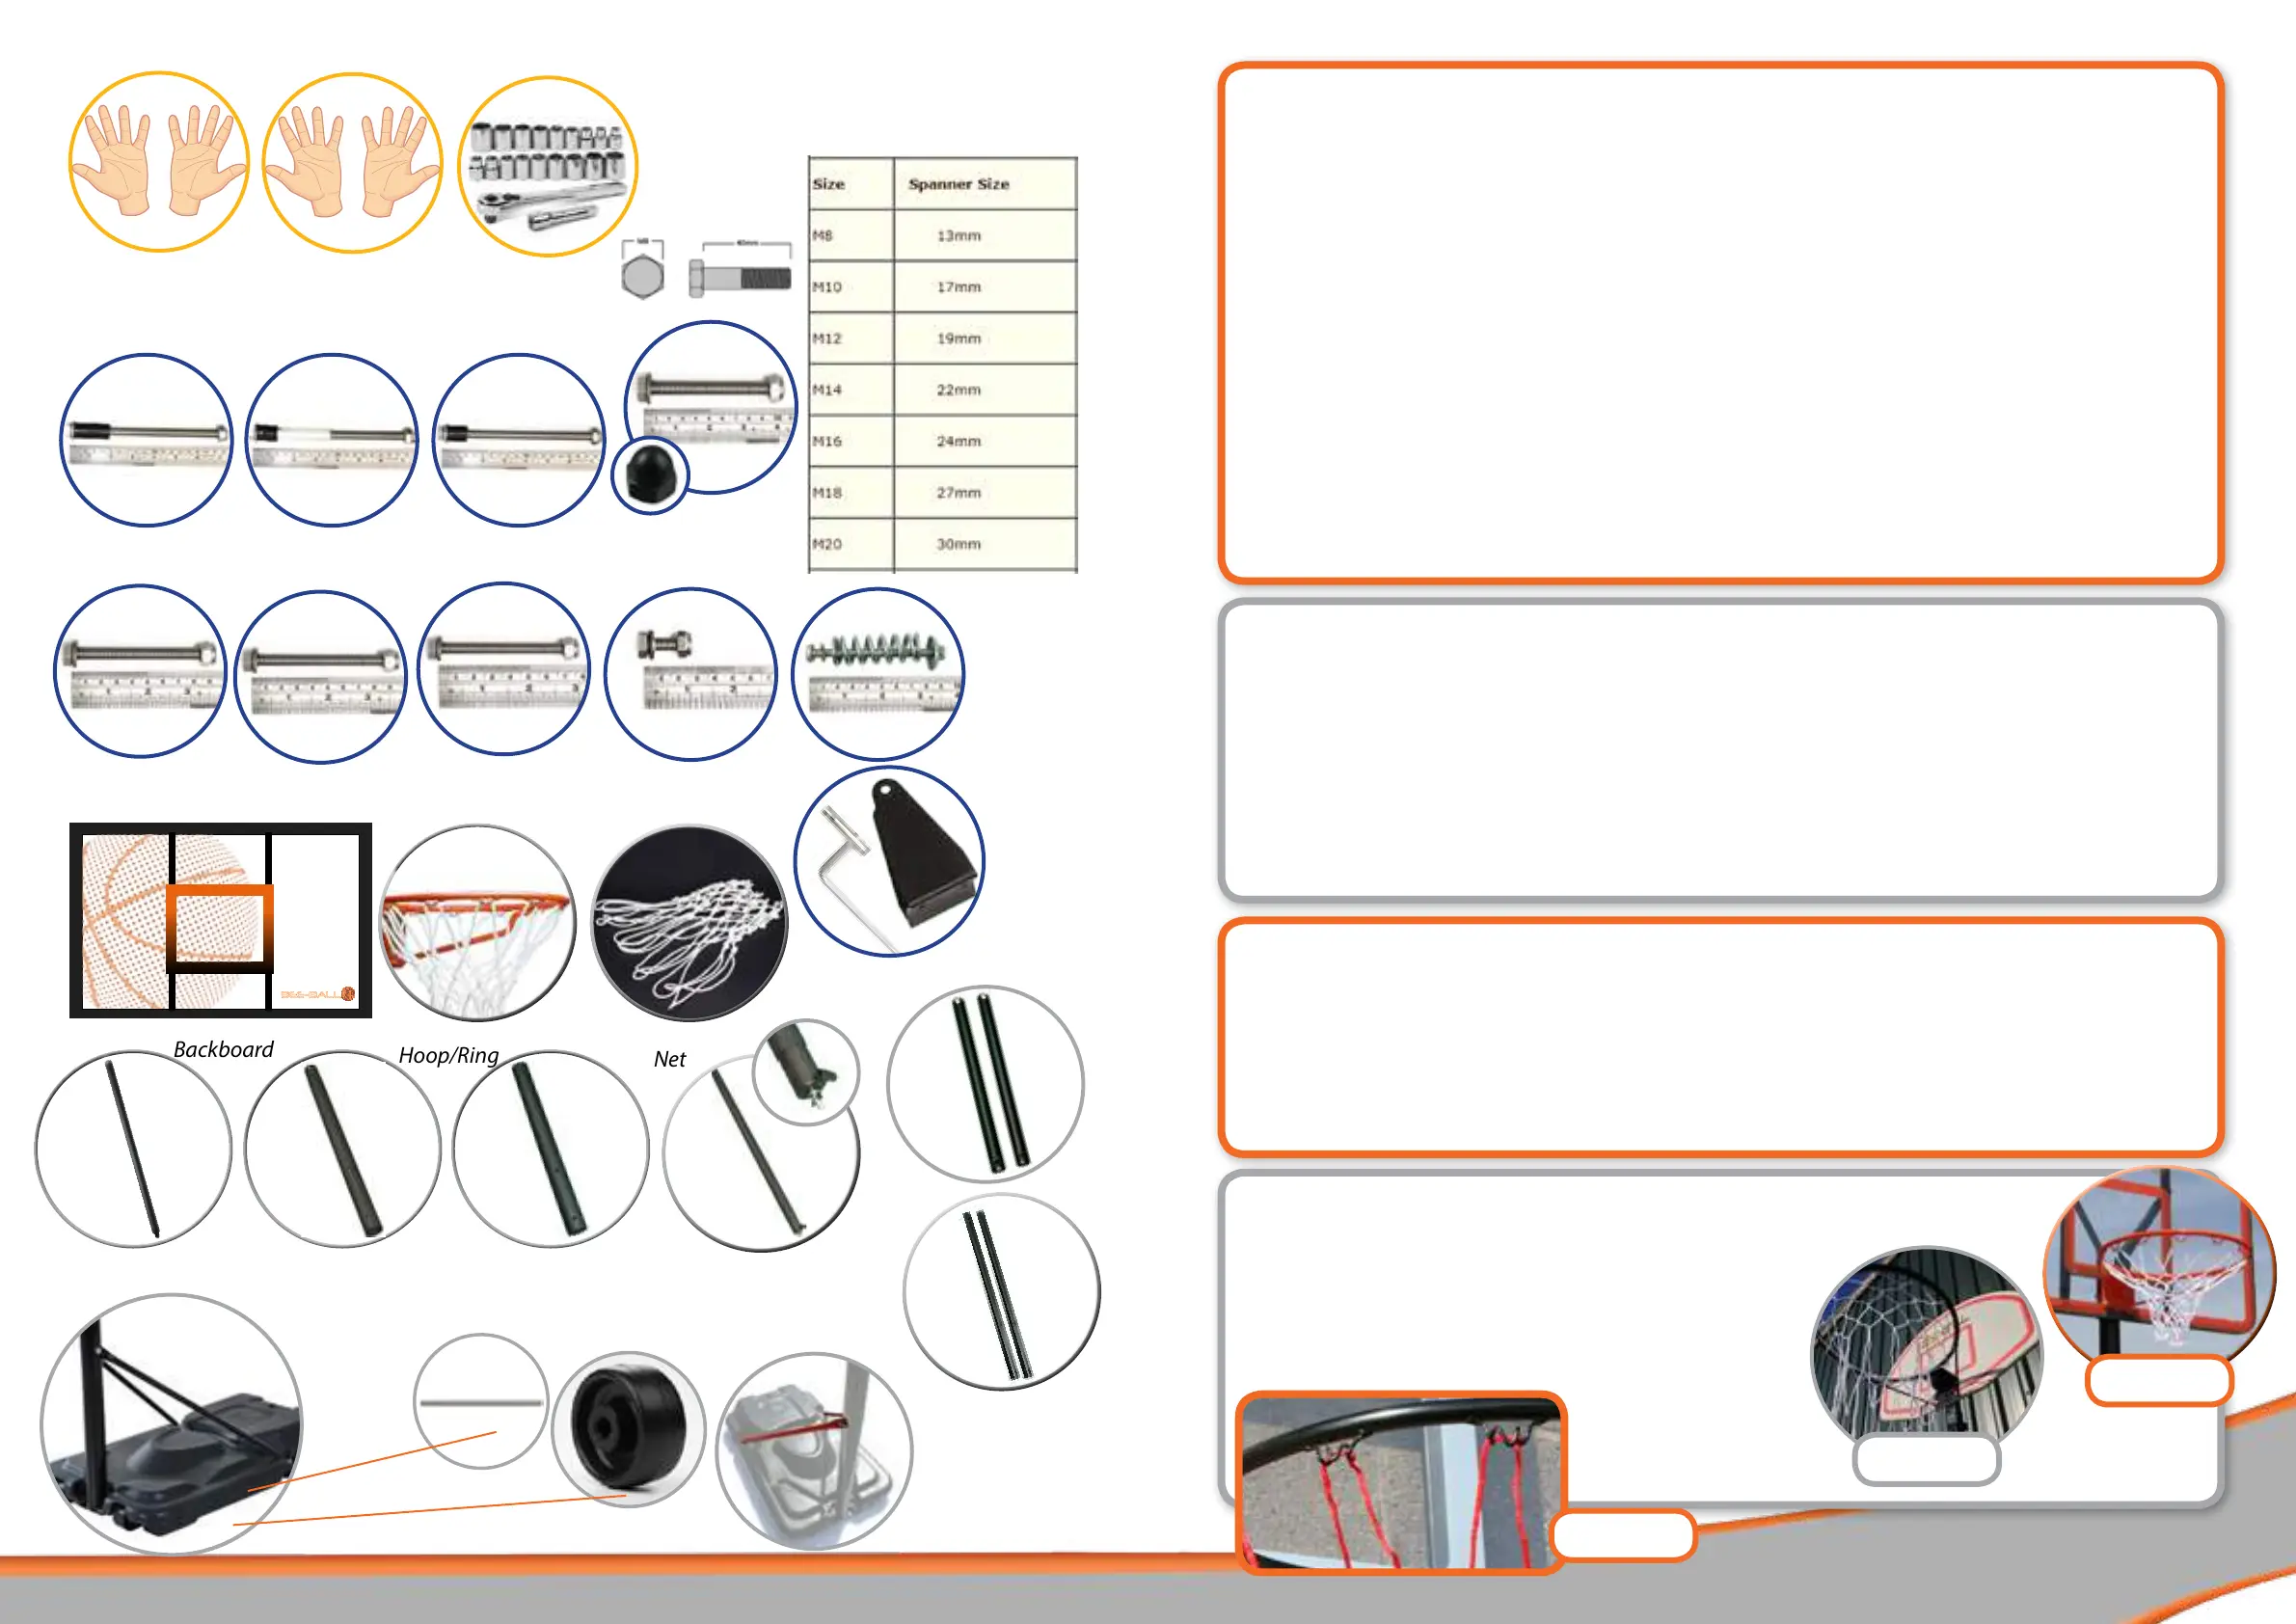
Parts Included
Unterteile / Liste des pièces / Lista de partes
Elenco degli elementi / Onderdelen
Two pairs of
hands
Spanner and
Socket Set
1
Part 1
Backboard
Part 2
Hoop/Ring
Part 3
Net
BEE-BALL
Part 4 (S)
Short Board
Braces (x2)
Part 5 (T)
Long Board
Braces (x2)
Part 6 (W)
Top Pole
Part 7 (X)
Middle Pole
Part 8 (Y)
Bottom Pole
Part 11
Metal Rod - Wheel Axle
Part 12
Wheels (x2)
Identifying
Bolts
Parts 13
Base Struts (x2)
Part 10
Base
*comes part
assembled
with
parts 10 &
11 (wheels
and axle)
Bolt, Nut &
Washer A (x1)
M12 / 180mm
Bolt, Nut &
Washer B (x2)
M12/ 180mm
Bolt, Nut &
Washer C (x2)
M12 / 180mm
Bolt, Nut &
Washer D (x1)
M10 / 100mm
+ plastic bolt
cap
Bolt, Nut &
Washer H (x1)
M8 / 70mm
Bolt, Nut &
Washer E (x2)
M10 / 90mm
Bolt, Nut &
Washer J (x4)
M8 / 20mm
Part 9 (Z)
Adjustment
Pole
Bolt, Spring,
Nut & Washer
K (x2)
M8 / 90mm
Bracket Q
&
Handle R
Bolt, Nut &
Washer G (x2)
M8 / 90mm
2
Before Installation
Check all parts are present!
Our factory takes every eort to make sure everything is packed in its proper place. But just in case a small part has gone
astray please make sure you check every piece is present before you begin installing - right down to the nuts and bolts.
Assemble with Care
Installation should be completed by two adults. Please make sure you follow all the instructions carefully. If you have any
questions during installation please do not hesitate to contact us on +441865 392439 or email
sales@biggamehunters.co.uk and we will be happy to advise.
Please make sure you read all the safety warnings and advice in this instruction manual. Take extra care and attention over
the ballasting instructions as this will make sure your equipment stands rm once you have completed the assembly. We
recommend the use of sand and water - if water is used anti-freeze is necessary to prevent the water from freezing and
cracking the base. Make sure you position the stand somewhere where there is plenty of space to play.
Using the Basketball Equipment
Improper installation or use of the basketball stand may cause damage to the stand or result in serious injury to the user.
We would advise that children are supervised at all times when using this product.
Do not use the stand in windy weather conditions - adjust to the lowest height and store to prevent any damage.
Please adhere to the warnings below to ensure proper use of this equipment and ultimately to ensure full enjoyment!
Weighing Down the Base
Making sure the base is weighted properly is very important for safety reasons.
We recommend lling your base with sand or a mixture of water and sand or ne gravel - to a total weight of 170kg.
To ll, simply remove the plastic plug/lid in the base and add water using a hose. To add sand or gravel, use a funnel - you
can create a make-shift funnel using a exible plastic board or thick glossy piece of cardboard.
If you are using water you must add anti-freeze to prevent the base from cracking during winter months. We would also
recommend adding an anti-algae solution to the water to prevent algae from growing inside the base (such as bleach or
chlorine).
Moving Your Basketball Stand
The stand must be moved by two adults capable of handling the weight of the stand - children should not be
allowed to move the stand.
Stand in front of the basketball system and pull the pole forward slowly until the system is balanced on the wheels in the
base.
Roll the stand carefully to the new location and slowly push the system back to a standing position.
Attaching the Basketball Net
When attaching the net to your basketball hoop, make sure you have
the net the correct way up. The wider loops/wider part of the net
should be at the top. Slide the loops of the net over the metal loops on
the inside of the basketball hoop - from the inside towards the
outside (see diagram 1). You can also see here a net that has been
assembled correctly and one that has been assembled upside down!
diagram 1
Incorrect
Correct
 Loading...