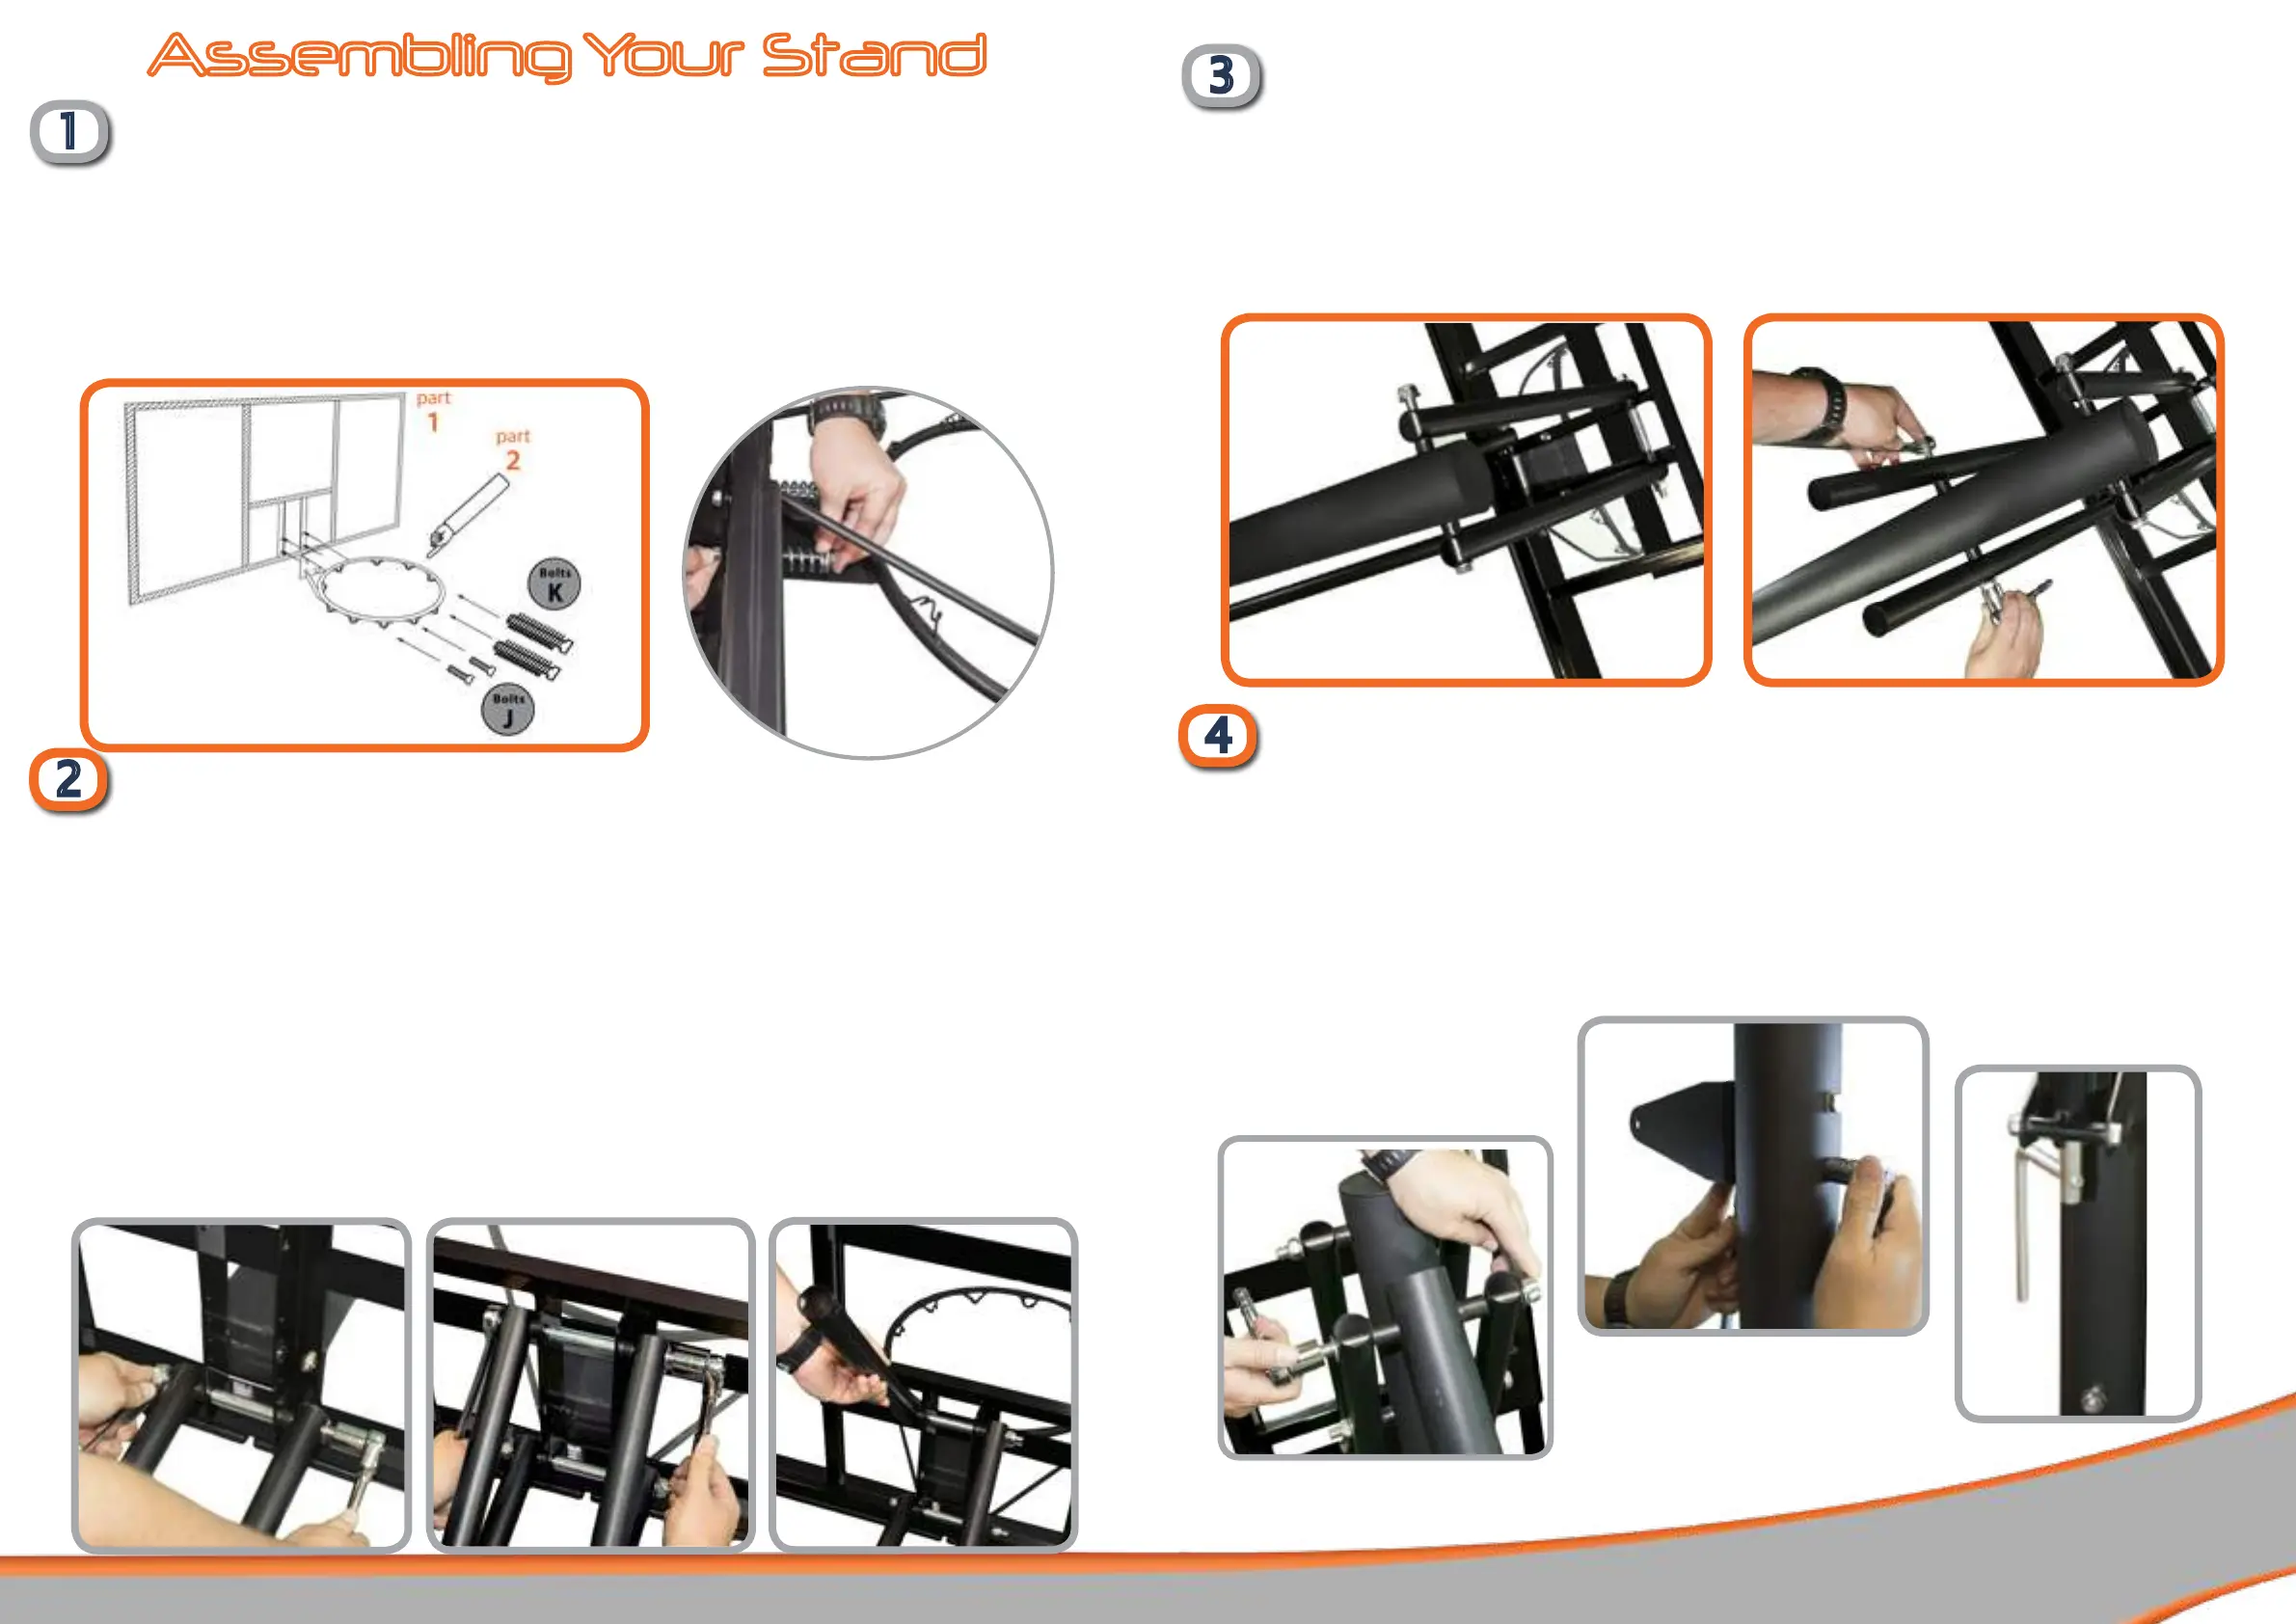
3
Assembling Your Stand
4
1
Attach Ring to Backboard
You will need:
Hoop/Ring (part 2) 2 x Bolts, Nut & Washers J (M8 x 20mm)
Backboard (part 1) 2 x Bolts, Springs & Nuts K (M8 x 90mm)
Attach ring (part 2) to the backboard (part 1) using two Bolts, Nuts and Washers J and two Bolts, Springs & Nuts K.
The spring bolts go in the top two holes, and plain bolts in the bottom two.
The bolts go through the ring then through the backboard and are xed in place using the nuts.
2
You will need:
Parts as assembled in Step 1
2 x Short Backboard Braces (parts 4 ‘S’)
2 x Long Backboard Braces (parts 5 ‘T’)
2 x Bolts, Nuts & Washers B (M12 x 180mm - with metal
sleeves)
Attach the Long Backboard Braces (parts 5 ‘T’) to the lower holes on the metal bracket on the back of the
backboard using two Bolts, Nuts and Washers B.
Repeat this with the two Short Backboard Braces (parts 4 ‘S’) in the two upper holes in the backboard metal
bracket.
They should sit in this order once assembled:
Bolt > Washer > Brace Tube > Rubber Washer > Backboard > Bolt Sleeve > Backboard > Rubber Washer > Brace Tube > Washer > Nut
Please Note: These bolts need to be tightened to the right level. If they are too tight, it will be impossible to adjust
the height of the backboard and too much pressure will be put on the stand.
Tighten the nuts up until you can feel a resistance and then loosen a little bit, the braces should move freely.
Attach Backboard Braces
3
Join the Top Pole and Braces
You will need:
Parts as assembled in Step 1 & 2 Top Pole + plastic cap (part 6 - W)
2 x Bolts, Nuts & Washers C (M12 x 180mm)
4
You will need:
Parts as assembled in Step 1, 2 & 3
Middle Pole (part 7 - X)
Adjustment Pole (part 9 - Z)
Adjustment Handle (part R)
Middle Pole Bracket (part Q)
1 x Bolt, Nut & Washers A (M12 x 180mm)
1 x Bolt, Nut & Washers E (M10 x 90mm)
2 x Bolts, Nuts & Washers G (M8 x 90mm)
1 x Bolt, Nut and Washer H (M8 x 70mm)
a. Attach the Adjustment Pole (part
9 - Z) between the ends of the Board
Braces (part 5 - T) using one Bolt, Nut
and Washers A. The horizontal cylin-
der already xed on the bottom of
the adjustment pole should face away
from the main poles.
Add the Adjustment Pole and Middle Pole
c. Attach Middle Pole Bracket (part Q) to
the middle pole using two Bolts, Nuts &
Washers G.
d. Add the Adjustment Handle (part R)
to the bottom of the Adjustment Pole
(part 9) - the nut and bolt for this is al-
ready attached to the adjustment pole
so you will need to unscrew this then
add the handle and tighten.
b. Attach the Middle Pole (part 7 - X)
to the top pole using one Bolt, Nut &
Washers E.
e. Now secure the horizontal
cylinder at the bottom of
the adjustment pole to the
bracket using one Bolt, Nut
and Washers H.
Fix the ends of the Backboard Braces (parts 4 & 5) to the Top Pole (part 6 - W) using two Bolts, Nuts and Washers C.
Start with the top two tubes (shorter braces S) and attach these to the highest hole in the top pole - then attach
the two longer brace tubes (T). Again, don’t overtighten - follow our tip in Step 2 to ensure the braces can be
moved (very important for adjusting the height of the backboard).
 Loading...