5
5
6
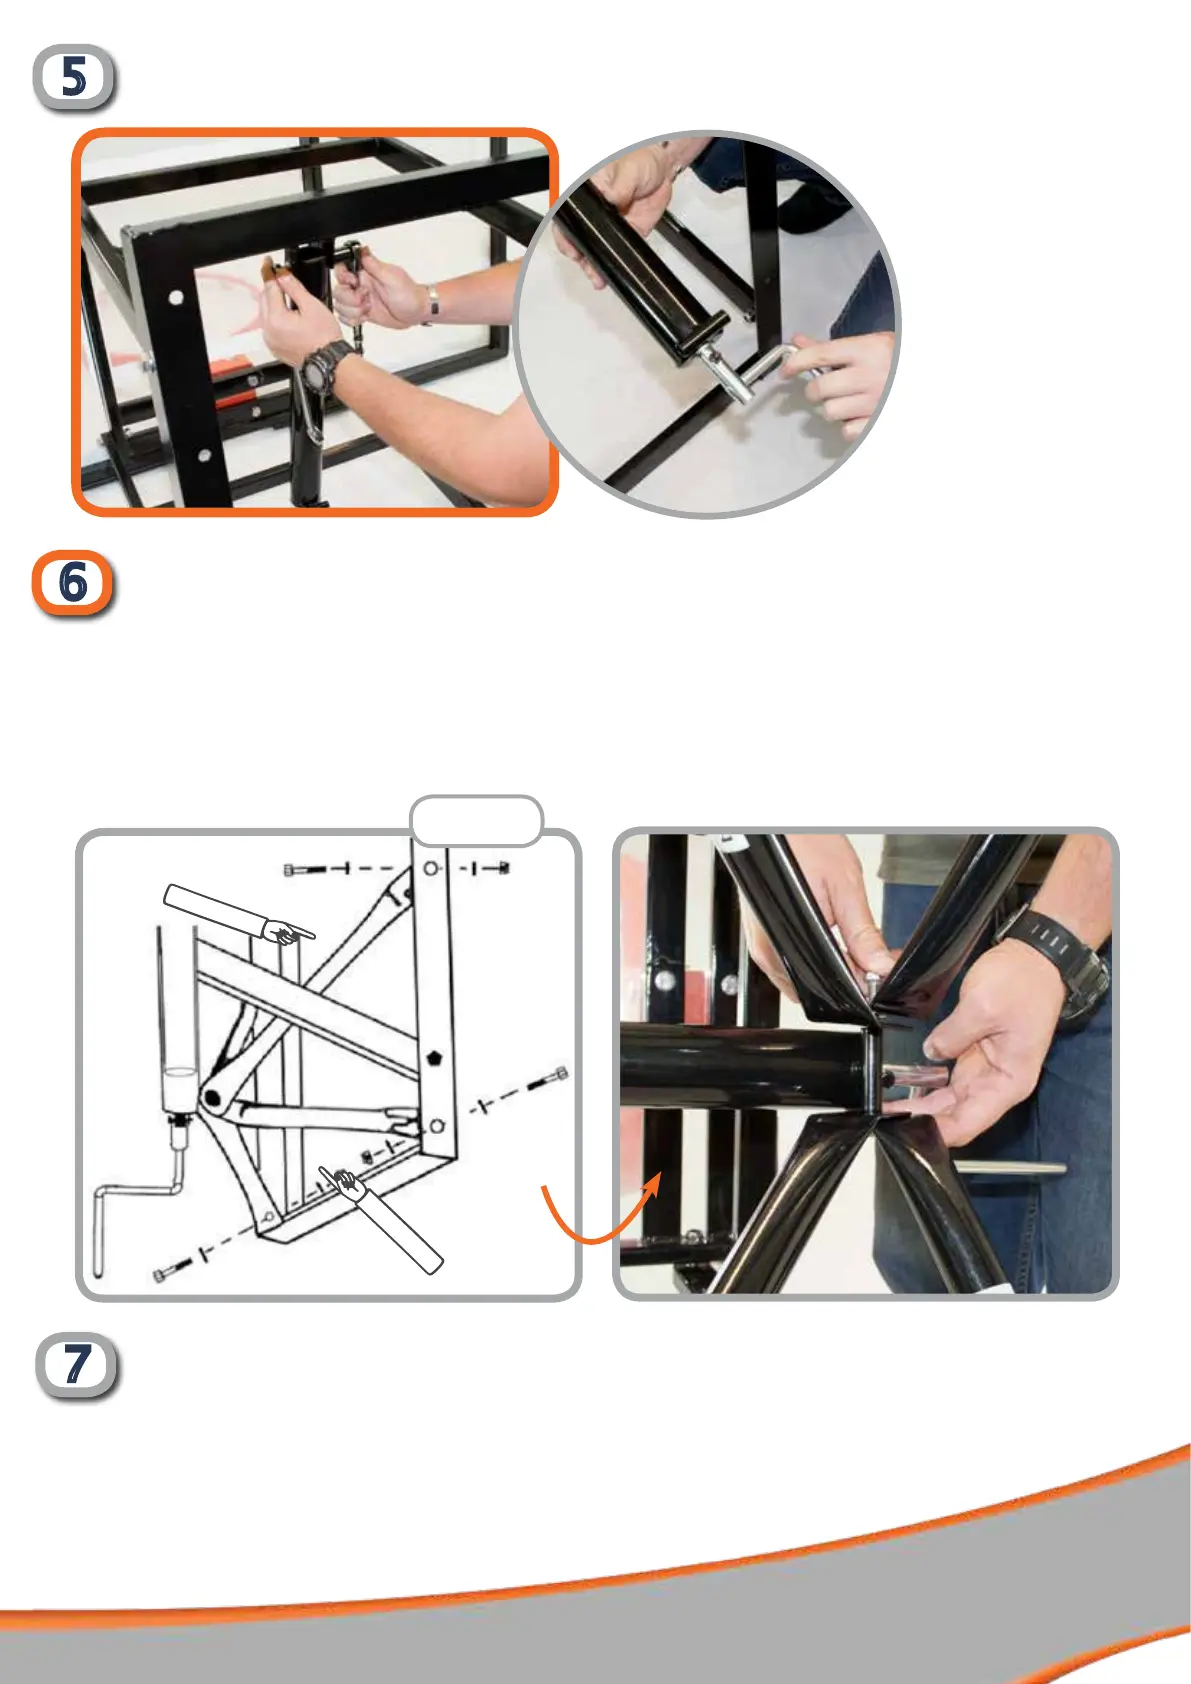
Attach Adjustment Pole and Handle
Attach Braces
You will need:
Pre assembled backboard from steps 1-5 (parts 1 + 2 + 4 + 5 + 6 + 9)
Lower Braces (part 8) Upper Braces (part 7)
4 x Bolts, Nut & Washers C (M8 x 20mm) Bolt, Nut and Washer D (M8 x 90mm)
diagram 1
Note:
If there is not enough
clearance for the bolt,
wind the handle so it
drops down.
Part 7
Part 8
90
°
Attach Upper Braces (part 7) and Lower Braces (part 8) to the Wall Bracket as shown in diagram 1 using four Bolts,
Nut and Washers C. Then connect the end of all Braces (parts 7 + 8) to the Adjustment Pole (part 9) using a single
Bolt, Nut and Washer D.
Fix Backboard to Wall
You will need:
Pre assembled backboard from steps 1-6 (parts 1-9) 6 x Bolts, Nut & Washers F (M10 x 110mm)
7
Fix the backboard brackets to the wall using four wall anchor Bolts, Nuts and Washers F. Using an equal diameter
drill bit to the wall anchor bolts drill the holes in your wall and insert the bolts with the nuts facing out. Remove the
nuts and place the backboard onto the bolts. Put the nuts back onto the bolts and tighten them. The anchor bolts
will expand as you tighten the nuts, securing the backboard in place.
 Loading...