3
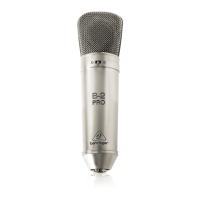
STUDIO CONDENSER MICROPHONE B-2 PRO
5. MOUNTING MICROPHONE AND ELASTIC SUSPENSION
5. MOUNTING MICROPHONE AND ELASTIC SUSPENSION
Attach the enclosed elastic suspension to the microphone stand. Fasten the screw, once the
suspension has been positioned properly. Open the elastic suspension by pressing the two
circular levers, then insert the B-2 PRO from above.
6. AUDIO CONNECTION
Use a balanced XLR microphone cable with the following pin assignment: pin 1 = shielding;
pin 2 = +; pin 3 = -. Since your B-2 PRO features gold-plated contact points throughout, we
recommend that you use only microphone cables with gold-plated connectors.
7. LEVEL SETTING / ADJUSTING THE BASIC SOUND
Adjust the gain control in the microphone channel of your mixing console so that the peak LED lights
up only occasionally or never at all. The EQ controls in the microphone channel should be set to mid-
travel position to start with; low-cut filter and level attenuator should be off. Try to achieve the
desired sound by experimenting with the microphone position. Use the omnidirectional, cardioid
and figure eight directivity patterns (see chapter 3). Often, it will be useful to set up acoustic
barriers (gobos) at various angles towards the signal source. Only when the desired basic
sound has been achieved, should you start to use equalizers and signal processors, if any at all
(Remember: less is often more!)
The B-2 PRO provides a level peak around 12 kHz producing some kind of presence in this range;
so, there is no need for high-frequency EQing which could deteriorate the signal and raise the
overall noise floor. On the contrary, the B-2 PRO provides that much-desired transparency which
often gets lost during recording and mixing.
8. WARRANTY
+ Please find our current warranty terms on our web site under http://www.behringer.com
or send us a request by e-mail (support@behringer.de), fax (+49 (0) 2154 920665), or
telephone (+49 (0) 2154 920666).
9. SPECIFICATIONS
Transducer type: condenser, 1" dual-diaphragm
Operating principle: pressure gradient
Polar pattern: cardioid, omnidirectional or figure eight
Connection: gold-plated balanced XLR connector
Open circuit sensitivity (at 1 kHz): cardioid: -36 dBV (0 dBV = 1 V/Pa), 16 mV/Pa
omnidirectional: -37 dBV (0 dBV = 1 V/Pa), 14 mV/Pa
figure eight: -35 dBV (0 dBV = 1 V/Pa), 18 mV/Pa
Frequency response: 20 Hz - 20 kHz
Level attenuation: -10 dB (switchable)
Low-Cut filter: 6 dB/oct. at 150 Hz (switchable)
Max. SPL (1% THD @ 1 kHz): cardioid: 138 dB (0 dB), 148 dB (-10 dB)
omnidirectional: 139 dB (0 dB), 149 dB (-10 dB)
figure eight: 137 dB (0 dB), 147 dB (-10 dB)
Equivalent SPL (IEC 651): 17 dB-A (cardioid) / 18 dB-A (omnidirectional) /
16 dB-A (figure eight)
Signal-to-noise ratio: 77 dB, A-weighted (cardioid) / 76 dB, A-weighted
(omnidirectional) / 78 dB, A-weighted (figure eight)
Nominal impedance: <100 Ω
Load impedance: >1 kΩ
Supply voltage: +48 V
Supply current: 3 mA
Dimensions: ∅ head: 56 mm, ∅ shaft: 50 mm, length: 210 mm
Weight: approx. 0.55 kg