15
(EN) Step 2: Controls
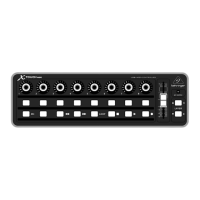
(1) Push encoder knobs – these 16 endless
encoders each have a detent and push
function (not illuminated), and a 13-segment
amber LED ring. The top row of 8 knobs are
typically used in Digital Audio Workstation
(DAW) applications for ne control of
parameters such as level or pan control
of channels 1 to 8, and the 8 knobs on the
right can be used for individual level and
EQ adjustments.
(2) Select buttons – these 3 x 8 buttons
are typically used for DAW mixer channel
applications such as solo or mute of channels
1 to 8.
(3) Faders – these touch-sensitive motorized
100 mm faders are typically used for
ne control of level functions in DAW
applications. There are 8 channel faders and
1 master on the right. The faders can also be
used for drawbar control of virtual organs.
For this use, the value range can be inverted
in the X-TOUCH editor software (min = 127,
max = 0). Typical drawbar organ printing
(16’, 5 1⁄3’, 8’ etc.) can be found next to the
fader numbers (1, 2, 3..).
(4) Select buttons – these 9 buttons are
typically used for lighting applications
(spotlight on/o), and sample triggering
(notes on/o).
(5) MC button – this select button can also
be used to switch the unit between Mackie
Control mode and standard mode. See the
“Getting Started” section for more details.
(6) Select buttons – these 6 buttons
are typically used for DAW transport
applications (e.g. play, rec, stop). They can
also be recongured using the X-TOUCH
editorsoftware.
(7) Layer A and B buttons – these 2 buttons
allow selection between preset layer A
(mixer control) and B (instrument control),
in standard mode. In MC mode, there are
dierent assignments. See MIDI Maps on
pages 19 to 21. Presets can be saved or
loaded to and from the computer using the
X-TOUCH editor software.
(8) LED section – these LEDs show the status of
the X-TOUCH COMPACT:
INTERFACE USB – lit when the unit is
connected correctly to the USB port of a
live computer
MIDI IN – lit when MIDI data is received
MIDI OUT – lit when MIDI data is sent out
FOOT SW – lit when the foot switch is
in operation
FOOT EXP – lit when the expression pedal is
in operation
MODE MC – lit when the unit is in Mackie
Control mode
(9) AC IN – securely connect the supplied AC
power cord here.
(10) POWER – press in to turn on the unit,
pressout to turn it o.
(11) USB HUB – these 2 USB type A connectors
are used for connecting external USB
hardware such as a USB mouse, a keyboard,
USB MIDI controllers such as the X-TOUCH
MINI, andUSB MIDI keyboards. The Hub
communicates directly to the computer
and not to the X-TOUCH COMPACT. Each
connector can supply 5V USB power. The hub
is only active when the X-TOUCH COMPACT is
powered on, and in USB mode, connected to
a live computer via the USB MIDI connector.
(12) USB MIDI – this USB type B connector is
used to connect to a computer’s USB port for
MIDI data transfer (send/receive), and USB
Hub communications. The X-TOUCH COMPACT
will operate in USB mode when connected
to a live computer via the supplied USB cord.
Itcan also operate in stand-alone mode with
no USB connection.
(13) MIDI OUT – this 5-pin DIN connector sends
MIDI data to external MIDI devices. In USB
mode, the X-TOUCH COMPACT only sends
MIDI data received directly from the host
computer. In stand-alone mode, it sends
MIDI data from the X-TOUCH COMPACT,
merged with any MIDI IN signals.
(14) MIDI IN – this 5-pin DIN connector receives
MIDI data from external MIDI devices.
InUSB mode, the X-TOUCH COMPACT routes
any incoming MIDI data only to the host
computer. In stand-alone mode, it routes
it to the MIDI OUT connector (thru data)
and also sends it to the X-TOUCH COMPACT
(parameter feedback).
(15) Foot Control Expression Pedal – this ¼"
connector is used for a standard swell pedal
for continuous MIDI data control. The editor
software allows control over the MIDI data
assignment and control behavior.
(16) Foot Control Foot Switch – this ¼"
connector is used for a standard sustain
pedal for momentary or toggle MIDI data
control. The editor software allows control
over the MIDI data assignment, switch
behavior andpolarity.

 Loading...
