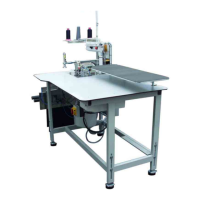
Do you have a question about the Beisler 1220/5 and is the answer not in the manual?
| Type | Industrial sewing machine |
|---|---|
| Stitch Type | Lockstitch |
| Stitch Length | 5 mm |
| Needle System | DBx1 |
| Sewing Speed | Up to 5000 rpm |
| Voltage | 220V |
Covers procedures for powering the unit on, off, and managing program stops.
Details the steps to turn on the sewing unit via the main switch.
Explains how to safely turn off the sewing unit using the main switch.
Describes how to immediately stop the sewing unit in case of errors or emergencies.
Guides on how to feed material and initiate the automated sewing process.
Guides on altering various machine and seam-specific parameters via the control panel.
Adjusts parameters for auxiliary roller and holding stamp.
Lists and explains potential error codes and informational messages displayed by the unit.
Guides the user through the physical installation steps of the sewing unit.
Provides instructions for connecting the sewing unit to the power supply.
Guides on connecting the unit to a compressed air supply.
Covers the final steps and checks before the unit is ready for use.
Explains how to perform a sewing test to verify functionality after installation.
Details how to check and adjust the needle bar height for correct stitch formation.
Covers the adjustment of hook timing and clearances relative to the needle.
Explains how to set the correct distance between the left hook and needle.
Details the adjustment for the distance between the right hook and needle.
Covers adjustments related to the feed-dog position and height.
Explains how to set the correct horizontal position of the feed-dogs.
Details how to adjust the vertical height of the feed-dogs relative to the throat plate.
Covers adjustments related to the presser foot and its lift mechanism.
Adjusts the presser foot lift mechanism for the EX5204 head.
Adjusts the presser foot lift mechanism for the S52 head.
Adjusts the general position and height of the presser foot.
Covers changing and adjusting the cutting knives.
Details the procedure for replacing and setting the upper cutting knife.
Explains how to replace and adjust the lower cutting knife.
 Loading...