This document is a user manual for a Beko WX 842430W washing machine.
Function Description
The Beko WX 842430W is a washing machine designed for domestic use, intended for washing and rinsing laundry. It is not suitable for commercial purposes or any use outside its intended purpose. The product is designed to last for 10 years, with original spare parts available for this period.
Important Technical Specifications
The washing machine operates on a 230 V / 50 Hz electrical input, with a total current of 10 A and a total power of 2200 W. The rated capacity is 8 kg. It has an energy efficiency class of A+++ (Highest Efficiency) to D (Lowest Efficiency), with an annual energy consumption of 192 kWh and annual water consumption of 11000 liters. The spin-drying efficiency class is A (Highest Efficiency) to G (Lowest Efficiency), with a maximum spin speed of 1400 rpm. The remaining moisture content is 53%. The standard cotton programme is Cotton Eco 60°C and 40°C. The programme time for the standard 60°C cotton programme at full load is 194 minutes, and at partial load is 173 minutes. For the standard 40°C cotton programme at partial load, the time is 173 minutes. The duration of the left-on mode is N/A. The airborne acoustical noise emissions for washing/spinning are 57/73 dB. The machine has a height of 84 cm, width of 60 cm, and depth of 54 cm, with a net weight of 72 kg. It supports single or double water inlet. The main model code is 9211.
Usage Features
The washing machine offers various programmes and settings to accommodate different types of laundry and washing needs.
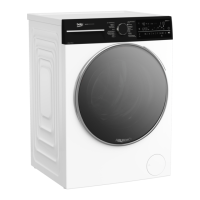
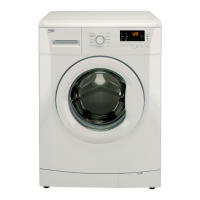
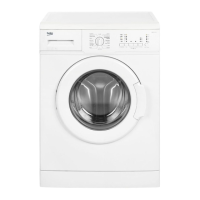
Control Panel: The control panel includes a Programme Selection knob (On/Off), Display, Delayed Start Indicator, Programme Follow-up indicator, Start / Pause button, Auxiliary Function buttons, Spin Speed Adjustment button, and Temperature Adjustment button.
Programme Selection: Users can select programmes suitable for the type, quantity, and soiling degree of the laundry in accordance with the "Programme and consumption table" and the temperature table.
Programmes:
- Cottons: For your cotton laundry (such as bed sheets, duvet and pillowcase sets, towels, bathrobes, underwear, etc.). Your laundry will be washed with vigorous washing action for a longer washing cycle.
- Synthetics: For your synthetic clothes (shirts, blouses, synthetic/cotton blends, etc.). It washes with a gentle action and has a shorter washing cycle compared to the Cotton programme.
- Woollens: For woollens.
- Cottons Eco: For normally soiled cotton and linen laundry.
- Anti Allergy: For laundry that requires anti-allergic and hygienic washing at high temperature with intensive and long washing cycle.
- Gentle Care 20°: For your delicate cotton clothes.
- Hand Wash 20°: For woollen/delicate clothes that bear "not machine-washable" tags and for which hand wash is recommended.
- Daily Quick: For lightly soiled cotton clothes in a short time.
- Super Short: For small amount of lightly soiled cotton clothes in a short time.
- DarkCare: For dark coloured laundry.
- Mixed Fabrics: For cotton and synthetic clothes together.
- Shirts: For shirts.
- Hygiene 20°: For laundry that require washing at lower temperature with intensive and long washing cycle.
- Rinse: For when you want to rinse or starch separately.
- Spin+Drain: To apply an additional spin cycle or to drain the water.
Auxiliary Functions:
- Prewash: For heavily soiled laundry.
- Quicker Wash: Decreases the washing times for lightly soiled laundries and also the number of rinsing steps.
- Extra Rinse: For additional rinsing.
- Delayed Start: Allows delaying the start of a programme by up to 19 hours.
Loading Laundry:
- Open the laundry door.
- Put the laundry items into the product in a loose manner.
- Push and close the loading cover until you hear the locking sound.
Detergent and Softener: The detergent drawer has three compartments: (1) for prewash, (2) for main wash, and (3) for softener. There is also a siphon piece in the softener compartment.
- Choosing detergent type: Detergent type depends on fabric type and color. Use different detergents for coloured and white laundry. Wash your delicate clothes only with special detergents (liquid detergent, wool shampoo, etc.) used solely for delicate clothes. When washing dark coloured clothes and quilts, it is recommended to use liquid detergent. Wash woollens with special detergent made specifically for woollens.
- Adjusting detergent amount: The amount of washing detergent depends on the amount of laundry, the degree of soiling, and water hardness. Do not use amounts exceeding the dosage quantities recommended on the detergent package to avoid problems of excessive foam, poor rinsing, financial savings, and environmentally friendly operation.
- Using softeners: Pour the softener into the softener compartment of the detergent drawer. Do not exceed the (> max <) level sign on the softener compartment.
- Using liquid detergents: Put the liquid detergent container into the compartment no "2". If the liquid detergent lost its fluidity, dilute it with water before putting it into the detergent container.
- Using gel and tablet detergent: If the gel detergent thickness is fluidal and your product does not contain a special liquid detergent cup, put the gel detergent into the main wash detergent compartment during first water intake. If your product contains a liquid detergent cup, fill the detergent into this cup before starting the programme. If the gel detergent thickness is not fluidal or in the shape of capsule liquid tablet, put it directly into the drum before washing. Put tablet detergents into the main wash compartment (compartment nr. "2") or directly into the drum before washing.
- Using starch: Put the liquid soda, powder soda or the fabric dye into the softener compartment. Do not use softener and starch together in a washing cycle. Wipe the inside of the product with a damp and clean cloth after using starch.
- Using limescale remover: When required, use limescale removers manufactured specifically for washing machines only.
- Using bleaches: Add the bleach at the beginning of the washing cycle by selecting a prewash program. Do not put detergent in the prewash compartment. As an alternative application, select a programme with extra rinse and add the bleaching agent while the product is taking water from the detergent compartment during first rinsing step. Do not use bleaching agent and detergent by mixing them. Use just a little amount (1/2 tea glass - approx. 50 ml) of bleaching agent and rinse the clothes very well as it causes skin irritation. Do not pour the bleach onto the laundry. Do not use it with the colored items. When using oxygen-based decolorant, select a program which washes the laundry at a low temperature. Oxygen-based decolorants can be used together with the detergent. However, if its thickness is not the same with the detergent, put the detergent first into the compartment nr. "2" in the detergent drawer and wait until the detergent flows while the product is taking in water. While the machine continues taking in water, add decolorant in the same compartment.
Adjusting the feet: Loosen the lock nuts on the feet by hand. Adjust the feet until the product stands in a stable and balanced way. Tighten all lock nuts by hand again.
Electrical connection: Connect the product to a grounded outlet protected by a 13 A fuse. Our company shall not be liable for any damages that will arise when the product is used without grounding in accordance with the local regulations. Connection must comply with national regulations. Power cable plug must be within easy reach after installation. If the current value of the fuse or breaker in the house is less than 13 Amps, have a qualified electrician install a 13 Amp fuse. The voltage specified in the "Technical specifications" section must be equal to your mains voltage. Do not make connections via extension cables or multi-plugs.
Fitting a different plug: As the colours of the wires in the mains lead of this appliance may not correspond with the coloured markings identifying the terminals on your plug, proceed as follows:
- Connect the green – yellow or green (earth) wire to the terminal in the plug marked ‘E’ or with the symbol or coloured green and yellow or green.
- Connect the blue (neutral) wire to the terminal in the plug marked ‘N’ or coloured black.
- Connect the brown (live) wire to the terminal in the plug marked ‘L’ or coloured red.
With the alternative plugs a 13A fuse must be fitted either in the plug or adaptor or in the main fuse box. If in doubt contact a qualified electrician.
Child Lock: Use Child Lock function to prevent children from tampering with the machine. To activate the Child Lock: Press and hold 1st and 2nd auxiliary function buttons for 3 seconds while any programme is running. The lights on the 1st and 2nd Auxiliary Function buttons will flash, and "C03", "C02", "C01" will appear on the display respectively while you keep the buttons pressed for 3 seconds. Then, "COFF" will appear on the display indicating that the Child Lock is deactivated.
Maintenance Features
Cleaning the detergent drawer: Clean the detergent drawer at regular intervals (every 4-5 washing cycles) as shown below in order to prevent accumulation of powder detergent in time. If more than normal amount of water and softener mixture starts to gather in the softener compartment, the siphon must be cleaned.
- Press the dotted point in the siphon in the softener compartment and pull towards you until the compartment is removed from the machine.
- Lift the rear part of the siphon to remove it as illustrated.
- Wash the detergent drawer and the siphon with plenty of lukewarm water in a washbasin. In order to prevent the residues to contact your skin, clean it with an appropriate brush by wearing a pair of gloves.
- Insert the drawer back into its place after cleaning and make sure that it is seated well.
Cleaning the loading door and the drum: For products with drum cleaning programme, please see Operating the product - Programmes. For products without drum cleaning, follow the below steps to clean the drum: Select Additional Water or Extra Rinse auxiliary functions. Use a Cottons programme without pre-wash. Set the temperature to the level recommended on the drum cleaning agent which can be provided from authorised services. Apply this procedure without any laundry in the product. Before starting the programme, put 1 pouch of special drum cleaning agent (if the special agent could not be supplied, put max. 100 g of powder anti-limescale) into the main wash detergent compartment (compartment no.„2”). If the anti-limescale is in tablet form, put only one tablet into the main wash compartment no. „2”. Dry the inside of the bellow with a clean piece of cloth after the programme has come to an end.
Cleaning the body and control panel: Wipe the body of the product with soapy water or non-corrosive mild gel detergents as necessary, and dry with a soft cloth. Use only a soft and damp cloth to clean the control panel.
Cleaning the water intake filters: There is a filter at the end of each water intake valve at the rear of the product and also at the end of each water intake hose where they are connected to the tap. These filters prevent foreign substances and dirt in the water to enter the product. Filters should be cleaned as they do get dirty.
- Close the taps.
- Remove the nuts of the water intake hoses to access the filters on the water intake valves. Clean them with an appropriate brush. If the filters are too dirty, remove them from their places with a pliers and clean in this way.
- Take out the filters on the flat ends of the water intake hoses together with the gaskets and clean thoroughly under running water.
- Replace the seals and filters carefully and tighten their nuts by hand.
Draining remaining water and cleaning the pump filter: The filter system in your product prevents solid items such as buttons, coins and fabric fibers clogging the pump impeller during discharge of washing water. Thus, the water will be discharged without any problem and the service life of the pump will extend. If the product fails to drain water inside it, the pump filter is clogged. Filter must be cleaned whenever it is clogged or in every 3 months. Water must be drained off first to clean the pump filter. In addition, prior to transporting the product (e.g., when moving to another house) water should be drained completely.
- Unplug the product to cut off the supply power.
- Open the filter cover.
- Follow the below procedures in order to drain water.
- Pull the emergency draining hose out from its seat.
- Place a large container at the end of the hose. Drain the water into the container by pulling out the plug at the end of the hose. When the container is full, block the inlet of the hose by replacing the plug. After the container is emptied, repeat the above procedure to drain the water in the product completely.
- When draining of water is finished, close the end by the plug again and fix the hose in its place.
- Turn and remove the pump filter.
- Clean any residues inside the filter as well as fibres, if any, around the pump impeller region.
- Replace the filter.
- If the filter cap is composed of two pieces, close the filter cap by pressing on the tab. If it is one piece, seat the tabs in the lower part into their places first, and then press the upper part to close.