11
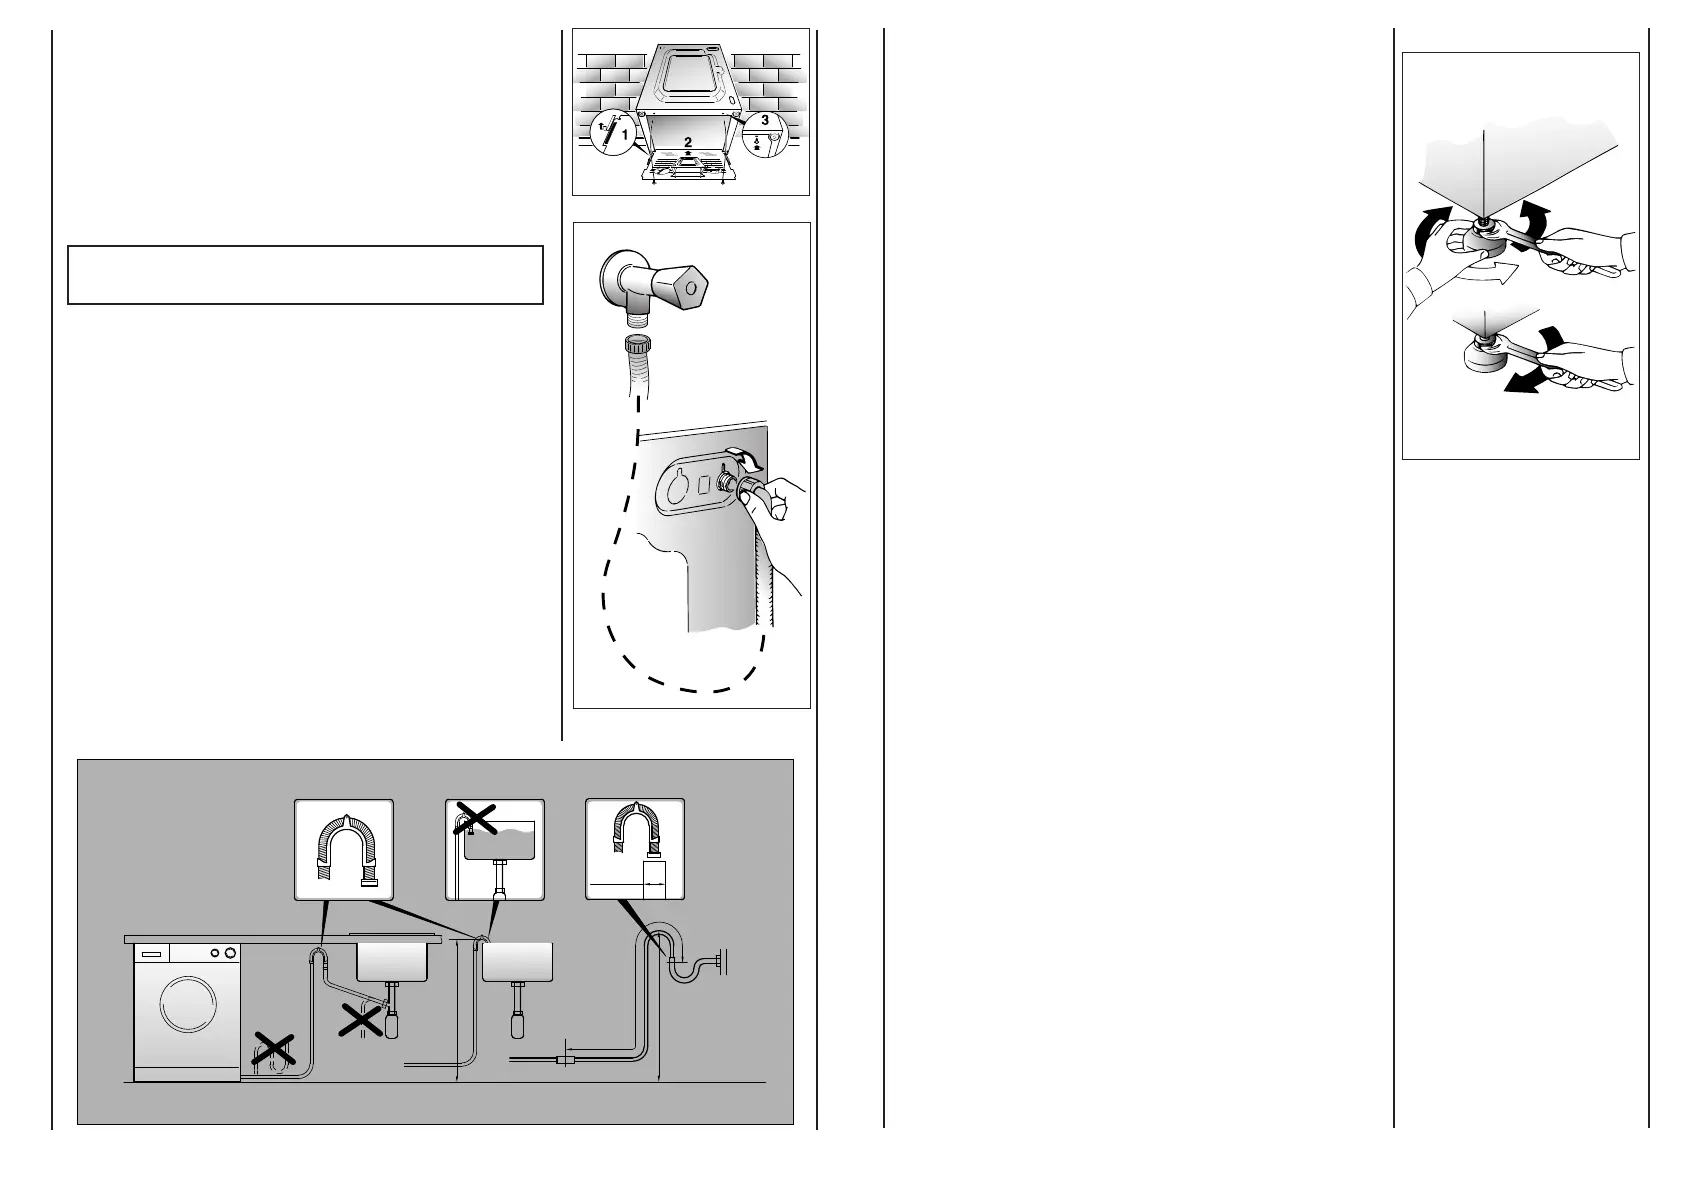
Use the 4 feet to level the machine with the floor:
a) Turn the nut clockwise to release the screw adjuster of the
foot.
b) Rotate foot to raise or lower it until it stands firmly on the
ground.
c) Lock the foot in position by turning the nut anti-clockwise
until it comes up against the bottom of the machine.
Ensure that the knob is on the “OFF” position and the load
door is closed
Insert the plug.
After installation, the appliance must be positioned so that
the plug is accessible.
10
min 50 cm
max 85 cm
+2,6 mt max
max 100 cm
min 4 cm
Fix the sheet of corrugated material on the bottom as shown
in picture.
Connect the fill hose to the tap.
The appliance must be connected to the water mains using
new hose-sets.The old hose-sets should not be reused.
IMPORTANT:
DO NOT TURN THE TAP ON AT THIS TIME.
Position the washing machine next to the wall. Hook the
outlet tube to the edge of the sink paying attention that
there are no bends or restrictions along the tube.
It is better to connect the discharge hose to a fixed outlet of
a diameter greater than that of the outlet tube and at a
height of min. 50 cm. If is necessary to use the plastic sleeve
supplied.
The appliance must not be installed behind a lockable door,
a sliding door or a door with a hinge on the opposite side to
that of the washer dryer.
Please refer to diagrams below for various installation
options.