1. Cabinet Upper Part
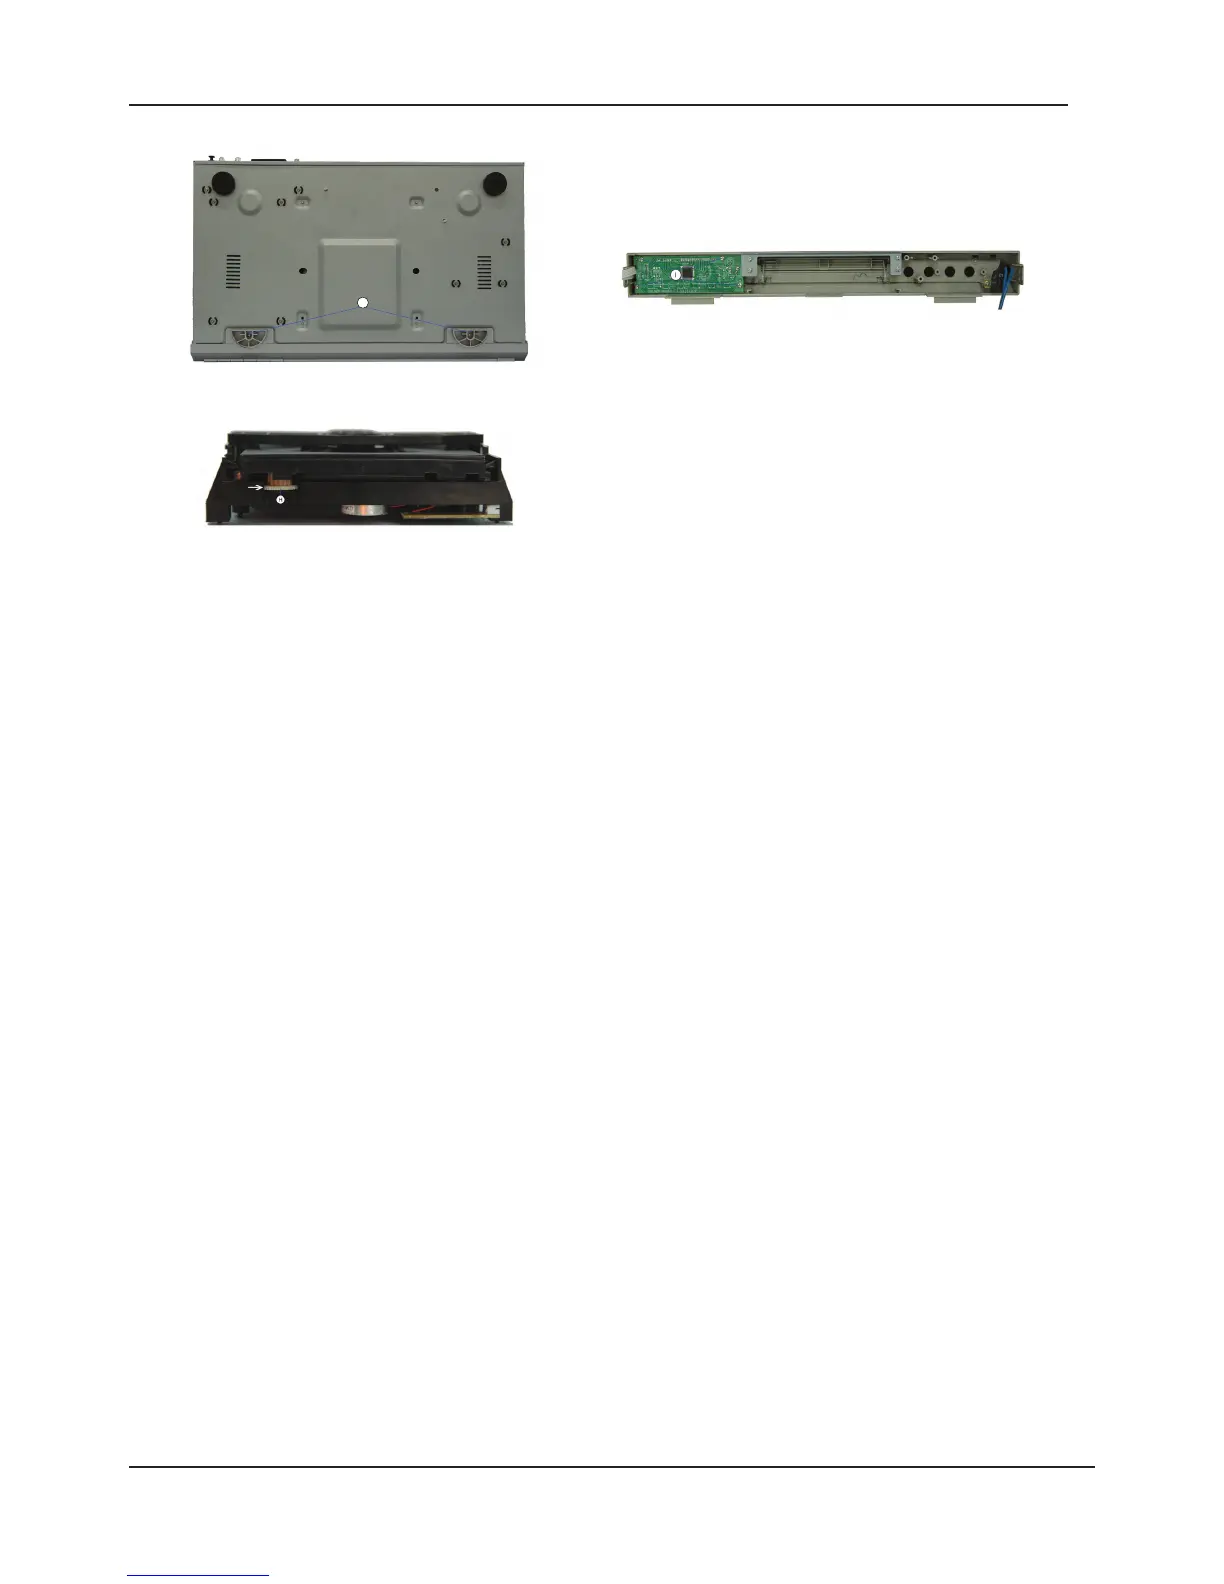
- Undo the 8 screws A (Fig. 1)
- Bend the upper part of the cabinet from the rear side (Fig. 1) off the base plate, and then detach
the cabinet upper part from the unit.
2. Front Panel
- Undo the 2 screws J (Fig. 3)
- Undo the 2 screws F (Fig. 2)
- Undo the 2 locking lugs G (Fig. 2) and then remove the front panel.
- Unplug the connectors if necessary.
3. VFD Driver and Key Control Board Units
- Remove the front panel (Point 2)
- Undo the 4 screws I (Fig. 4)
- Remove the VFD Driver and Key Control Board units.
4. Power Supply Board
- Undo the 4 screws B (Fig. 2).
- Undo the 1 screw L (Fig. 1).
- Remove the Power Supply Board from the unit.
- Unplug the connectors if necessary.
5. Main Board
- Undo the 7 screws E (Fig. 2).
- Remove the main board.
- Unplug the connectors if necessary.
6. Output Board
- Undo the 2 screws M (Fig. 2)
- Undo the 4 screws C (Fig. 1).
- Remove the output board.
- Unplug the connectors if necessary.
7. Drive Mechanism
- Undo the 4 screws D (Fig. 2)
- Lift the drive mechanism at its back part, slide it to the rear, and then remove it.
- Unplug the connectors if necessary.
8. Opening the Tray of a Defective Unit
- Turn the toothed wheel H (Fig. 5) in direction of the arrow until the tray moves then pull out the tray
completely.
- Remove the DVD/CD from the defective drive unit if necessary.