STEP 10
( Power-Unit Start Up )
1. Have a certified electrician run 208 - 230 volt
single phase 60 HZ power supply to motor. ( If you
ordered optional three phase power refer to the
data plate found on the motor for proper power
supply. ) Be sure to size wire for a 25 amp circuit.
RISK OF EXPLOSION!
This equipment has internal arcing or parts that
may spark and should not be exposed to
flammable vapors. Motor should not be located in
a recessed area or below floor level. NEVER
expose motor to rain or other damp environments.
DAMAGE TO MOTOR CAUSED BY WATER IS
NOT COVERED UNDER WARRANTY.
STEP 11
( Lift Start Up )
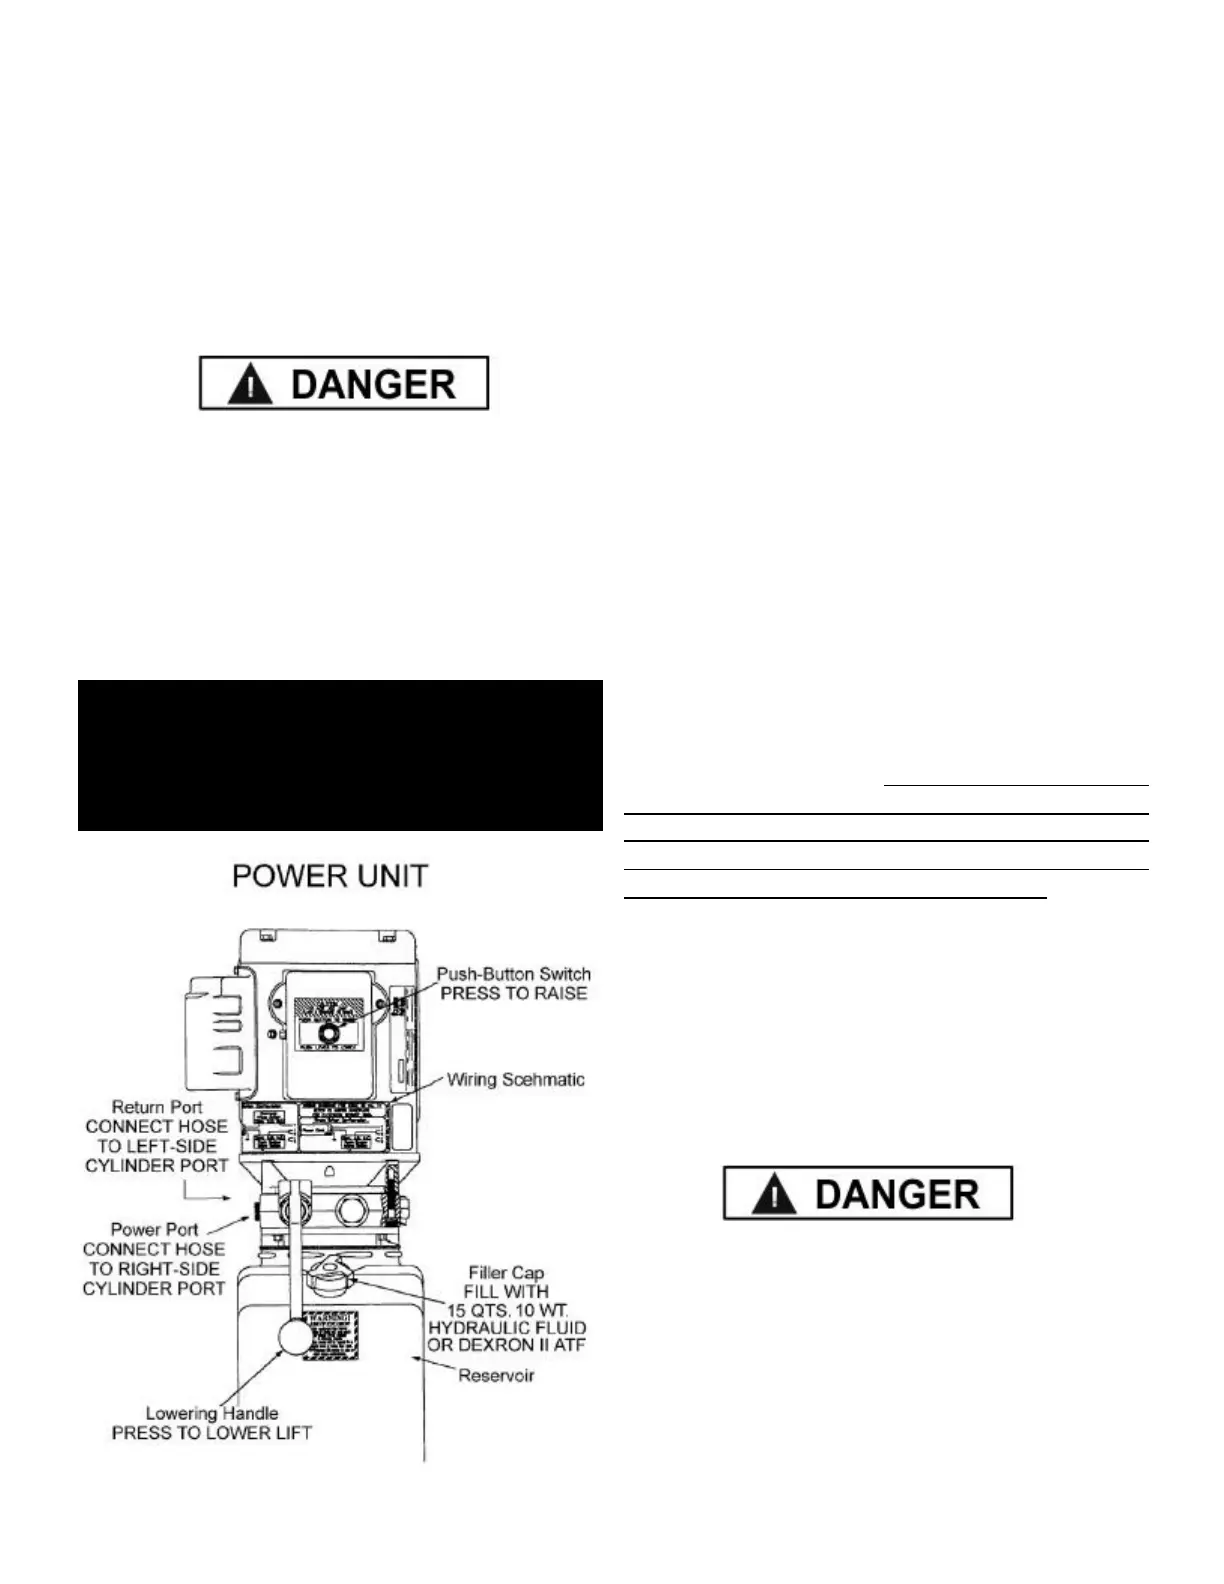
1. Make sure the power unit reservoir is full with
15 quarts of 10-WT hydraulic oil or Dexron-III
automatic transmission fluid.
2. Spray the inside of the columns where the slide
blocks glide with a light lubricant or WD-40.
3. Test the power unit by depressing the push-
button switch. If the motor sounds like it is
operating properly, raise lift and check all hose
connections for leaks.
SOUNDS PECULIAR, STOP IMMEDIATELY AND
RE-CHECK ELECTRICAL CONNECTIONS.
4. Once the lift starts to raise, simultaneously
press the power unit lowering handle at the same
time you are pressing the raise button. This will
allow any air trapped in the cylinder and lines to
escape and vent into the fluid reservoir.
5. Continue raising the lift slowly until all the slack in
the cables is taken out.
THE CYLINDER BOTTOMS OUT AND THE LIFT
STOPS. ADJUST EACH CABLE SO THAT THE
SAFETY LOCKS REST AT ONE INCH ABOVE
THE TOP SAFETY LOCK POSITION.
necessary to tighten or loosen each cable to reach
the proper height. The nylon cable nuts MUST be
tightened on each end until there is at least 1/4” of
threads through the nylon end of the nut.
STEP 12
( Installing Slack Safety Springs )
The following steps involve the SLACK CABLE
SAFETY DEVICE and MAIN SAFETY. Failure to
follow these steps could result in serious injury
or death in the event of cable failure.
1. Install the SLACK SAFETY LOCK SPRINGS
on the REAR CROSS TUBE as shown. Make
sure spring ends are secure at both ends. ( See
Fig. 14 )
IMPORTANT NOTE:
DO NOT USE 110 VOLT POWER SUPPLY for
this power unit. damage to motor will occur which
is not covered under warranty. You must use a
separate circuit breaker for each lift.
 Loading...