3
6. Remove, retain and mark the two 3/8" end cover cap
screws, lock nuts and washers that retain the lower
mounting bracket to the end cover, also mark these two
holes of the end cover. (These bolts are longer than the
other six bolts.)
7. Remove the Bendix
®
AD-9
®
air dryer from its mounting
brackets on the vehicle.
DISASSEMBLY (Refer to Fig. 1)
Caution: While performing service on the AD-9 air dryer, it
is not recommended that a clamping device (vise, C-clamp,
etc.) be used to hold any die cast aluminum component as
damage may result. To hold the end cover, install a pipe
nipple in the supply port and clamp the nipple in a vise.
1. Remove the remaining six 3/8" cap screws, lock nuts,
and twelve washers that secure the end cover to the
outer housing. Separate the end cover and desiccant
cartridge from the outer housing. If the AD-9 air dryer
has a stabilizing ring on top of the cartridge, remove it
and set it aside.
2. Remove and discard the outer housing o-ring(1).
3. Place a strap or chain wrench around the desiccant
cartridge(2) so that it is approximately 2 to 3 inches away
from the end cover. Rotate the cartridge counterclockwise
until it completely separates from the end cover. Note:
A substantial torque (up to 50 lb.ft.) may be required to
perform this disassembly. Check with a Bendix parts
outlet for possible core value of the removed cartridge.
4. Remove and discard the desiccant cartridge o-ring(3)
from the end cover.
ASSEMBLY (Refer to Fig. 1)
1. Install the desiccant cartridge o-ring(3) in its groove in the
end cover assembly. Using a light coat of the lubricant(4),
lubricate the bottom of the desiccant cartridge(2) and
the end cover assembly in the area that will contact the
o-ring(3).
2. Screw the desiccant cartridge(2) into the end cover until
light contact is made between it and the o-ring(3). Using
a strap or chain wrench positioned 2 to 3 inches from the
bottom of the cartridge, turn the desiccant cartridge(2)
clockwise 180-225 degrees to secure the desiccant
cartridge to the end cover. Torque should not exceed
50 ft. lbs.
3. Install the outer housing o-ring(1) on the shoulder in the
end cover.
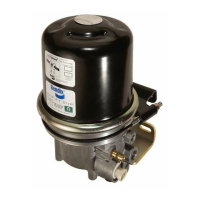
4. If a stabilizing ring was removed during disassembly, it
MUST be reused. Place the stabilizing ring on top of the
air dryer cartridge (2). See Figure 3.
NOTE: The desiccant cartridge provided in this kit comes
in two heights, varying 3/4". (Although the cartridges
vary in height their functionality and performance is
the same.) The taller style can not be used together
with the stabilizing ring. If the air dryer being serviced
uses a stabilizing ring, verify the new cartridge height
is the same as the cartridge removed. If a stabilizing
ring is being reused, and the taller cartridge is included
in the kit, please exchange the kit for one containing a
shorter cartridge. Operating certain vehicles without the
stabilizing ring can cause premature air dryer damage.
5. Place the outer housing over the desiccant cartridge,
and stabilizing ring if applicable, and align the holes.
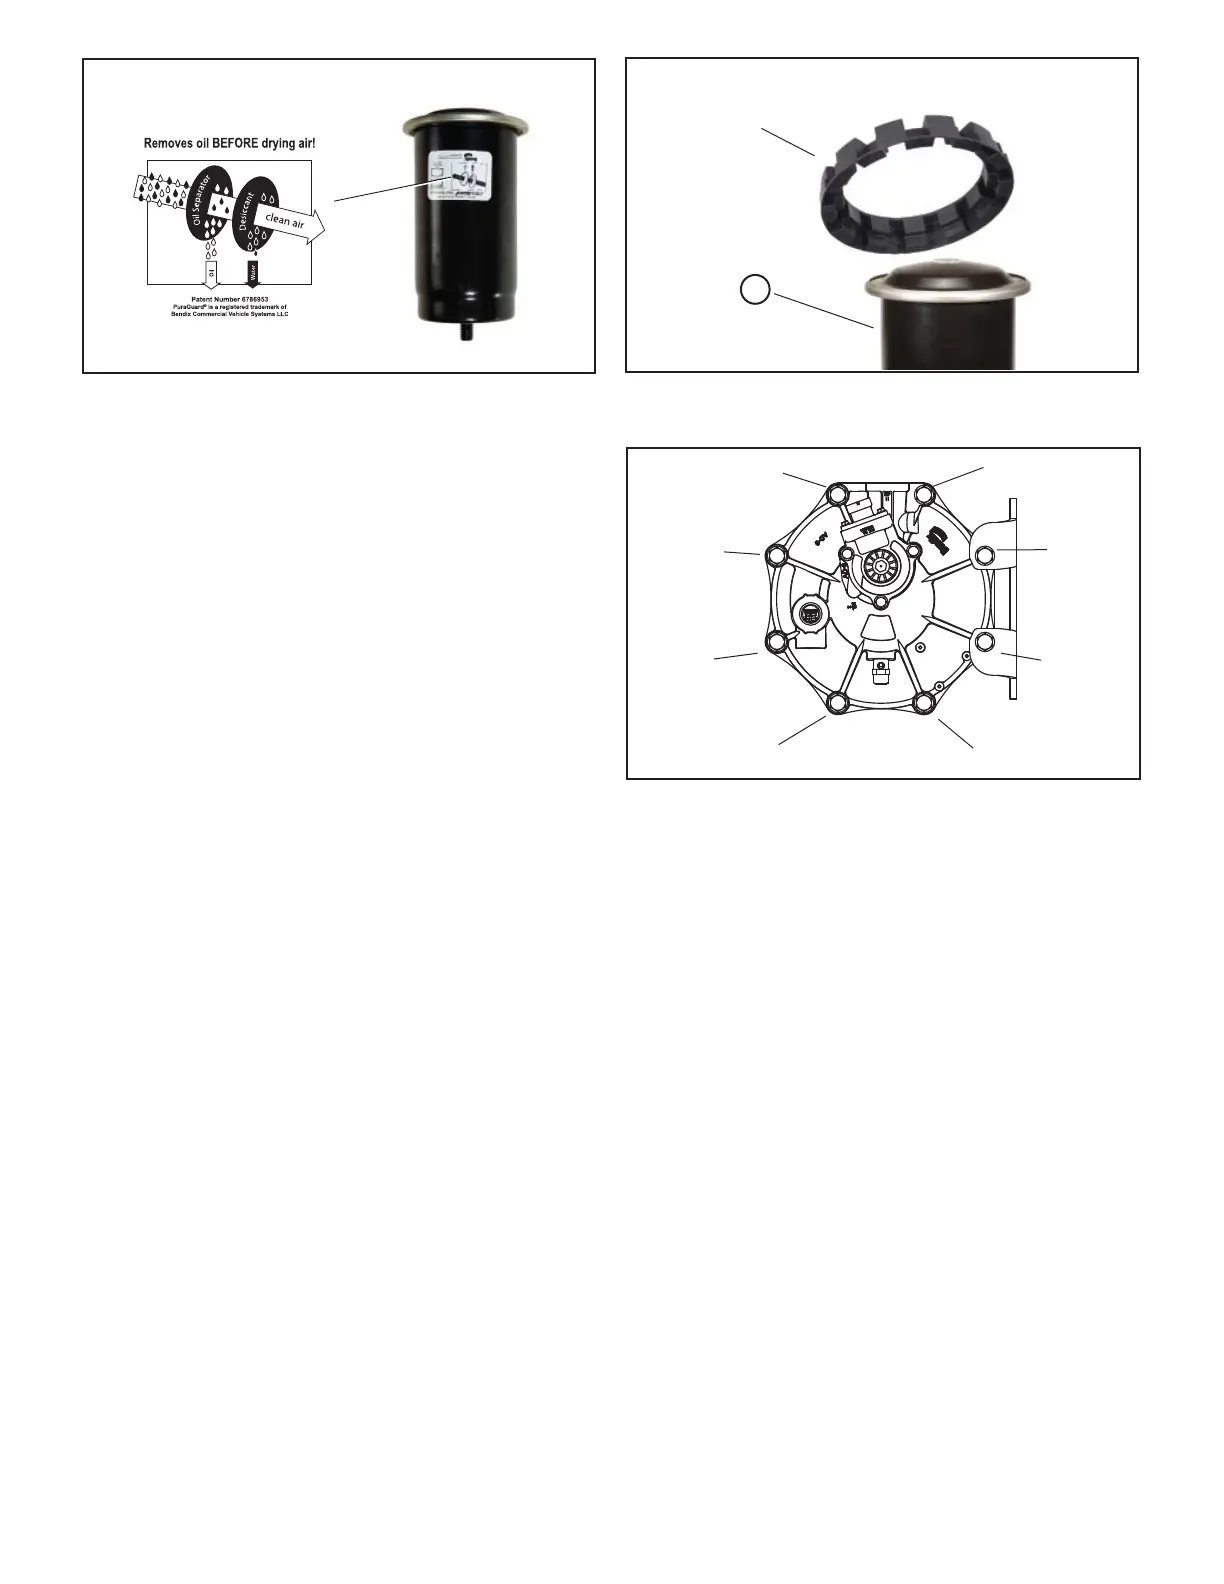
6. Install the six 3/8" cap screws, lock nuts and twelve
washers making certain they are in the proper position
as marked during disassembly. The two longer 3/8" cap
screws will be used to secure the AD-9
®
air dryer to its
mounting bracket. Tighten the six cap screws and nuts
in a star pattern (Refer to Figure 4). Torque to 270-385
in. lbs. Note: The two remaining bolt holes in the end
cover and two 3/8" cap screws must be the ones marked
during disassembly to assure proper orientation of the
ports and adequate length of the cap screws.
2
1 & 9
4
5
3
67
8
Figure 4 End Cover Bolt Torque Pattern
Figure 3 Bendix
®
AD-9
®
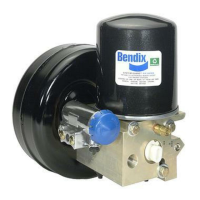
Air Dryer Stabilizing RingFigure 2 Bendix
®
AD-9
®
PuraGuard
®
Oil Coalescing Cartridge
Identifi cation Label
2
Stabilizing Ring
(Option on some air dryers)
 Loading...