44
3) Prendere l'affusto e accertarsi che
il punto bianco di riferimento per
il montaggio sia ben visibile all'in-
terno dell'asola inferiore posizio-
nata vicino alla matricola (fig. 5).
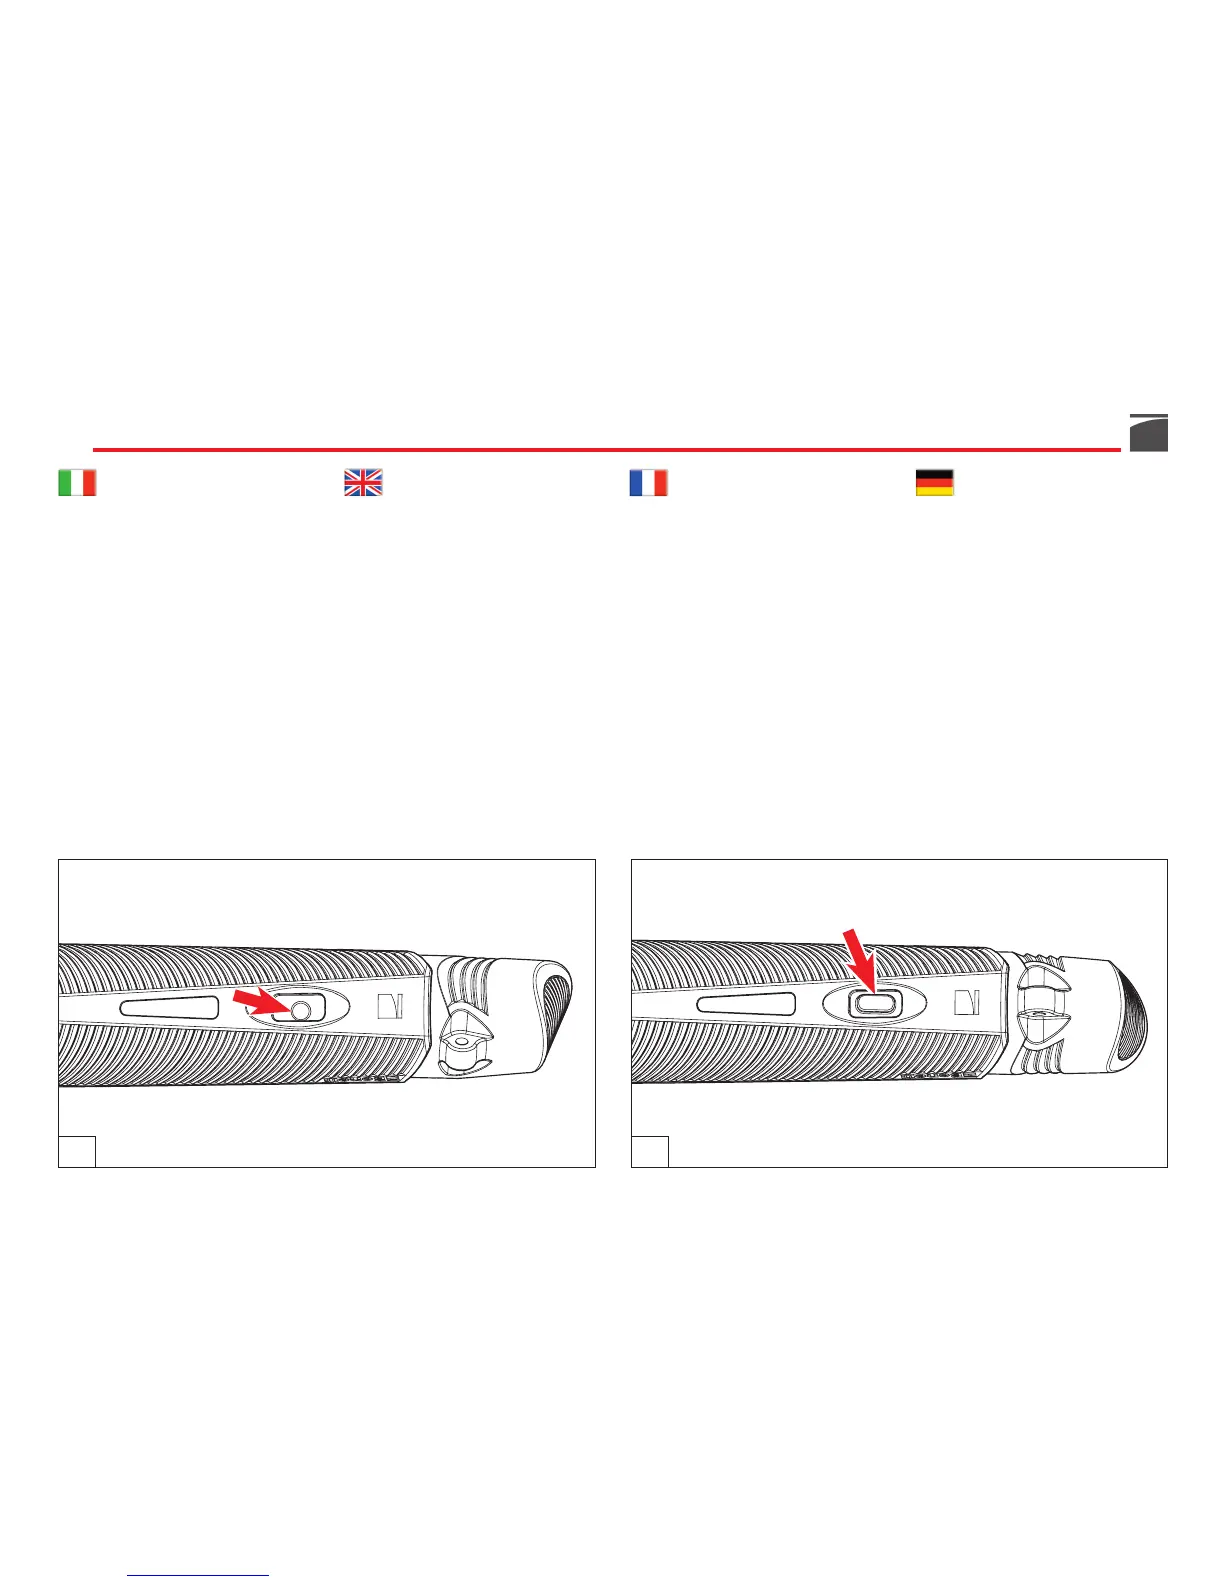
ATTENZIONE: se il punto bianco è
coperto dal pulsante di montaggio/
smontaggio arma (fig. 6), è sufficiente
premere a fondo il pulsante stesso e
ruotare in senso antiorario il tappo
serbatoio (fig. 7), fino alla corretta
posizione per il montaggio dell'arma:
punto bianco visibile.
3) Grip the gun carriage and make
sure that the white reference dot for
assembly is well visible through the
lower slot positioned near the com-
plementary serial number (fig. 5).
WARNING: if the white dot is cover-
ed by the assembly/disassembly but-
ton (fig. 6), press the button all the
way down and rotate the magazine
tube plug counter clockwise (fig. 7)
until it reaches the correct position for
assembling the gun: white dot visible.
3) Prendre l’affût et vérifier que le
point blanc de référence pour l’as-
semblage soit bien visible à l’inté-
rieur de la boutonnière inférieure
située près du numéro de matricu-
le (fig. 5).
ATTENTION: si le point blanc de réfé-
rence est couvert par le poussoir de
montage/démontage de l’arme (fig. 6),
il suffit de pousser à fond le poussoir
en question et de tourner dans le sens
opposé des aiguilles d’une montre le
bouchon magasin (fig. 7), jusqu’à la
position correcte pour l’assemblage de
l’arme: point blanc visible.
3) Das Waffengestell nehmen und
sicherstellen, dass der weiße Be-
zugspunkt für die Montage gut
sichtbar innerhalb der unteren
Ausfräsung ist, die nahe der
Matrikel positioniert ist (Abb. 5).
ACHTUNG: Falls der weiße Punkt von
dem Knopf zur Montage/Zerlegung
der Waffe verdeckt sein sollte (Abb. 6),
ist es ausreichend, den Knopf selbst bis
nach unten zu drücken und den Maga-
zin-Zapfen gegen den Uhrzeigersinn
zu drehen (Abb. 7), bis die korrekte
Position zur Waffenmontage gegeben
ist: sichtbarer weißer Punkt.
5 6
 Loading...