Do you have a question about the Beninca PUPILLA.T and is the answer not in the manual?
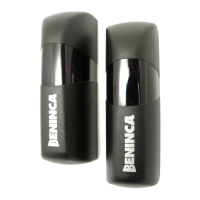
Details the PUPILLA and PUPILLA.T photocells for wall installation, highlighting key differences.
Use a screwdriver for leverage on the lower central part as indicated in Fig.1.
Fasten the base of photocell A using screws and plugs suitable for the type of fastening surface.
Adjustment of photocell centring is carried out by loosening the screws E (Fig. 3). The card can rotate 180°.
Insert the card of the receiver/transmitter on three different positions: Front, Right, and Left (Fig.4).
Specific wiring terminal details for PUPILLA.T TX and RX units, including power supply.
Method to check photocell reception and alignment using the RX receiver's LED indicator.
Procedure to activate synchronism on PUPILLA photocells to prevent interference, by removing metal gear NT2.
| Protection Degree | IP54 |
|---|---|
| Protection Rating | IP54 |
| Operating Temperature | -20°C / +50°C |
| Power Consumption | 5W (operating) |
| Application | Sliding gate automation |