8
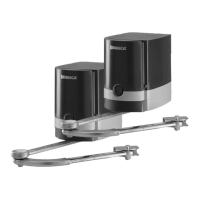
ZED24 Control unit
The electronic control unit ZED24 can be used to control 1 or 2 motors with a power not exceeding 120W+120W.
The following types of installation are possible:
A) 1 Motor ZED24 with built-in control unit: In fig.1, with reference to the “A” general scheme, connect the accessories as
indicated in the “C” diagram.
B) 1 Motor ZED24 with built-in control unit and one motor ZED24 without control unit: In fig. 1, taking as a reference the “A”
and “B” general diagrams, connect the accessories as per “C” diagram and connect the two motors as indicated in the “D”
diagram shown in Fig. 2.
C) 1 Control unit ZED24 fitted to wall and two motors ZED24 without control unit: In fig. 1, taking as a reference the “A” and
“B” general diagrams, connect the accessories as per “C” diagram and connect the two motors as indicated in the “E” diagram
shown in Fig. 2.
IMPORTANT: Should two motors be used, connect the limit switches of one single motor to the control unit.
GENERAL WARNINGS
a) The wire connections and the operating logic should be in compliance with regulations in force.
b) The cables featuring different voltage should be detached, or adequately insulated by an additional insulation of at least 1 mm.
c) The cables should be further fastened in proximity to the terminals.
d) Check all connections before powering the unit.
e) Check that setting of the Dip-Switches are the required ones.
f) Normally Closed inputs which are not in use should be short-circuited 230VAC – keep to phase/neutral).
INPUT/OUTPUT FUNCTIONS
ZED24 Control Unit
Terminal No. Function Description
1-2 Power supply Input, 230VAC 50Hz (1-Phase/2-Neutral)
3-4 Flashing light Connection of flashing light, 24Vac 40W max.
5-6 Light, Motor 2 Connection to the courtesy light of motor 2
(only when 2 motors are in use)
7 COM Common for limit switch and all control inputs.
8 SWO Input, OPEN limit switch (N.C. contact)
9 SWC Input, CLOSE limit switch (N.C. contact)
10 STOP Input, STOP push button (N.C. contact)
11 PHOT Input, connection to safety devices, N.C. contact
(e.g. Photocells)
12 OPEN Input, OPEN push button (N.O. contact)
13 CLOSE Input, CLOSE push button (N.O. contact)
14 Step-by-Step Input, step-by-step push button (N.O. contact)
15-16 Motor 1 Connection to motor 1 (15+/16-)
17-18 Motor 2 Connection to motor 2 (15+/16-)
To be used only when 2 motors are in use
19-20 24 Vac Output, power supply of accessories, 24Vac/1A max.
21-22 SCA Free contact, N.O. for open door warning light.
23-24 COSTA Input, safety edge contact
Resistive edge: Closed “DAS” jumper
Mechanical edge: Open “DAS” jumper
If the safety edge is activated in the opening phase, the gate stops.
In the closing phase, the gate stops and the performs a movement reversion (opens) for
3s.
25-26 Aerial Connection to the radio receiver card of the aerial (25-screen/26-signal).
0-24-VMOT Secondary Connection, winding of secondary transformer
L1-N1 Primary Connection, winding of primary transformer
J3 Radio receiver Connector for radio receiver.