EasyManua.ls Logo

BenQ 4300U User Manual

BenQ 4300U
18 pages
To Next Page IconTo Next Page
Page #1 background imageLoading...
Page #1 background image
BENQ Scanner Windows XP Installation Guide
Driver version : MiraScan V4.03U09
Scanner model : USB1.1 interface scanner 3000U , 3300U , 4300U
OS : Windows XP
Download website : http://www.benq.com.tw/global/service/scan/drivers.htm
Notice 1 : Please setup Photoshop or PhotoExpress first before driver installation .
Notice 2 : If you still got Error Messages after these installation steps , please E-mail to us your problems .
E-mail to :
Asia Pacific area and Taiwan : APFService@benq.com
America : support-sc@benq.com
Europe : support@benq-eu.com
China : service@benq.com.cn
Other Sites : IMGservice@benq.com
Please specify :
1.OS version (WinXP)
2.Driver version (MiraScan vX.XX)
3.Model No. & Serial No.
4.Platform spec. (Motherboard model , Platform model , Ram size , CPU spec...)
5.Application problem (Which steps / what situation will happen... ) & Software version
6.Your local Country ( Address )
Question and Answer IconNeed help?

Do you have a question about the BenQ 4300U and is the answer not in the manual?

BenQ 4300U Specifications

General IconGeneral
BrandBenQ
Model4300U
CategoryScanner
LanguageEnglish

Summary

BENQ Scanner Windows XP Installation Guide Overview

Technical Support Contact Information

Provides regional email addresses for technical assistance and problem reporting.

Download Website and System Specifications

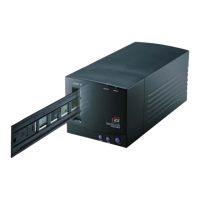
Details the download URL for drivers and lists scanner model, driver version, and OS.

Step-by-Step Scanner Installation Procedure

Step 1: Unzip and Run Setup

Unzip the MiraScan V4.03U09 driver and execute setup.exe to begin installation.

Step 2: Select Installation Language

Choose the desired language for the installation wizard, typically English or Traditional Chinese.

Step 3: Choose Setup Type

Select the setup type, with 'Typical' being the default recommended option for most users.

Step 4: Select Program Folder

Specify the program folder name for installing the scanner's application icons.

Step 5: Create Desktop Shortcut

Choose whether to create a shortcut for MiraScan on the desktop and install the e-manual.

Step 6: Start Copying Files

Review the current settings before proceeding with copying program files to the system.

Step 7: Copying Program Files

Wait for the scanner driver program files to be copied to the computer.

Step 8: Setup Complete and Restart

Confirm setup completion and choose to restart the computer to finalize the installation.

Step 9: Detect New Hardware

After logging in and powering on the scanner, Windows XP detects new hardware.

Step 10: Handle Windows Logo Notice

Address the Windows Logo testing notice by choosing to 'Continue Anyway' to install.

Step 11: Copy Files During Hardware Install

Wait for the system to copy the necessary files during the hardware installation phase.

Step 12: Finish Hardware Installation

Complete the Found New Hardware Wizard by clicking 'Finish' to close the wizard.

Scanner Usage and Verification

Check Scanner in Device Manager

Verify the scanner is recognized and functioning correctly via the Windows Device Manager.

Launch and Basic Scan Mode

Access MiraScan.exe from the desktop and perform a 'Preview' and 'Scan' in Basic Mode.

Switch to Advanced Editing Mode

Transition from Basic Mode to Advanced Mode within MiraScan for more detailed job editing.

View Scanner Information

Access scanner details such as model, firmware, and driver versions through the Help menu.

Use Scanner and Camera Wizard

Utilize the Scanner and Camera Wizard to configure scanning preferences and perform scans.

Related product manuals